Ever dreamed of creating your own personal Netflix? A place where you have complete control over your entire collection of movies, TV shows, and music, all beautifully organized and ready to watch. Learning how to set up a home media server with Plex is your ticket to that dream. It transforms a humble computer or network drive into a powerful entertainment hub, letting you stream your library to any device, anywhere in the world.
If you’re feeling a bit intimidated by the technical side, don’t be. This isn’t a project reserved for hardcore tech hobbyists. As someone who has built and troubleshooted countless media servers over the years, I’ve seen how this simple, powerful tool can completely revolutionize the way you enjoy your digital collection.
In this comprehensive Safelyo guide, we will walk you through everything, step by step. You will learn:
- How to choose the perfect hardware for your server.
- The secret to organizing your files for a beautiful library.
- The simple installation process on any popular device.
- How to configure Plex and start streaming in minutes.
WHAT YOU'LL NEED (QUICK CHECKLIST)
- A “server” device: This can be a dedicated NAS, an old PC/laptop you have lying around, or even a powerful streaming device.
- Your media files: The collection of movies, TV shows, and music you want to organize.
- An internet connection: Needed for the initial setup and for Plex to download all the beautiful artwork and show information.
- Plex client apps: Free apps you’ll install on your TV, phone, or tablet to watch your content.
Stop just hoarding files and start enjoying them. Let’s build the ultimate home media hub you’ve always wanted, together.
1. The first crucial step: Choosing the right home for your Plex server
Before you install any software or organize a single file, you need to answer the most important question: Where will your Plex Media Server live? Think of this as choosing the foundation for your new house. The right choice now will ensure a smooth, reliable, and enjoyable experience for years to come.
The Plex Media Server software needs a device that is always on, or at least on whenever you want to access your media. This device acts as the brain of your operation, managing your library and streaming content to your other devices.
Let’s break down the three most popular choices.
1.1. An old PC or laptop (the budget-friendly choice)
This is the most common starting point for many. If you have an old desktop or laptop gathering dust, you can press it into service as a dedicated Plex server.
Pros
It’s essentially free if you already own the hardware. A reasonably modern computer, even one that’s a few years old, has plenty of power to handle streaming and even some transcoding (more on that later).
Cons
General-purpose computers aren’t designed to run 24/7. They can be power-hungry, noisy, and physically bulky. You’re also responsible for managing the operating system and any potential issues that come with it.
1.2. A dedicated NAS (the all-in-one champion)
A NAS (Network Attached Storage) device is a mini-computer designed specifically for storing and serving files over a network. For many, this is the gold standard for running a home media server.
Pros
NAS devices are highly energy-efficient, quiet, and built to run 24/7. They make managing your storage simple and often include features like RAID, which can protect your data from a hard drive failure. Brands like Synology and QNAP are top players and offer a simple, app-store-like experience for installing Plex.
Cons
The main drawback is the higher upfront cost. You have to buy the NAS enclosure and the hard drives to go inside it.
>> Read more:
1.3. A powerful streaming device (the compact powerhouse)
Some high-end media players are powerful enough to run the Plex server software themselves, combining the server and the player into one tiny box. The undisputed king in this category is the NVIDIA Shield Pro.
Pros
It’s an incredibly compact and silent solution. The Shield Pro is also a beast at hardware transcoding, efficiently converting video files to play on any device without breaking a sweat.
Cons
Your storage options are more limited, typically relying on external USB hard drives. It’s less of a general-purpose server and more of a specialized Plex machine.
QUICK COMPARISON TABLE
| Feature | Old PC/Laptop | Dedicated NAS | NVIDIA Shield Pro |
|---|---|---|---|
| Best For | Users on a tight budget or just starting out. | A “set it and forget it” reliable experience. | A minimalist setup focused purely on media. |
| Upfront Cost | Low to none. | Medium to high. | Medium. |
| Ease of Use | Moderate. Requires some tinkering. | Very easy. App-based installation. | Easy. |
| Energy Use | High. | Very low. | Very low. |
| Storage | Highly flexible. | Excellent and expandable. | Limited to USB drives. |
SAFELYO’S RECOMMENDATION
After setting up and testing Plex on dozens of different hardware configurations, our advice is clear. For most beginners looking for a balance of ease-of-use, efficiency, and power, a dedicated NAS device is the best long-term investment.
However, if you’re on a tight budget or just want to dip your toes in the water, a spare PC is a fantastic and capable starting point.
2. Preparing your media files
Alright, let’s talk about the one step that people are most tempted to skip. And trust me, I get it. You have your hardware, you’re excited, and you just want to install the software and see the magic happen. But I’m going to ask you to pause for a moment.
This preparation phase is the secret ingredient. It’s the difference between a stunning, organized Plex library that looks like a professional streaming service and a chaotic mess of mismatched posters and untitled files that will drive you crazy. I learned this the hard way years ago, spending an entire weekend manually fixing hundreds of movies that Plex couldn’t identify.
Think of Plex as a very smart, but very literal, robot librarian. You have to put the books on the right shelves and label them clearly for the robot to do its job. Here’s how we do that.
2.1. First, create a logical folder structure
This is like setting up the main sections of your library. On the hard drive where you plan to store your media, create one main folder. For this guide, let’s call it Media.
Inside that Media folder, create separate folders for each type of content. The most common ones are:
- Movies
- TV Shows
- Music
- Photos
It’s that simple. This structure tells Plex, “Hey, everything in this folder is a movie, and everything in that folder is a TV show.” This prevents it from getting confused and trying to find episode information for your copy of Top Gun.
2.2. Second, follow Plex’s naming rules
This is the most critical part. Your robot librarian reads the file name to figure out exactly what it is so it can go online and download the beautiful artwork, cast info, and summaries.
For movies, the format is simple:

Movie Name (Year).ext
Example: The Dark Knight (2008).mkv
The year is crucial! It helps Plex distinguish between different versions of a movie. For instance, it tells Plex you have the 2021 Dune and not the 1984 Dune. Without the year, you’re leaving it up to a guess.
For TV shows, the format is more detailed but unlocks the real power of Plex:

Show Name/Season XX/Show Name - SXXEYY.ext
Example: TV Shows/The Office (US)/Season 02/The Office (US) - s02e12 - The Injury.mp4
This looks a little intimidating, but it’s a simple pattern. Let’s break it down with an example. Here’s what you’re telling the Plex robot:
- Go to the TV Shows folder.
- Look inside the The Office (US) folder.
- Then go into the Season 02 folder.
- The file s02e12 means Season 02, Episode 12.
When you follow this structure, Plex will perfectly organize the entire show, grouping episodes by season and pulling the correct title for each one. It’s what creates that professional, binge-worthy layout.
TRUST ME ON THIS ONE!
As someone who has helped friends and family set up their own servers, this is the step that makes all the difference. Spending 30 minutes organizing your files now will save you countless hours of frustration later. A clean library is a happy library!
3. Installation guide: Setting up Plex Media Server
You’ve chosen your hardware and organized your files. Now for the exciting part – bringing your server to life. This is where we install the Plex Media Server software itself. Don’t worry, the team at Plex has made this process incredibly straightforward.
I’ll walk you through the two most common scenarios: Installing on a standard computer and on a popular Synology NAS.
3.1. On a Windows PC or Mac
If you’re using a computer as your server, you’ll be up and running in about the time it takes to make a cup of coffee.
- Download the software. Head over to the official Plex downloads page at plex.tv/media-server-downloads/. The website is smart and should automatically detect whether you’re on Windows or macOS and highlight the correct version for you. Click the download button.
- Run the installer. Once the download is complete, open the file. It’s a standard installation wizard just like any other program you’ve installed. Just click through the prompts to complete the setup.
- Launch Plex. After installation, the Plex Media Server will start automatically. It doesn’t open a big program window on your desktop. Instead, it runs quietly in the background. You’ll see its small, arrow-shaped icon appear in your Windows system tray (bottom-right) or your macOS menu bar (top-right). Crucially, it will also automatically open a new tab in your web browser to begin the setup wizard. This browser window is where all the configuration happens.
3.2. On a Synology NAS
If you invested in a NAS, the process is just as easy and feels a lot like installing an app on your phone. The steps are very similar for other brands like QNAP.
- Log in to your NAS. Open your web browser and log in to your Synology’s web interface, called DSM (DiskStation Manager).
- Open the Package Center. Think of this as the app store for your NAS. Find and click on the “Package Center” icon.
- Find and install Plex. Use the search bar to type in “Plex.” The Plex Media Server package will appear. Click “Install” and let the NAS do its thing.
- CRITICAL STEP: Set permissions. This is the one extra step on a NAS that trips up many beginners. For security, a new app can’t automatically access your files. You have to permit it.
- Go to your NAS Control Panel > Shared Folder.
- Select the Media folder you created earlier and click Edit.
- Go to the Permissions tab.
- Find the user named PlexMediaServer (or Plex on older versions) in the list.
- Check the box to allow it read/write access. Click Save.
- My Experience: I can’t stress this enough. Forgetting this step is the #1 reason people see an empty library. Taking 30 seconds to do this now ensures Plex can actually see and organize your files.
- Open Plex. Go back to the Package Center, find Plex again, and now click “Open.” Just like the PC version, this will launch the setup wizard in a new browser tab, ready for you to configure.
4. Configuring your Plex library
You’ve done the hard work. The hardware is running, the software is installed, and your files are perfectly organized. Now, you get to see why it was all worth it. The Plex Setup Wizard, which should be open in your browser, is the final bridge between you and your personal streaming service.
I still remember the first time I did this – seeing my scattered collection of video files transform into a polished library was genuinely magical. Let’s walk through these last simple steps together.
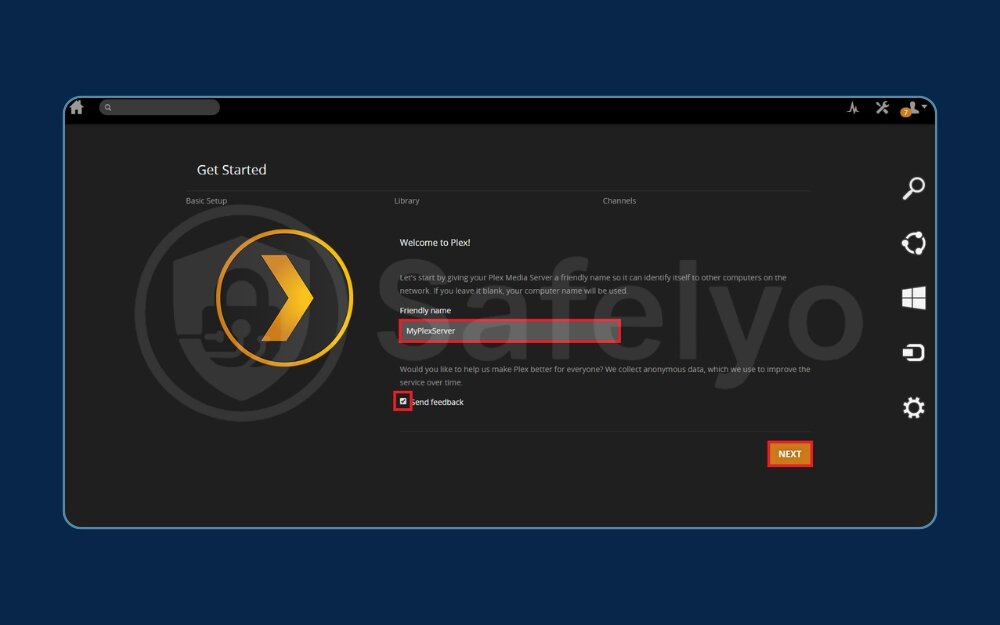
4.1. Name your server
The first thing Plex will ask is for you to give your server a name. This can be anything you like! “The Family Server,” “Movie Night HQ,” or just “Dave’s Plex Server” – make it your own. This is the name you’ll see when you connect from your different devices. Check the box that allows you to access your media outside your home (we’ll fine-tune this later) and click “Next.”
4.2. Add your first library
This is the core of the setup.
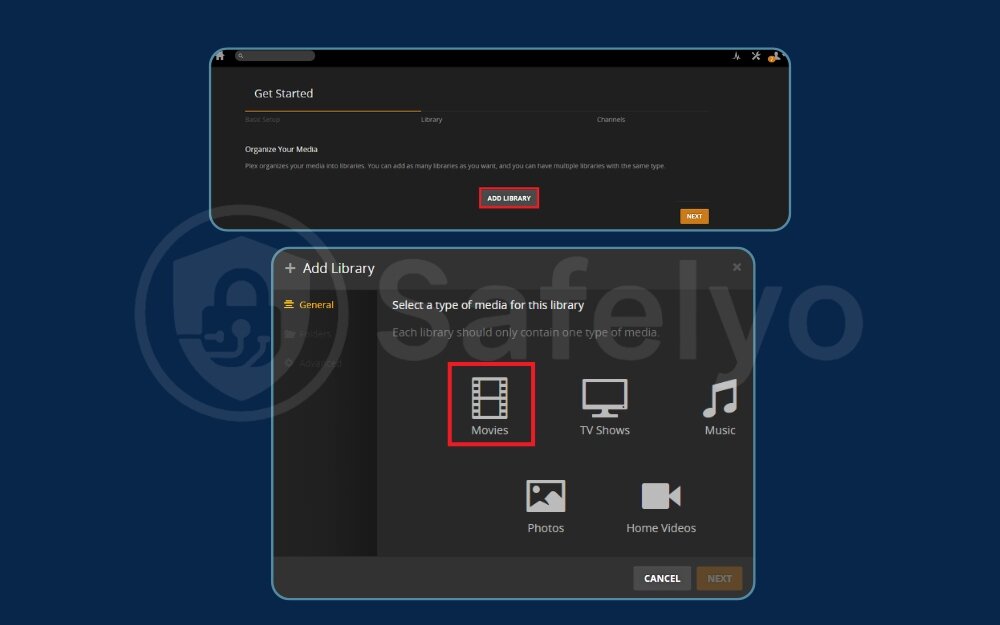
- Click the big Add Library button.
- A window will pop up asking you to select the library type. Choose Movies. This tells Plex to look for movie posters, cast information, ratings, and plot summaries.
- Next, click Browse for Media Folder. A file browser will open. Now, simply navigate to and select the Movies folder you created back in step 2 (e.g., D:/Media/Movies). Click Add.
- Click the Add Library button at the bottom to confirm.
4.3. Add your other libraries
You’ll be taken back to the main wizard screen. Simply repeat the process for your other media types.
- Click Add Library again.
- This time, select TV Shows.
- Browse to and select your TV Shows folder.
- Click Add Library.
Do the same for Music or Photos if you have them. Once you’re done adding all your main folders, click “Next.”
4.4. Witness the transformation
Click “Done” to finish the wizard. Now, sit back for a minute. You’ll see Plex begin to work its magic. It’s scanning every file you told it about, going online to a massive database, and pulling down all the information.
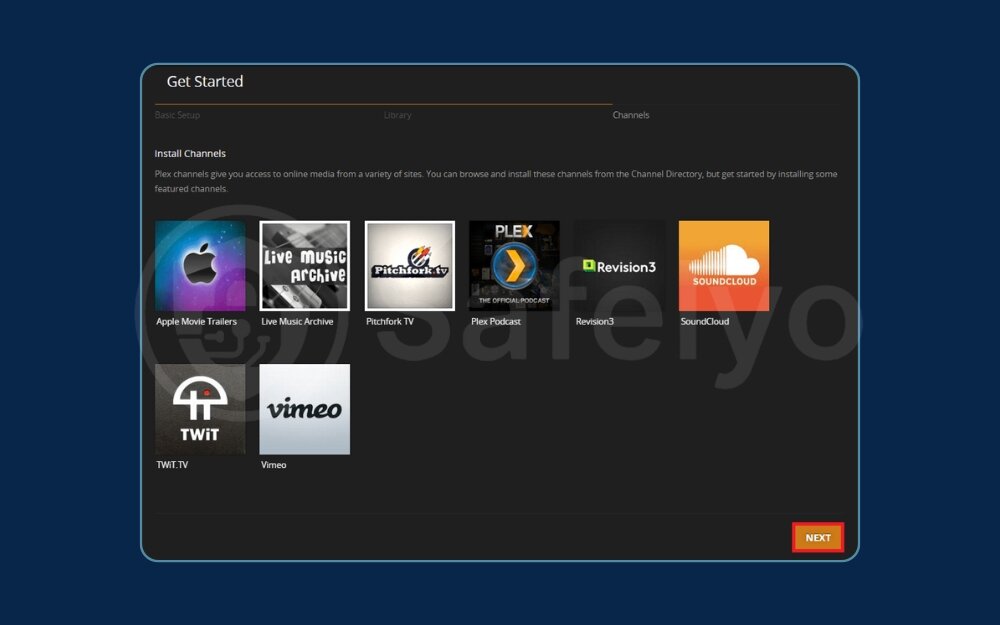
Suddenly, you’ll see it happen. Plain file names are replaced with vibrant, high-resolution movie posters. TV shows are neatly stacked into seasons. Your screen will transform from a simple file list into a gorgeous, media-rich interface that looks and feels just like a professional streaming service.
This is your personal Netflix. You built it.
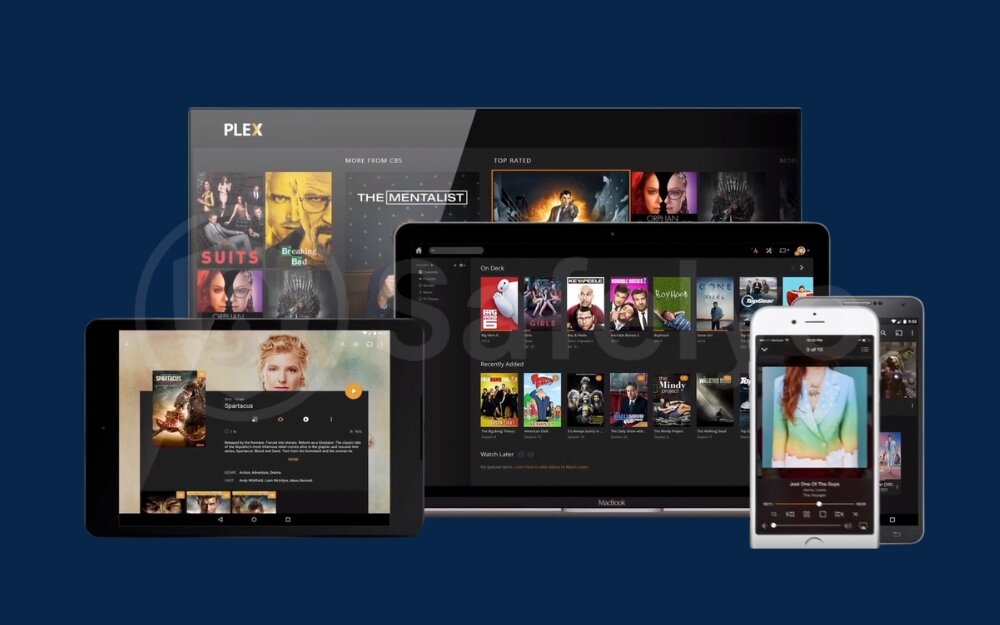
5. Start watching: Installing Plex apps on your devices
Your server is now a fully functional, beautiful library running silently on your PC or NAS. But how do you actually watch anything? This is where the other half of the Plex ecosystem comes in: The Plex client apps.
Think of it like your server is the “Netflix” data center, and the client app is the “Netflix” app you use on your TV or phone. The server does all the heavy lifting and organization – the app is just a sleek, simple window to access it all.
The best part? The app is free and available on virtually every device you can imagine. Here’s how you get it.
On your smart TV (LG, Samsung, Sony, etc.)
This is probably where you’ll do most of your watching.
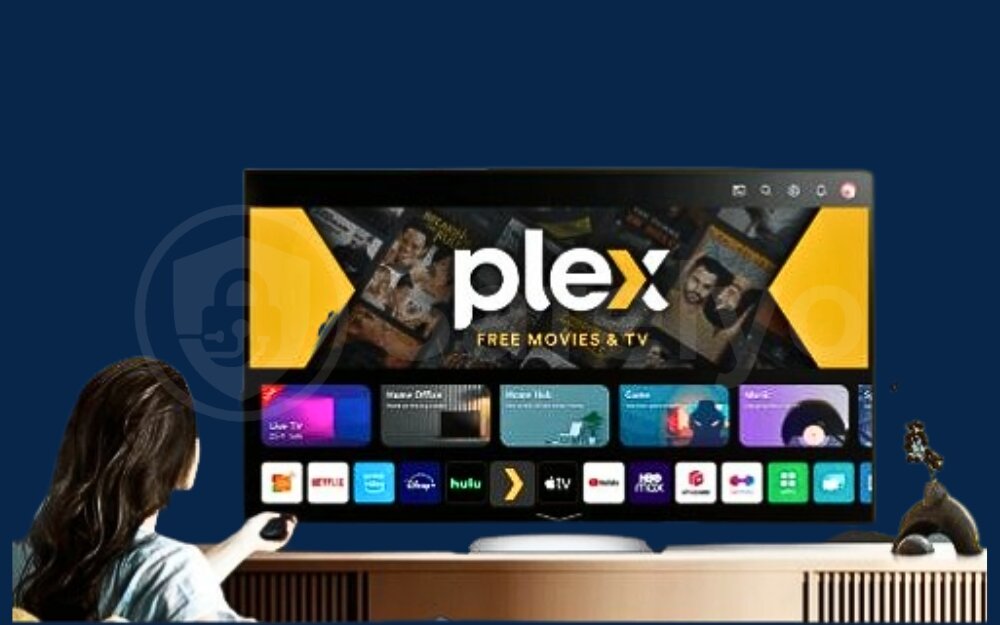
How to do it: Grab your TV remote, go to its built-in app store (e.g., LG Content Store, Samsung Apps), and search for “Plex.” Install it just like you would any other app, like YouTube or Netflix.
This is the most seamless experience. Once installed, the app will show a simple 4-digit code on the screen. You just go to plex.tv/link on your phone or computer, type in the code, and your TV is instantly and securely connected to your server. No need to type in a long password with your TV remote!
On a streaming stick or box (Apple TV, Roku, Amazon Fire TV)
If your TV isn’t “smart” or its built-in apps are slow, a dedicated streaming device is a fantastic upgrade.
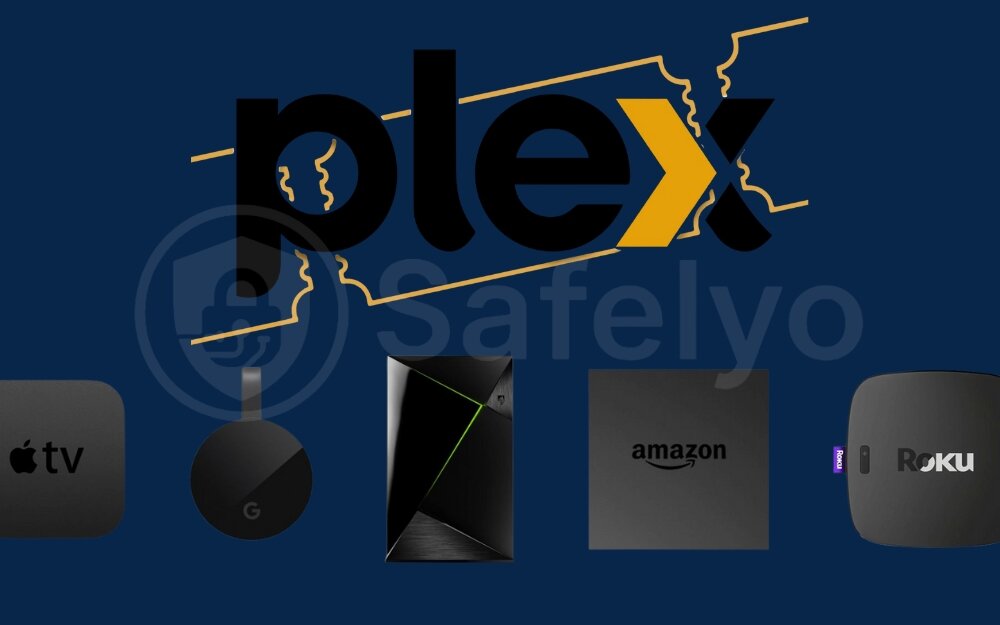
How to do it: The process is identical to the Smart TV. Go to the device’s app store (Apple App Store, Roku Channel Store, etc.), search for “Plex,” and install it.
On your phone or tablet (iOS/Android)
This is perfect for watching on the go or casting to a Chromecast.
How to do it: Simply open the Apple App Store or Google Play Store on your device, search for “Plex,” and tap download. Log in with the same Plex account you created earlier.
I often use this when I’m at the gym. I can stream a TV show directly from my home server to my phone. It’s like having my entire media library in my pocket.
On another computer
While you can always use the web browser interface, Plex also offers a dedicated desktop app for Windows and Mac called Plex HTPC.
How to do it: Download it from the same Plex downloads page. This app is optimized for a full-screen viewing experience, making it perfect if you have a computer connected directly to a TV or a large monitor.
Once you log into the Plex app on any of these devices, your entire, beautifully organized library will appear, ready for you to press play.
6. Pro tips: Unlocking Plex’s full potential
Your server is running, and you can watch your media at home. Congratulations, you’ve already succeeded! But if you want to take your new setup from “great” to “absolutely incredible,” here are a few pro tips I’ve learned over the years that make all the difference.
6.1. Enable remote access (the “anywhere” feature)
This is what allows you to watch your movies from a hotel room or share your library with family across the country. Essentially, you’re opening a small, secure door for your server to talk to the internet.
- How to do it: In the Plex web browser interface, click the Settings icon (the wrench) in the top-right corner. On the left menu, under your server name, click on Remote Access.
- What to expect: In most cases, Plex will automatically configure everything for you. After a moment, you should see a green checkmark and the message: “Fully accessible outside your network.” It’s that easy.
EXPERT TIP:
If you see a red error message, don’t panic. It often relates to a setting on your internet router called “Double-NAT.” While fixing that is a more advanced topic, the automatic setting works for over 90% of users.
6.2. The key to performance: Understanding direct play vs. transcoding
This is the single most important concept to understand for a smooth Plex experience. I’ll break it down with a simple analogy. Imagine your Plex server only speaks English.
- Direct Play (The goal): This happens when you send a movie file to your TV, and your TV also understands English. The server doesn’t have to do any work; it just “directly plays” the file. This is effortless, uses almost no CPU power, and gives you the absolute best video quality.
- Transcoding (The heavy lifting): This happens when you send that English movie file to a device that only understands French (like an old tablet or a web browser). Your server now has to act as a live translator, converting the video on the fly from one format to another. This is a very intensive task and uses a lot of your server’s “brainpower” (CPU).
If your server isn’t very powerful, transcoding can cause buffering or stuttering.
- Your Actionable Goal: To get more Direct Play, try to have your media in a common format like MP4 with an H.264 video codec and AAC stereo audio. This combination is like the “universal language” of the video world that almost every device understands natively.
>> You may also be interested in: How to set up split tunnel VPN for Plex (step-by-step guide)
6.3. Explore Plex Pass (the optional upgrade)
Everything we’ve done so far is 100% free, and the free version is amazing. Plex also offers a premium subscription called Plex Pass, which unlocks some powerful features for enthusiasts. You don’t need it, but it’s good to know what it offers.
The three biggest benefits are:
- Hardware Transcoding: Remember our translator analogy? Hardware transcoding is like giving your server’s translator a specialized supercomputer. It offloads the heavy work of transcoding from the main CPU to the graphics hardware, making it incredibly efficient. If you plan to have many people streaming at once, this is a game-changer.
- Downloads (Mobile Sync): This lets you save movies and shows directly to your phone or tablet. It’s perfect for loading up on content before a long flight, so you can watch offline.
- Live TV & DVR: If you have a digital TV antenna and a compatible tuner, you can connect it to Plex to watch and record live broadcast television, just like a traditional DVR.
MY TAKE
Start with the free version. If you fall in love with Plex and find yourself wanting these extra features, the Plex Pass is a worthy upgrade.
7. FAQ about how to set up a home media server with Plex
Setting up a server for the first time can bring up a few questions. Here are clear, straightforward answers to some of the most common ones we encounter from new Plex users.
How to set up a Plex server at home?
Setting up a Plex server at home involves four main steps: 1. Choose a device to act as your server (like a NAS or an old PC). 2. Organize your movie and TV show files into specific folders with correct naming. 3. Install the free Plex Media Server software on your chosen device. 4. Add your media folders to create your libraries within the Plex setup wizard.
Do I need an internet connection to use Plex?
You need an internet connection for the initial setup to download the software and all the movie posters and info (metadata). You also need it for remote access. However, to watch media within your own home network (streaming from your server to your living room TV), no active internet connection is required once it’s set up.
Is Plex free to use?
Yes, the core functionality of Plex is completely free. This includes installing the server, organizing your library, and streaming to most devices. They offer an optional premium subscription, Plex Pass, for advanced features like hardware transcoding, downloading files for offline viewing, and Live TV & DVR.
Why are some of my movies not showing a poster?
This is almost always due to incorrect file naming. Go back to step 2 of our guide and ensure your file is named in the format Movie Name (Year).ext. For example, Avatar (2009).mkv. After fixing the name, go into your Plex library and select “Scan Library Files” to have it try again.
Is it worth setting up a Plex server?
Absolutely. If you have a collection of digital media, setting up a Plex server is one of the most rewarding tech projects you can do. It gives you a beautiful, centralized “personal Netflix,” frees you from reliance on multiple streaming services, and gives you complete control over your content, accessible from anywhere.
Why is Plex not illegal?
The Plex software itself is 100% legal. It is simply a tool for organizing and streaming media that you own. Illegality only comes into play if the user acquires their media content (the movies and TV shows) through illegal means, such as piracy. Plex as a company has no connection to how users obtain their files.
What is the best home server for Plex?
For most users, a dedicated NAS (Network Attached Storage) device from a brand like Synology or QNAP is the best all-around choice. It offers a great balance of low power consumption, ease of use, and reliability. For those on a budget, an old PC or laptop is a great starting point, while an NVIDIA Shield Pro is a powerful, compact option.
8. Conclusion
Congratulations! You’ve officially learned how to set up a home media server with Plex. You’ve gone from a simple idea to a fully functioning, personal streaming service that puts you in complete control. By following these steps, you’ve turned a collection of files into a living, breathing library ready to be enjoyed on any screen, anywhere.
Let’s quickly recap the key milestones on your journey:
- You chose the right hardware for your needs, whether it was a budget-friendly PC, a reliable NAS, or a compact streaming device.
- You organized your media files like a pro, creating the clean structure that Plex needs to work its magic.
- You installed and configured the Plex Media Server, adding your libraries and watching them transform.
- You unlocked pro-level features by understanding remote access and the difference between Direct Play and transcoding.
This is just the beginning of your Plex adventure. You now have a robust foundation to build upon, whether you choose to expand your storage, share with more family, or explore advanced features. The power is now in your hands.
Here at Safelyo, we’re dedicated to making complex technology simple and accessible. We hope this guide in our Tech How-To Simplified series has empowered you to take control of your digital entertainment. Now that your server is up and running, the next logical step is ensuring it has the best possible home. Discover which device is perfect for your growing library in the updated review of the best NAS for Plex in 2025 from Safelyo.

