You’ve invested in a VPN to create a private, encrypted tunnel for your data – shielding your activity from prying eyes. But what if a lesser-known flaw, an IPv6 leak, is creating a secret exit ramp, exposing your true location without you ever knowing?
In today’s digital world, ensuring your privacy tools are working perfectly isn’t just for the tech-savvy; it’s essential for everyone. An IPv6 leak undermines the very reason you use a VPN, potentially revealing your real IP address to your internet service provider and the websites you visit.
Having tested hundreds of VPNs over the years, I’ve seen how this specific vulnerability can go unnoticed, silently compromising user privacy. Understanding what is IPv6 leak protection is the critical difference between thinking you’re anonymous and knowing you are.
In this comprehensive guide, you’ll discover:
- What an IPv6 leak is, explained with a simple analogy.
- The real-world privacy risks it poses.
- A simple, 3-step plan to test for and fix this vulnerability.
- How to ensure your VPN is configured for maximum security.
Don’t let a technical flaw compromise your privacy. Let me guide you through the simple steps to verify your connection and ensure your digital shield is truly leak-proof.
IPv6 Leak Protection in 30 Seconds
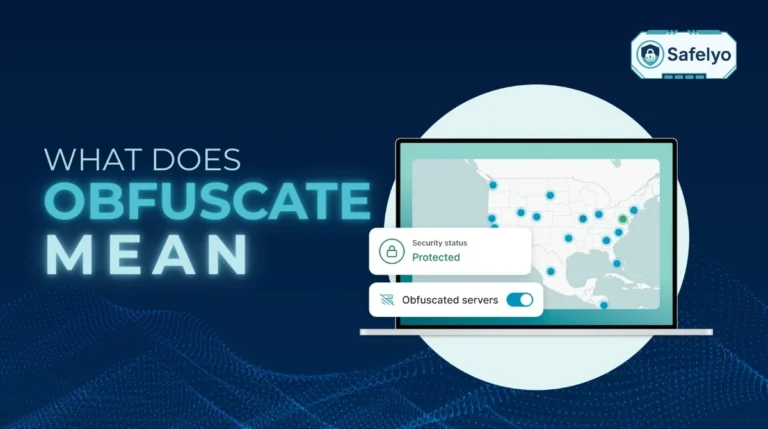
IPv6 leak protection is a crucial component of any VPN, designed to keep your real IPv6 address concealed while you’re online. It works by either blocking all IPv6 traffic or routing it securely through the VPN tunnel. The good news: Most top-tier VPNs have this protection enabled by default, so you are likely already safe. This guide will help you understand, test, and verify your connection.
1. What is IPv6 leak protection? How an IPv6 leak happens
To understand this leak, let’s set aside the technical jargon. Over the years, I’ve found that the best way to explain this security flaw isn’t with network diagrams, but with a simple story about a VIP convoy.
Imagine all your data traveling on the internet as a convoy of important VIPs. Your VPN is a heavily armored escort service, designed to shield these VIPs inside an encrypted tunnel, hiding them from anyone watching the road.
- The Limousines (IPv4 Traffic): Most of the internet still runs on the older, established Internet Protocol version 4 (IPv4). These are the standard, well-known limousines in your convoy. Your VPN escort service is an expert at protecting them.
- The Motorcycles (IPv6 Traffic): IPv6 is the newer, more modern standard designed for the future of the internet. Think of this traffic as fast, nimble motorcycles traveling alongside the limousines.
Here’s where the problem occurs. An IPv6 leak happens when your VPN escort service was designed primarily for the limousines (IPv4) and completely ignores the motorcycles (IPv6). The limousines are safely hidden inside the armored tunnel, but the motorcycles are left to travel on the open road. This exposes their identity – your real IPv6 address – to your Internet Service Provider (ISP) and every website you visit, completely defeating a key purpose of your VPN.
What does IPv6 leak protection mean in this context? It’s simply an upgrade to your escort service. It’s a clear directive. It ensures the motorcycles (IPv6 traffic) are brought inside the armored tunnel. Alternatively, they are told to stay at the base. This prevents them from revealing your position.

2. The 3-step plan to test for and fix IPv6 leaks
Finding and fixing an IPv6 leak sounds complicated, but it’s a straightforward process. In my experience, most people just need the peace of mind that comes from testing and confirming their VPN is working correctly.
Follow these three steps in order. Most users will only need to do steps 1 and 2.
- Step 1: Perform a leak test. We’ll quickly check if your “motorcycles” are exposed.
- Step 2: Enable the built-in protection in your VPN app. This is the easiest and best solution.
- Step 3 (If Necessary): Manually disable on your device. This is the last resort if your VPN doesn’t offer protection.
2.1. Step 1: Test for an IPv6 leak
This is the moment of truth, and it only takes a minute. A proper VPN IPv6 leak test is the only way to be 100% sure about your connection’s privacy.
- Disconnect your VPN. Go to a trusted testing site like ipleak.net or browserleaks.com/ip. Take a screenshot or note your real IPv4 and IPv6 addresses provided by your ISP.
- To clearly demonstrate the change, connect to your VPN server in a different country.
- Refresh the test page. Now, carefully compare the results.
Interpreting the results:
- You are Secure: These outcomes below mean your real IP is hidden and you are protected.
- The test page shows only the IP addresses of your VPN server.
- You might see a new IPv4 and a new IPv6 address from the VPN.
- Or you may not see an IPv6 address at all. Both of these outcomes mean your real IP is hidden and you are protected.
- You have an IPv6 Leak: The test page shows the IPv4 address of your VPN, but your real IPv6 address from Step 1 is still visible. This confirms your VPN is protecting the “limousines” but not the “motorcycles.”
If your test shows a leak, don’t panic. The fix is usually just a few clicks away, which we’ll cover in the very next step.

2.2. Step 2: Enable IPv6 leak protection in your VPN app
If your test revealed a leak, the good news is you almost certainly don’t need to dive into complex system settings. The simplest answer to how to fix an IPv6 leak is built right into your VPN app. Nearly all modern, reputable providers have a dedicated solution for this.
You just need to make sure it's turned on.
Typically, you can find this option by navigating to your VPN app’s settings menu, usually under a tab like ‘Advanced,’ ‘Connection,’ or ‘Security’. The option itself is a simple checkbox or toggle switch, often labeled with one of the following:
- IPv6 Leak Protection
- Block IPv6 Traffic
- Disable IPv6 while on VPN
From my own extensive testing of dozens of services, I can confirm that for most top providers like NordVPN, ExpressVPN, and Surfshark, this critical security feature is enabled by default. The reality is, if you’re using a quality VPN, you are likely already protected, and the leak test from Step 1 simply confirms it.
To make it even easier, here’s where you can typically find the setting:
Simply ensure this box is checked or the toggle is on. Then, reconnect your VPN and re-run the leak test from Step 1. Your real IPv6 address should now be completely hidden, confirming your connection is secure.
2.3. Step 3: Manually disable IPv6 on your device (the last resort)
I want to be very clear about this step: You should only follow these instructions if your VPN is outdated or, for some reason, does not offer built-in leak protection. For 99% of users with a quality VPN, the toggle switch in Step 2 is the better, safer, and more flexible solution.
Manually disabling IPv6 on your entire operating system is a blunt instrument. It’s like telling all the “motorcycles” they’re grounded, forever. This can sometimes cause connectivity issues with the small but growing number of websites and services that are starting to rely on the newer IPv6 protocol.
However, if you’ve confirmed your VPN offers no protection and you need to ensure your privacy, here is how to disable IPv6 on the most common operating systems.
On Windows 11:
- Go to Settings > Network & internet > Advanced network settings.
- Click on More network adapter options. This will open the classic Control Panel window.
- Right-click on your active connection (e.g., “Wi-Fi” or “Ethernet”) and select Properties.
- In the list displayed, locate the option for “Internet Protocol Version 6 (TCP/IPv6)” and make sure to uncheck its box.
- Click OK to save your changes.
")
")
")
On macOS (Ventura and later):
- Go to System Settings > Network.
- Choose your active connection, such as Wi-Fi, from the available options in the list.
- Click the Details… button.
- Go to the TCP/IP tab in the new window.
- Next to “Configure IPv6,” use the dropdown menu to select “Link-Local Only” or “Off”.
- Click OK.
")
")
")
")
After making these changes, it’s a good idea to restart your computer and run the leak test one last time to confirm the issue is resolved.
3. VPN approaches to IPv6: Blocking vs. full support
When you toggle that “IPv6 Leak Protection” switch in your app, what’s actually happening behind the scenes? From my deep dives into VPN architecture, I can tell you that providers generally take one of two distinct approaches to handle the IPv4 vs IPv6 VPN challenge.
Understanding this can tell you a lot about a provider’s technical priorities.
| Approach | How It Works | Pros | Cons | Example VPNs |
|---|---|---|---|---|
| Blocking IPv6 (Most Common) | The VPN forces all IPv6 traffic to stop at your device, ensuring it can’t leak outside the tunnel. | Simple and 100% effective at preventing leaks. It’s a foolproof way to ensure your privacy. | It can occasionally cause loading issues with the very few websites or services that are IPv6-only. | NordVPN, Surfshark, and most other providers. |
| Full IPv6 Support (Advanced) | The VPN correctly routes your IPv6 traffic through the encrypted tunnel, just like it does with IPv4. | More future-proof and ensures you have a seamless connection to all parts of the modern internet. | More complex and expensive for the provider to implement correctly and securely across a global network. | ExpressVPN, Private Internet Access. |
The verdict for your security
For today’s internet, both methods are equally secure for you as a user. A VPN that does not block IPv6 and offers full support is a great sign of a forward-thinking, technically proficient provider. However, the far more common “blocking” method is perfectly safe and solves the immediate privacy problem completely.
When I review a service, as long as it effectively prevents the IPv6 leak, DNS leak, and WebRTC leak, I consider it a pass. The key is that the provider acknowledges the issue and has a robust system – either blocking or full routing – to protect you.
4. DNS leak vs. IPv6 leak vs. WebRTC leak
An IPv6 leak is just one of several potential vulnerabilities that can compromise your privacy while using a VPN. It’s easy to get these terms mixed up, but they expose different types of information. When I’m conducting a full security audit of a VPN service, I test for all three: IPv6 Leak, DNS Leak, and WebRTC Leak.
Here’s a quick cheat sheet to tell them apart:
| Leak Type | What It Exposes | The Simple Cause |
| IPv6 Leak | Your real location/identity (via IPv6 address) | VPNs struggle to effectively manage contemporary IPv6 internet traffic. |
| DNS Leak | Your browsing activity (the sites you visit) | VPN lets your ISP see your “internet phonebook” lookups. |
| WebRTC Leak | Your real location/identity (via IP address) | A browser communication feature bypasses the VPN tunnel. |
Now, let’s break these down further using our convoy analogy to understand how they work in practice.
IPv6 Leak
As we’ve discussed, this happens when your armored escort (the VPN) protects your limousines (IPv4 traffic). However, it leaves your motorcycles (IPv6 traffic) exposed on the open road. This can reveal your real IPv6 address.
DNS Leak
Imagine your convoy is perfectly hidden, but your driver keeps rolling down the window to ask a local police officer (your ISP) for directions to every single destination. A DNS leak is when your VPN protects your data traffic, but your DNS requests – the “phone book” of the internet – are still sent to your ISP’s servers. This doesn’t expose your IP, but it does reveal which websites you are visiting.
WebRTC Leak
Think of this as a special radio inside one of the limousines that can broadcast its location directly, bypassing the escort’s jamming equipment. WebRTC is a technology used for real-time voice and video communication directly in your browser (like Google Meet or Discord). A WebRTC leak protection failure can expose your real IP address to websites and services, even when the VPN connection is active.
When you’re choosing a service, you shouldn’t have to pick and choose which leaks to prevent. A top-tier VPN should protect you from all three by default. Always look for a service that explicitly mentions WebRTC leak, IPv6 leak, and DNS leak protection as core features. This is a clear sign that the provider takes a multi-layered approach to securing your entire connection.
“Trust, But Verify”
While reputable VPN providers build robust leak protection into their apps, the principle of “Trust, but Verify” is paramount in cybersecurity. Your network configuration, browser settings, or even a recent software update can sometimes create unexpected vulnerabilities. This is why periodically running a comprehensive leak test is a habit of every security-conscious user. It’s not about distrusting your VPN; it’s about being a proactive guardian of your own privacy.
5. FAQ about the IPv6 leak protection
We’ve walked through the convoy analogy and the 3-step fix, but you might still have a few lingering questions. Here are direct answers to the most common queries I encounter about IPv6 and VPN security.
What is an IPv6 leak?
An IPv6 leak occurs when your VPN successfully hides your older IPv4 address but fails to protect or block your newer IPv6 address. As a result, your real IPv6 address – which can reveal your location – is exposed to your ISP and the websites you visit, undermining your privacy.
What is IPv6 leak protection?
IPv6 leak protection is a vital security feature in a VPN that helps keep your real IPv6 address concealed and secure from any potential exposure. It works in one of two ways: either by completely blocking all IPv6 traffic from leaving your device, or by securely routing that traffic through the encrypted VPN tunnel.
Is it better to have IPv6 on or off?
For most people, it’s best to leave IPv6 enabled on your device and let your VPN app manage the protection. Disabling it system-wide (the disable method) can sometimes interfere with modern internet services. A good VPN will handle it for you, giving you the best of both worlds: security and compatibility.
Why is IPv6 a security risk with a VPN?
IPv6 itself isn’t a security risk; it’s the future of the internet. The risk arises when a VPN is not properly configured to handle IPv6 traffic. If the VPN only creates a tunnel for IPv4, the IPv6 connection is left unprotected, creating a “leak” that bypasses your VPN’s encryption entirely.
Which is the best VPN with IPv6 leak protection?
All of our top-rated VPNs, including NordVPN, ExpressVPN, and Surfshark, provide robust, built-in IPv6 leak protection that is enabled by default. You can’t go wrong with any of them for comprehensive security, making them a strong choice for the best.
6. Conclusion
An IPv6 leak can be a serious chink in your digital armor, but the good news is that it’s an easy one to fix. This isn’t a complex flaw. It doesn’t require deep technical knowledge. Instead, it’s a simple checkbox that needs to be ticked. This can be done by you or, preferably, by your VPN provider by default.
- An IPv6 leak occurs when your VPN protects IPv4 traffic but ignores IPv6 traffic, exposing your real IP.
- Most top-tier VPNs already have IPv6 leak protection enabled by default.
- You can easily test for leaks in under a minute using a site like ipleak.net.
- Enabling the built-in protection in your VPN app is the best and easiest solution.
Don’t let technical jargon intimidate you. Taking a few minutes to test your connection is important. Reviewing your VPN settings is an easy task. This ensures your privacy shield is as strong as you believe it to be. A leak-proof VPN is the foundation of online privacy. Explore other comprehensive VPN reviews from Safelyo in our Privacy & Security Basics category to find a service that takes your security as seriously as you do.