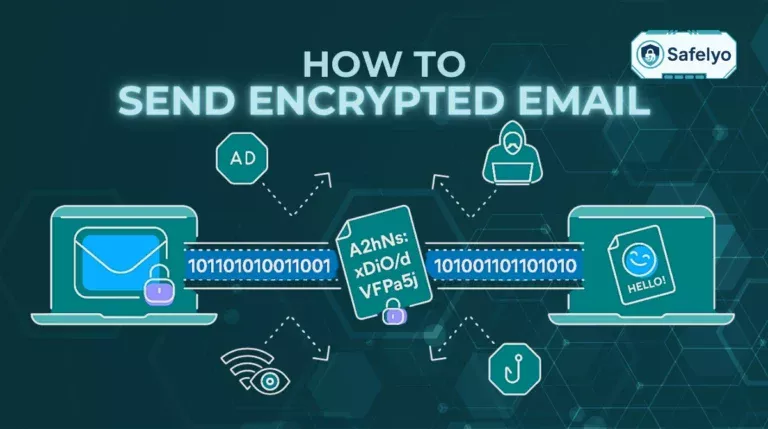
Need to email a payroll spreadsheet, a legal contract, or sensitive client information? Sending a standard email is like mailing a postcard – anyone who handles it can read its contents. In a world where data breaches are a constant threat, protecting this confidential information isn’t just good practice; it’s a professional necessity.
Fortunately, learning how to send an encrypted email in Outlook provides a simple, built-in way to digitally seal your most important communications. Having spent years helping businesses implement simple security measures, I’ve seen how often this powerful, built-in Outlook feature is overlooked. It’s not just for IT admins; it’s an essential tool for any professional handling sensitive data today.
In this step-by-step guide, you will learn:
- The easiest way to encrypt emails is to use the built-in Outlook encryption button.
- Clear instructions for both the ‘New’ and ‘Classic’ versions of Outlook.
- Exactly what your recipient will see, even if they use Gmail.
- What to do if you can’t find the encryption option.
Don’t leave your sensitive data exposed. Let me guide you through every step to send a secure email in Outlook with complete confidence.
1. The easy way: Using Microsoft 365 message encryption (ome)
Before we dive into the step-by-step instructions, it’s important to know that Outlook offers a couple of ways to handle email encryption. There’s an advanced, certificate-based method called S/MIME, but for 99% of users, there’s a much simpler and better solution: Microsoft 365 Message Encryption (OME).
So, what is it?
OME is a powerful, cloud-based encryption service built directly into eligible Microsoft 365 subscriptions. Think of it as the “easy button” for email security in Outlook. When I’m training teams on best practices, I always tell them to start here because it handles all the complicated technical parts behind the scenes.
Here's why it's the best choice for most people:
- No complex setup: Unlike other methods, you don’t need to generate, install, or exchange any digital certificates with your recipients. It just works.
- It works for everyone: You can send an encrypted email from Outlook to Gmail, Yahoo, or any other email service. The recipient doesn’t need to have Outlook or a special setup to open it.
- It’s user-friendly: The system provides clear instructions to your recipient on how to open your protected messages, ensuring they can always access the content.
For the rest of this guide, we’ll be focusing on this method. It’s the most practical, reliable, and straightforward way to encrypt email that Outlook offers.

2. How to send an encrypted email: Step-by-step instructions
Ready to send your first encrypted email? The process is incredibly simple, but the location of the Outlook encryption button can vary slightly depending on which version of Outlook you’re using. I’ll cover all the modern versions below.
2.1. In the new Outlook for Windows & Outlook on the web
The ‘New’ Outlook for Windows and the web version (Outlook.com) share a nearly identical, modern interface. If your Outlook looks clean and minimalist, these are the steps for you. This comparison of new Outlook vs classic Outlook encryption highlights how streamlined the process has become.
- Compose a new email by clicking the “New mail” button.
- In the new message window, look at the toolbar at the very top and click the “Options” tab.
- Click the “Encrypt” button. You may see a small lock icon.
- A notification banner will immediately appear at the top of your message, confirming: “This message is encrypted. Recipients can’t remove encryption.”
- Write your message, add your attachments, and click Send.
That’s all there is to it. Your email is now protected by Microsoft 365 Message Encryption (OME).
2.2. In the classic Outlook for Windows (desktop app)
If you’re using the traditional desktop version of Outlook, the steps are just as easy. This version has been a workhorse in offices for years. However, the menus may look a bit different.
- Create a new email.
- In the new message window, click the “Options” tab in the top ribbon.
- Look for a group labeled “Permissions” and click the “Encrypt” button. It will also have a lock icon.
- From the dropdown menu that appears, you can select the level of protection you want. We’ll cover what these mean next.

2.3. The encryption options: Encrypt-only vs. Do not forward
When you click the “Encrypt” button in Classic Outlook, or sometimes in the New version, you’ll be presented with a couple of choices. These email permissions give you more control over your confidential information.
- Encrypt-Only: This is the standard, default choice. It scrambles the content of your email so only the intended recipient can read it. However, once they open it, they can still copy the text, print it, or forward it. The forwarded email will remain encrypted, which is a key security feature. I use this option for 90% of my secure communications, like sending a project proposal.
- Do Not Forward: This is the high-security option. It not only encrypts the message but also applies a restrictive policy. The recipient cannot forward, print, or copy the content. This is the perfect choice for sending highly sensitive data like employee records or financial statements.
Choosing between Encrypt-Only / Do Not Forward allows you to match the level of security to the sensitivity of your information.
3. What your recipient sees (and how they open the email)
Sending an encrypted email is only half the battle. The most common question I get is, “What happens on the other end? Will my client be confused?” This section answers that critical question: how to open the encrypted email Outlook sends. The experience is surprisingly smooth, but it varies slightly depending on the email service your recipient uses.
If the recipient uses Outlook with a Microsoft 365 account
This is the dream scenario. For anyone within your organization or any other user with a modern Microsoft 365 account, the experience is completely seamless.
The encrypted email will arrive in their inbox and look almost identical to a regular message, perhaps with a small banner at the top indicating it’s protected. The message will automatically decrypt in their reading pane. They don’t have to click any special buttons, enter any codes, or jump through any hoops. It just works.
When sending secure messages internally, the intended recipient often doesn’t even notice anything different, which is exactly how good security should feel – invisible.
If the recipient uses Gmail, Yahoo, or another email service
This is where Microsoft 365 Message Encryption (OME) truly shines. When you send an encrypted email from Outlook to Gmail or another provider, the recipient won’t see your message content directly in their inbox.
Instead, they will receive a “wrapper” email from Microsoft. This email looks very professional and contains a large, clear button that says “Read the message.”
When they click that button, they are taken to a secure Microsoft web portal to view the email. To ensure the message is only seen by the right person, they will have two simple options for identity validation:
- Sign in with their existing account: They can simply sign in with their Google or Yahoo credentials.
- Use a one-time passcode: This is the universal method that works for everyone. They click a button, and a temporary one-time passcode is immediately sent to their email inbox. They just copy that code, paste it into the portal, and the email unlocks.
The one-time passcode method is brilliant because it verifies that the person trying to open the message also has access to the recipient’s inbox. I’ve used this to send contracts to partners using all kinds of email systems, and it has proven to be a simple and reliable process for everyone involved.
4. Troubleshooting: “I don’t see the encrypt button!”
It’s one of the most common points of frustration. You’ve followed the steps, you’re in the “Options” tab, but the Outlook encryption button is nowhere to be found. I’ve helped dozens of colleagues and clients troubleshoot this exact issue. Don’t worry, the reason is almost always one of these three things.
Reason 1 (the most common):
Your Microsoft 365 subscription doesn't include it
This is the number one cause. The Microsoft 365 Message Encryption (OME) feature is powerful, but it’s not included in every plan. It’s typically available in:
- Microsoft 365 Business Premium
- Microsoft 365 Enterprise plans (E3, E5)
- Office 365 Enterprise plans (E3, E5)
- Some higher-tier Government and Education plans.
Unfortunately, it is not available in most standard consumer plans like Microsoft 365 Personal, Microsoft 365 Family, or the free version of Outlook.com. If you’re on one of these plans, the button simply won’t be there.
Reason 2:
Your it admin hasn't enabled it
If you’re using a work or school account, your organization might have the correct subscription. However, the IT administrator may not have enabled or configured the feature for your account. Email policies can vary widely between companies.
In this case, the solution is simple: reach out to your IT department. Just send them a quick email saying, “I’m trying to send a secure email in Outlook using the built-in encryption feature, but I don’t see the button. Can you please check if it’s enabled for my account?”
Reason 3 (for classic Outlook):
You might need to customize your ribbon
This is a less common issue, but it does happen. In the Classic Desktop version of Outlook, it’s possible that the button exists but has been removed from your view.
You can check this by right-clicking on the top ribbon (the area with all the buttons) and selecting “Customize the Ribbon…”. In the window that pops up, look for the “Encrypt” command. It should be in the list on the left. Check if you can add it to the “Options” tab on the right. This is a bit more technical, but it’s a good final check before contacting IT.

5. The advanced method: S/mime setup
While exploring email encryption in Outlook, you may come across another term: S/MIME (Secure/Multipurpose Internet Mail Extensions). It’s important to understand what this is, primarily so you know why the OME method we’ve discussed is almost always the better choice.
S/MIME is an older, certificate-based standard for encryption and providing a digital signature. It offers true end-to-end encryption, which sounds great in theory.
However, the reality is that a full s/mime Outlook setup is notoriously complex. Here’s the catch:
- Both the sender and the recipient must have a digital certificate installed on their respective devices.
- These certificates are often issued by third-party Certificate Authorities and can sometimes involve a cost.
- You must exchange public keys with each other before you can send an encrypted message.
I’ve been through this process for clients in highly regulated industries. It’s a cumbersome and unforgiving setup. If a recipient’s certificate expires or they try to read the email on a new device without the certificate installed (like their phone), they simply can’t open the message.
Who is S/MIME for? It’s typically required in environments with strict compliance mandates, such as government agencies, defense contractors, or financial institutions that need to verify a sender’s identity with a digital signature.
For everyday business professionals, Microsoft 365 Message Encryption (OME) is vastly superior in its simplicity and flexibility. It achieves the same core goal of protecting your sensitive information without the headache of managing certificates.
6. FAQ about how to send an encrypted email in Outlook
Have more questions? Here are quick answers to some of the most common queries about sending secure emails in Outlook.
How do I send an encrypted email in Outlook?
The easiest way is to compose a new email, go to the “Options” tab, and click the “Encrypt” button. This uses Microsoft 365 Message Encryption to protect your message. This feature is available in most Microsoft 365 Business and Enterprise plans.
Does Outlook provide email encryption?
Yes, Outlook provides robust email encryption through two primary methods: the user-friendly Microsoft 365 Message Encryption (OME) for subscribers of eligible plans, and the more complex, certificate-based S/MIME for advanced security and compliance needs.
How do I send a confidential email in Outlook?
To send a confidential email, click the “Encrypt” button from the “Options” tab and select the “Do Not Forward” policy. This not only encrypts the content but also prevents the recipient from forwarding, printing, or copying the information, making it ideal for highly confidential information.
How do I send an encrypted document via email?
When you encrypt an email in Outlook using the methods described in this guide, any attachments are automatically encrypted. This includes Word documents, PDFs, or spreadsheets. They are encrypted along with the body of the email. Simply attach the document as you normally would before sending the encrypted message.
7. Conclusion
Learning how to send an encrypted email in Outlook doesn’t have to be a complicated technical challenge. With the powerful and user-friendly features built directly into Microsoft 365, securing your sensitive communications is now as simple as clicking a single button. You can confidently protect everything from financial data to personal records, ensuring only the intended recipient can access the information.
Here are the key points to remember from this guide:
- Use the easy way: For most users, Microsoft 365 Message Encryption (OME), activated by the “Encrypt” button, is the best and simplest method.
- Choose your protection level: Select “Encrypt-Only” for standard security or “Do Not Forward” to prevent recipients from sharing, printing, or copying your message.
- It works for everyone: Recipients can easily open your protected messages, even on Gmail or other services, using a secure web portal and a one-time passcode.
- Troubleshoot the button: If you don’t see the “Encrypt” option, the most likely reason is that your Microsoft 365 plan doesn’t include it.
The next time you need to send sensitive information, don’t hesitate. That one extra click provides a critical layer of security and professionalism to your digital communications. To discover more ways to protect your data, explore the other guides in our Tech How-To Simplified section here on Safelyo.