There’s nothing more frustrating than your tech being almost perfect. You’ve set up your router, the VPN is active, but your work laptop just won’t connect. You’re likely here because you’ve been searching for a solution to the problem of GL.iNet using VPN, and how to make your work laptop work with it. I’m here to tell you that you’ve landed in exactly the right place, and the fix is much simpler than you think.
As someone who relies on a GL.iNet router for secure travel and remote work, I have personally faced and solved this exact issue countless times. This isn’t your fault, and it’s not a sign of a broken device. It’s a common conflict, and the solution is built right into your router’s software, hidden in a powerful feature many people overlook.
This guide isn’t about complex network commands or disabling your security. It’s about teaching your router to create a special “express lane” just for your work device.
In this step-by-step guide, you will discover:
- The simple reason behind this “double VPN” conflict is.
- The one piece of information you need from your laptop before you start.
- The exact clicks to create a “VPN Policy” and fix the issue in under five minutes.
- Quick troubleshooting tips if you get stuck.
Let’s get this sorted out. I’m here to walk you through every step to get your work setup running perfectly.
1. Why does your work laptop and GL.iNet VPN conflict?
Before we dive into the clicks and fixes, it’s crucial to understand why this is happening. I promise it’s not some complex technical curse. Once you see the simple logic behind the conflict, the solution will make perfect sense.
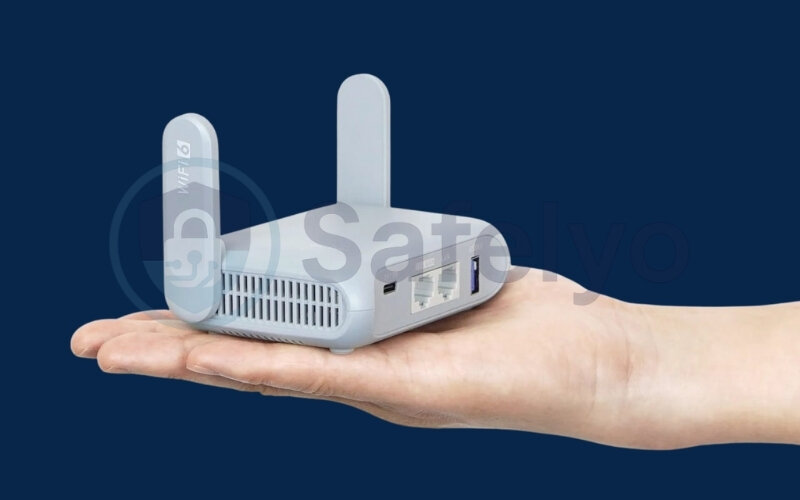
1.1. What is a GL.iNet router?
Think of GL.iNet routers as the Swiss Army knife for anyone who works or travels. These aren’t your typical bulky home routers. They are compact, incredibly powerful, and designed for people on the move.
Their main superpower, and the reason you likely bought one, is their ability to run a VPN client directly on the router itself. This means you can create a single secure, encrypted connection for every device you own, your phone, tablet, and personal laptop, all at once. It’s the ultimate tool for digital privacy and security on unfamiliar networks, like those at hotels, cafes, or airports.
1.2. The real issue: A “double VPN” conflict
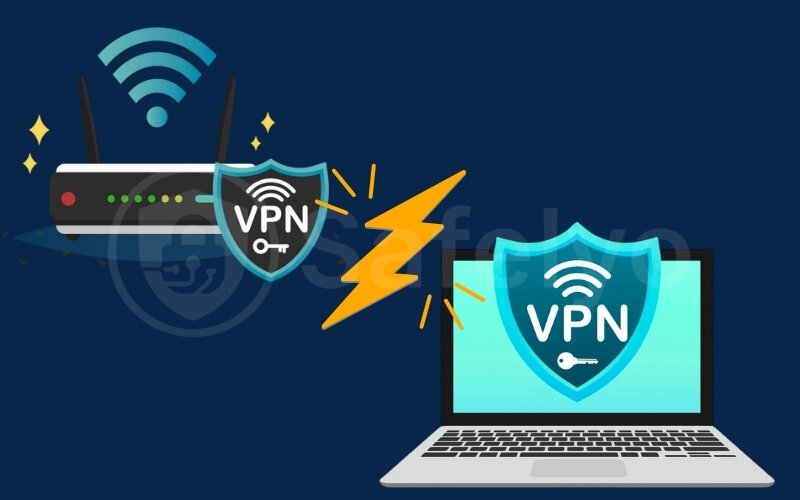
So, if the router is so great, what’s the problem? The issue arises from what I call a “double VPN” conflict. Here’s the breakdown:
- Your work laptop’s VPN: Your company’s laptop almost certainly has its own corporate VPN software (like Cisco AnyConnect, GlobalProtect, or Zscaler). This is mandatory to create a secure, encrypted tunnel from your laptop directly to your company’s servers.
- Your GL.iNet Router’s VPN: At the same time, your GL.iNet router is trying to wrap all of your laptop’s internet traffic inside its own VPN tunnel.
Imagine trying to mail a sealed, addressed envelope by putting it inside another sealed, addressed envelope. The system breaks down because the two encrypted tunnels conflict with each other, leading to a connection timeout. The result? Your work laptop has no internet access.
1.3. The elegant solution: GL.iNet’s VPN policy feature
Instead of turning off your router’s VPN and leaving your other devices unprotected, we’re going to use an incredibly useful feature built into your GL.iNet router: VPN Policy.
This feature is essentially a form of split tunneling. It lets you create a simple rule that tells the router: “Hey, for this specific device, my work laptop, please don’t force it through your VPN. Just let it access the internet directly.”
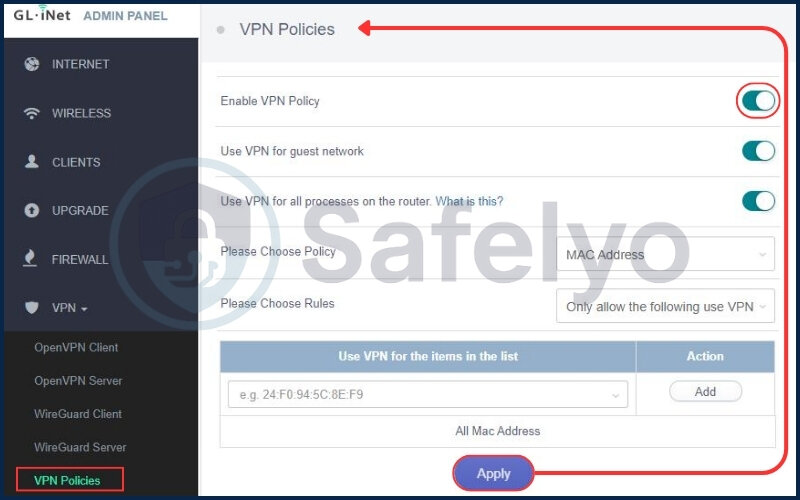
This creates a dedicated bypass or an “express lane” for your work laptop. It can then establish its own corporate VPN connection without any conflict, while all your other devices remain safely protected by the router’s VPN. It’s the best of both worlds.
2. The pre-flight check: What you need before we start
Like any good pilot, we need to run a quick pre-flight check before we take off. This will take less than two minutes and ensure the rest of the process is completely smooth. We just need to gather one small piece of information from your work laptop.
What we need is its MAC address. Think of the MAC address as a unique, permanent serial number for your laptop’s network connection hardware. Your GL.iNet router will use this address to identify your work laptop and give it the special “express lane” treatment.
Don’t worry, this is very easy to find.
How to find your MAC address on Windows
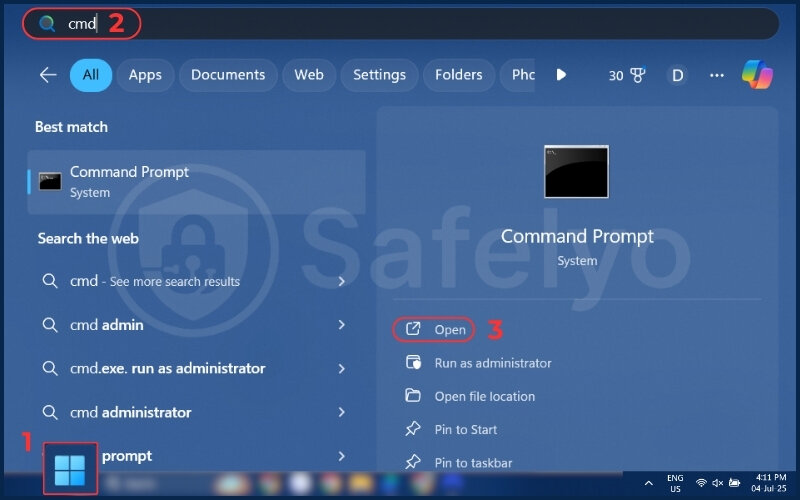
The quickest way is to use the Command Prompt.
- Click the Start Menu, type cmd, and press Enter.
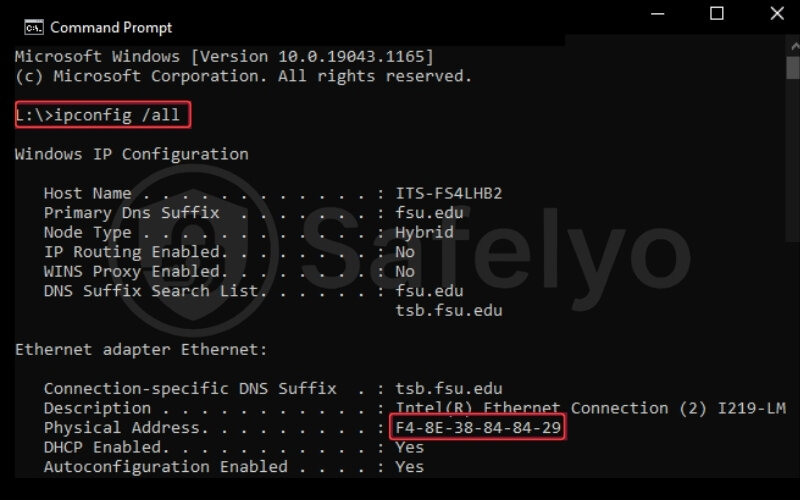
- In the black window that appears, type the following command and press Enter: ipconfig /all.
- Look for the connection you use (e.g., “Wireless LAN adapter Wi-Fi” or “Ethernet adapter Ethernet”). The MAC address is listed as the “Physical Address”. It will look something like A1-B2-C3-D4-E5-F6.
How to find your MAC address on macOS
This is found in your network settings.
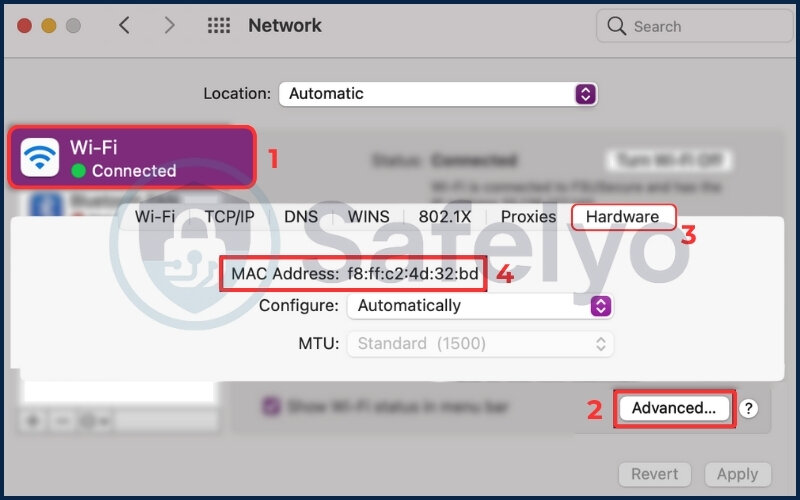
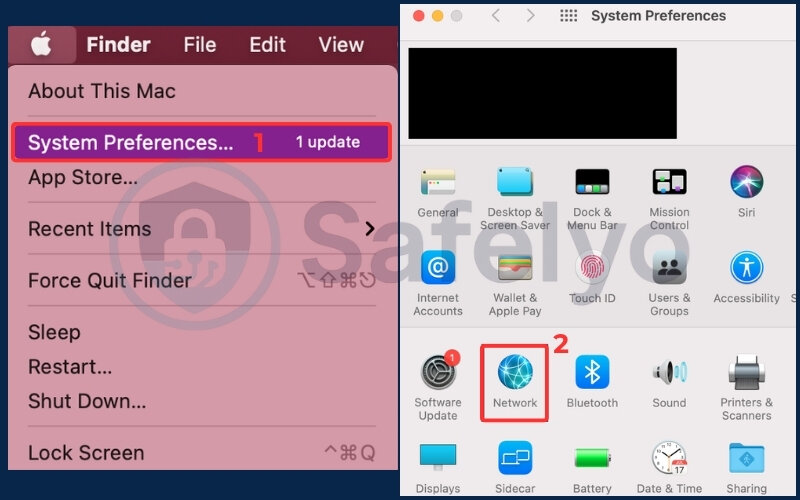
- Click the Apple icon in the top-left corner and go to System Settings.
- Click on Network in the left-hand menu.
- Select your active connection (Wi-Fi or Ethernet).
- For Wi-Fi, click the “Details…” button, and you will see the MAC Address listed right there in the first tab.
- For a wired Ethernet connection, you’ll see the MAC address displayed directly in the main panel.
Got that address copied or written down? Perfect. That was honestly the hardest part. Now, let’s get into the router and apply the fix.
3. The step-by-step fix: How to use GL.iNet VPN policy to bypass the VPN
Alright, you’ve done the prep work. This is the main event, and it’s surprisingly quick. We are now going to log in to your router and create the simple rule that fixes everything.
For your reference, I’ve tested this method on popular models like the GL.iNet Beryl (GL-MT3000), Flint (GL-AX1800), and Slate AX (GL-AXT1800). The process is identical for virtually any GL.iNet router running their 4.x firmware or newer.
The Quick Fix: 5 Steps in 60 Seconds
For those in a hurry, here’s the entire process. For a detailed walkthrough with helpful screenshots, just scroll past this box.
- Log in to your router’s admin panel at 192.168.8.1.
- Navigate to the VPN > VPN Client > VPN Policy tab.
- Select “Based on the Client Device” and click the “+ Add” button.
- In the pop-up, select your work laptop from the device list and choose the policy “Do Not Use VPN”.
- Click the “Apply” button to save the changes and reconnect your laptop.
Now, let’s walk through each of those steps in detail.
3.1. Step 1: Log in to your GL.iNet admin panel
First, make sure you are connected to your GL.iNet router’s Wi-Fi network.
Open a web browser (like Chrome, Safari, or Firefox) and go to the following address:192.168.8.1
Enter your admin password to log in. If you haven’t changed it, the default password is often printed on a label on the bottom of the router itself.
3.2. Step 2: Navigate to the VPN policy section
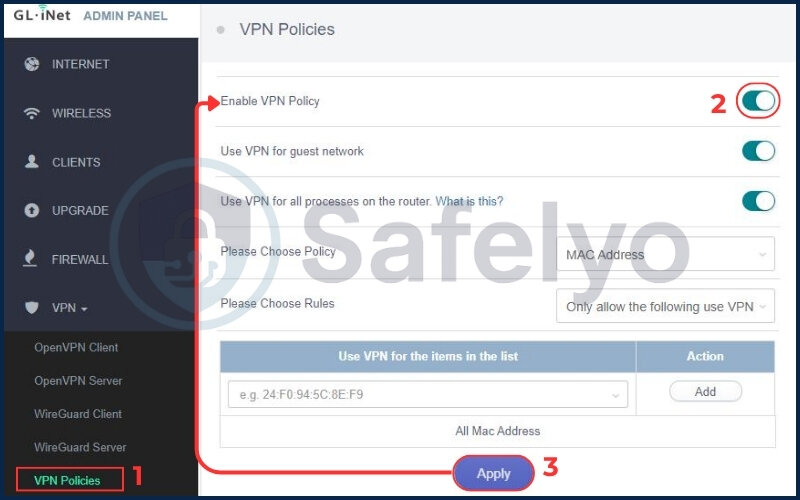
Once you are logged into the admin dashboard, follow this path:
- From the menu on the left side of the screen, click on VPN.
- In the sub-menu that appears, click on VPN Client.
- At the top of the main window, you will see a few tabs. Find and click on the VPN Policy tab.
3.3. Step 3: Create a new policy for your work laptop
Now you’re in the right place. In the VPN Policy screen, you’ll see a toggle switch and some options.
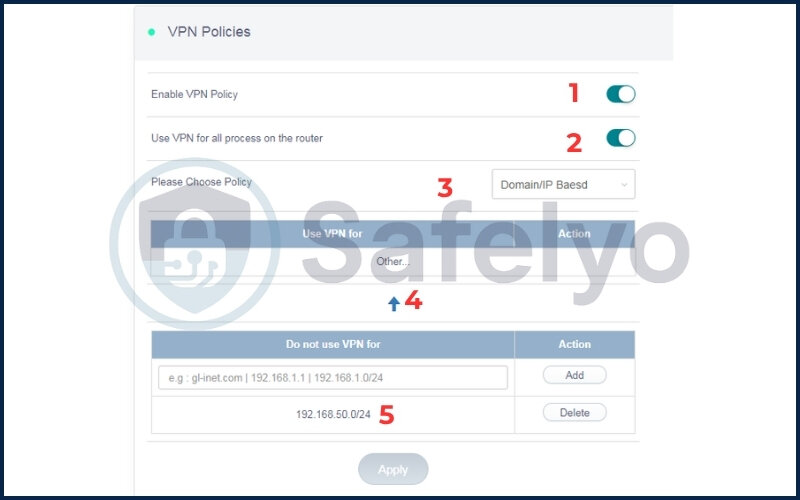
- Make sure the main toggle, which might be labeled “Use VPN for…”, is enabled (switched on).
- Underneath that, select the option that says “Based on the Client Device”.
- Click the blue “+ Add” button to create a new rule.
3.4. Step 4: Configure the policy to exclude your device
This is where the magic happens. A pop-up window labeled “Add New Policy” will appear.
- Devices: Click the dropdown menu. You will see a list of all devices currently connected to your router. Find and select your work laptop. (This is why connecting it earlier was important! You should recognize it by its name and the MAC address you found.
- VPN Access: Below the device list, you will see a choice for the policy. Select the option that says “Do Not Use VPN”.
- Confirm: Click the “Add” button at the bottom of the pop-up.
You have just told your router to let your work laptop bypass the VPN.
I recently set up this exact policy rule for a remote marketing team using a GL.iNet Slate router. Their work laptops were pre-configured with corporate VPNs, but when connecting via hotel Wi-Fi, everything broke down due to the double VPN conflict. By assigning their laptops as VPN-exempt in GL.iNet’s VPN Policy settings, they instantly regained access to internal tools without compromising security for other devices. This quick adjustment restored productivity instantly.
3.5. Step 5: Apply settings and verify the connection
You’re almost done! Don’t forget this final, crucial step.
- Back on the main VPN Policy page, click the “Apply” button, which is usually located in the top-right corner.
- On your work laptop, turn the Wi-Fi off and then back on to get a fresh connection.
- Verify the fix:
- On your work laptop, open a browser and go to a site like whatismyip.com. The IP address shown should be the real IP address of the network you’re on (e.g., the hotel’s or cafe’s IP).
- On a different device (like your phone), do the same. Its IP address VPN should be that of your VPN server.
>> You might also like this related article: How to fix if the weave not working when VPN is on (VoIP & Net)
4. What if it’s still not working? Common troubleshooting tips
Okay, so you followed the steps, but things still aren’t cooperating. Don’t panic. In my experience, the problem is usually one of these three simple things. Let’s quickly run through them.
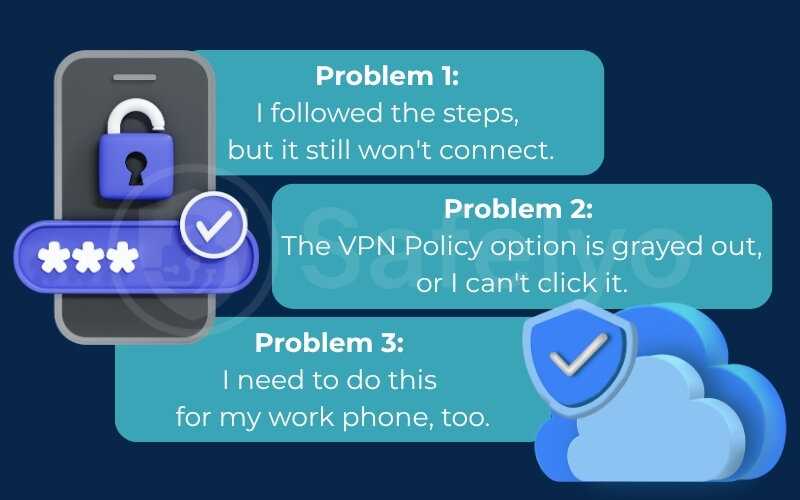
Problem 1:
I followed the steps, but it still won’t connect.
Solution: The most common culprit is having the wrong MAC address. Some laptops have one address for Wi-Fi and another for a wired Ethernet connection. Double-check that you selected the correct device and MAC address in the policy list. As a second step, try the classic fix: restart both your GL.iNet router and your work laptop. A simple reboot can solve a surprising number of connection issues.
Problem 2:
The VPN Policy option is grayed out, or I can’t click it.
Solution: This is a key detail: the VPN Policy feature only becomes active when your VPN client is actually connected and running. Go back to the main “VPN Client” page and ensure your VPN connection has a “Connected” status. Once the VPN is running, the policy options will become clickable.
Problem 3:
I need to do this for my work phone, too.
Solution: No problem at all. The process is fully repeatable. Simply follow Step 3 and 4 again for any other device you want to exclude from the router’s VPN. You can add as many devices to the “Do Not Use VPN” policy list as you need.
5. FAQ about GL.iNet using VPN
My work laptop requires the company’s VPN to work. Can I use it at the same time as the router’s VPN?
Yes, this is exactly what the VPN Policy feature is for. It creates a bypass for your work laptop, allowing its corporate VPN to connect without conflicting with the router’s VPN.
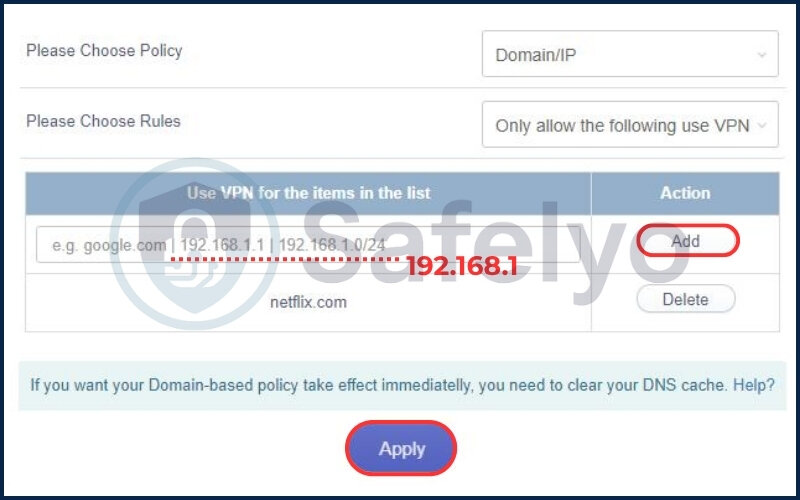
Can I use a VPN policy for a specific domain/IP only?
Yes, but it’s an advanced feature. For fixing the work laptop issue, setting the policy “Based on the Client Device” as shown in this guide is the simplest and most effective method.
Can you run a VPN through another VPN with this method?
No, this method does the opposite. It avoids a “VPN-in-a-VPN” conflict by creating a bypass, allowing your work VPN to run independently.
Does this method compromise the security of my other devices?
Not at all. This is the biggest benefit of the policy feature. Only the specific devices you add to the rule will bypass the router’s VPN. All other devices remain fully protected.
Do I need to do this every time I connect?
No, this is a one-time setup. Your GL.iNet router will remember the policy permanently. It will apply the rule automatically whenever your work laptop connects in the future.
6. Conclusion
So there you have it. That seemingly complex issue of your work laptop not connecting was nothing more than a simple traffic jam. By understanding the “double VPN” conflict, you can see that solving the problem of GL.iNet using VPN, and how to make work laptop work is all about knowing which feature to use. You’ve successfully turned your travel router into a smart, flexible hub for both work and personal use.
Key takeaways to remember:
- The core problem is a “double VPN” conflict between your work laptop’s VPN and the router’s VPN.
- The solution is GL.iNet’s built-in “VPN Policy” feature, which acts as a form of split tunneling.
- You need your laptop’s unique MAC address to correctly identify it in the router’s settings.
- This fix keeps your other devices secure on the router’s VPN while giving your work device the direct access it needs.
Now that your router is perfectly configured, you can work from anywhere with confidence. To get the best performance, Safelyo recommends pairing your router with a service that’s fast and reliable enough for the job. Check out our expert-tested list of the best VPNs for GL.iNet routers. We’re here to make complex tech simple in our Tech How-To Simplified section. Happy, secure browsing.


