Tinder is one of the most popular location-based dating apps worldwide, allowing users to discover matches nearby. However, sometimes users want to change your location on Tinder to explore new cities, meet people in different regions, or test how their matches vary in other areas. Changing location can be done through Tinder’s official tools or third-party methods, each with pros and cons.
In this guide, you will learn:
- How to change location on Tinder with Passport (premium)
- How to update Tinder location on iOS and Android devices
- Tips for when Tinder location is not updating
- Risks and considerations when using fake location methods
If you’re ready to take control of your Tinder experience and explore matches in new locations, keep reading to discover step-by-step instructions, expert tips, and important precautions for safely changing your Tinder location. This guide will help you expand your dating opportunities while avoiding common pitfalls.
1. How to change your location on Tinder
If you want to expand your matches or explore new areas, there are multiple ways to change your location on Tinder. You can use official features like Tinder Passport or technical methods like VPNs, proxies, and manual IP settings. Each method has its advantages, and some require premium access while others do not.
1.1. Change location with Tinder Passport
Tinder Passport is the official way to change your location on Tinder, available for users with a premium subscription. This feature lets you swipe in any city around the world, giving you access to matches outside your current area. While it requires a paid subscription, it is the safest and most reliable method to explore new locations without violating Tinder’s terms.
In the steps below, you will learn how to use Tinder Passport to select a new city and start browsing profiles in that location.
Step 1: Open the Tinder app on your mobile device and log in to your account.

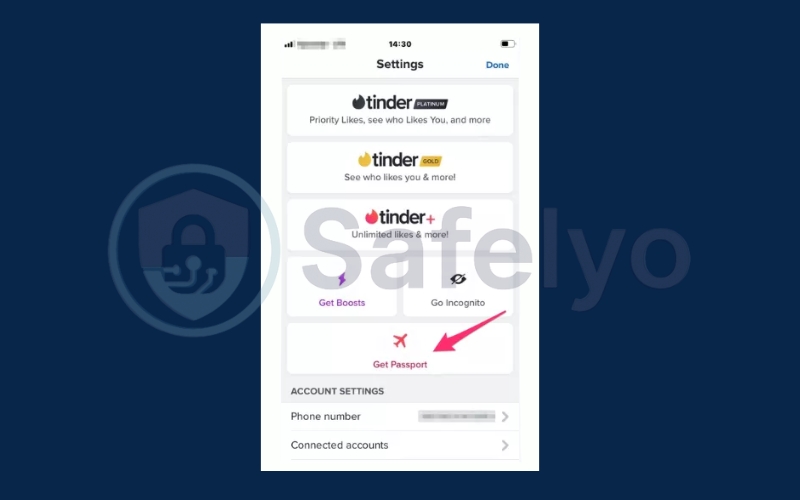
Step 2: Tap on your Profile icon in the top corner of the screen.
Step 3: Go to Settings and select the Get Passport option to activate the location-changing feature.
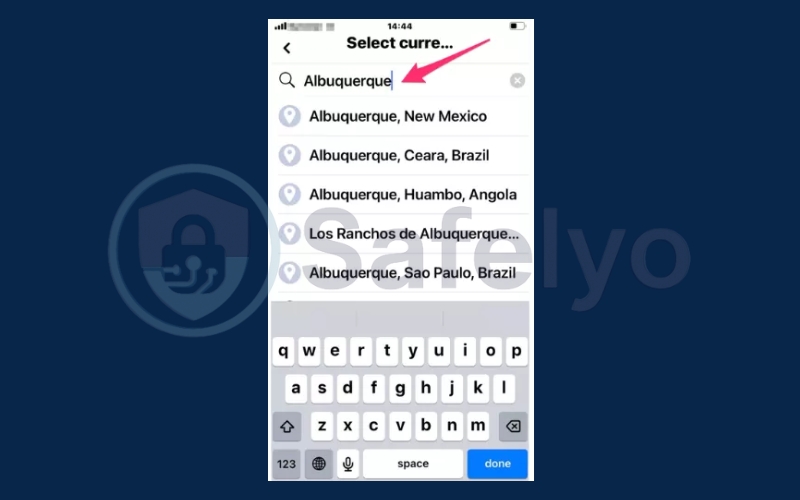
Step 4: Tap Add a new location to choose a different city.
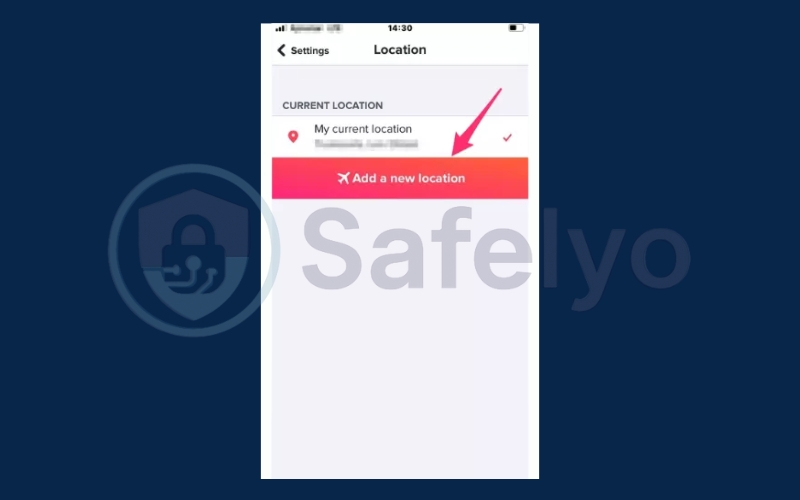
Step 5: Enter the name of the city you want to explore in the search bar.
Step 6: Start swiping and browsing Tinder in the selected location immediately.
1.2. Update Tinder location through Facebook
If your Tinder account is linked to Facebook, the app can use your Facebook profile’s city to determine your location. By updating your city in Facebook, you can effectively change your location on Tinder without using Passport or any premium features. This method is simple, works on both iOS and Android, and is ideal for users who prefer not to pay for Tinder’s premium subscription.
Step 1: Open the Facebook app and log in to your account linked with Tinder.
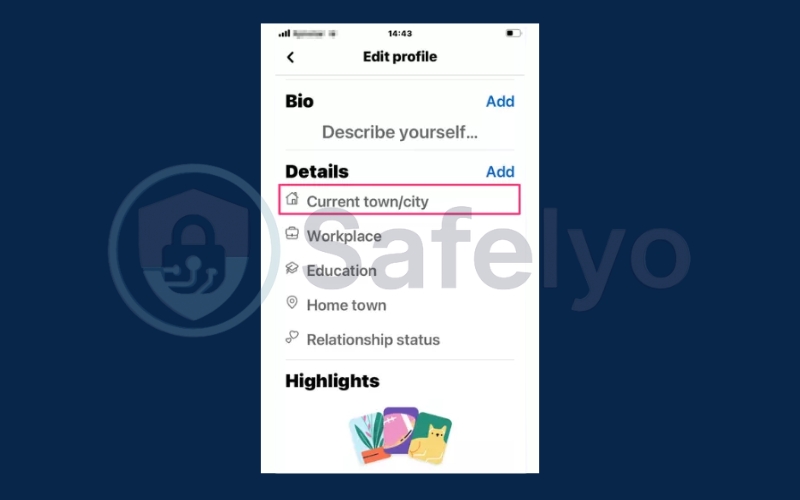
Step 2: Go to your Profile and tap Edit Profile.

Step 3: Scroll to the Current town/city section under Details.
Step 4: Tap Add current city to set a new location.
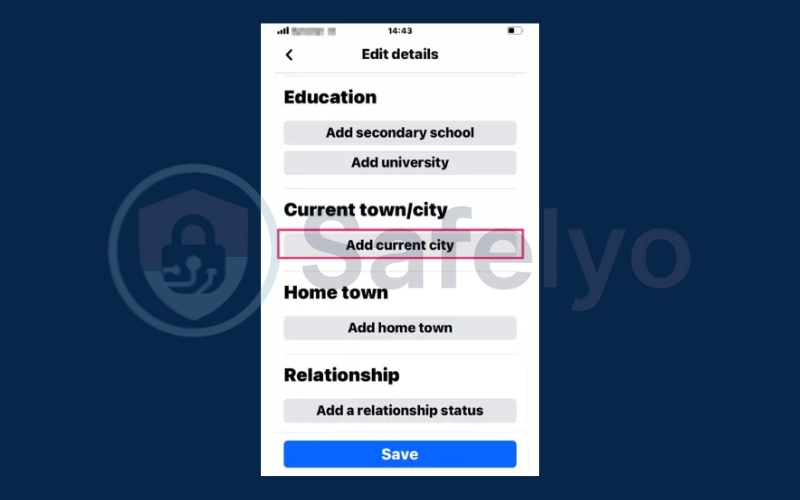
Step 5: Enter the desired city you want Tinder to reflect.
Step 6: Tap Save to confirm the changes, which should update your Tinder location automatically.
1.3. Use a proxy server
A proxy server works similarly to a VPN by routing your internet traffic through a remote server, which changes your IP address and can make it appear as though you are accessing Tinder from a different location. While this allows you to change your location on Tinder, proxies do not offer the same privacy and security benefits as VPNs because they typically do not encrypt your data. This means your personal information could still be exposed to third-party monitoring or other online risks.
It’s also important to note that many free proxy services collect and share user data. In addition, they often display intrusive ads, some of which may contain malware or link to unsafe websites, increasing the potential for security issues.
1.4. Use VPN
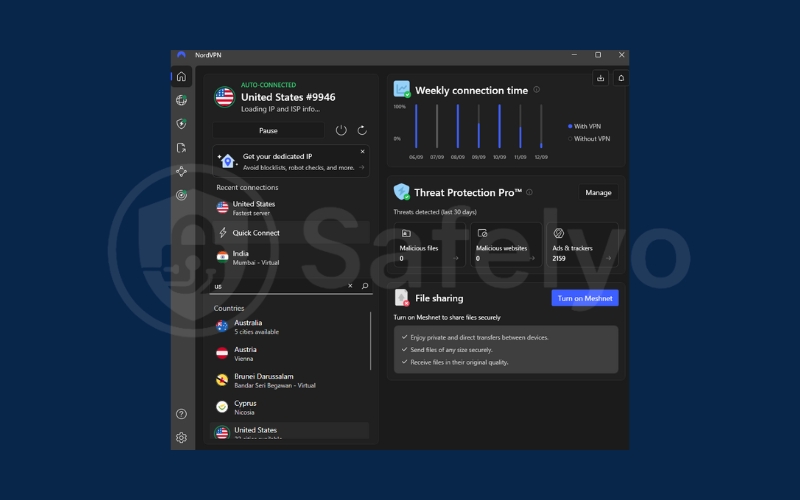
Using a VPN allows you to mask your real IP address and appear in another city, helping you explore matches elsewhere.
- Step 1: Install a trusted VPN app on your device
- Step 2: Connect to the city where you want to appear
- Step 3: Open Tinder while connected to the VPN
- Step 4: Clear Tinder cache or restart the app to ensure the location is refreshed
1.5. Set IP Address manually
Changing your device’s IP address manually is another way to change your location on Tinder, allowing the app to detect a different city or region. This method requires knowing the exact IP associated with your desired location and is less convenient than using a VPN, but it can work on both iOS and Android devices if done correctly.
iOS: Change IP Address manually
- Step 1: Open Settings and tap Wi-Fi.
- Step 2: Select your connected network.
- Step 3: Tap Configure IP under the IPv4 settings.
- Step 4: Choose Manual and enter your new IP address.
- Step 5: Save the settings and open Tinder to check if your location has updated.
Android: Change IP Address manually
- Step 1: Open Settings and go to Wireless & Network.
- Step 2: Tap your connected Wi-Fi network and select Modify Network.
- Step 3: Tap Advanced and choose Change Your IP Address.
- Step 4: Enter the new IP address corresponding to your desired location.
- Step 5: Save the changes and reopen Tinder to confirm your updated location.
2. What to do if Tinder location is not updating
Sometimes, even after changing your location using Passport, VPN, or other methods, Tinder may not reflect the new location. Here are some troubleshooting tips:
- Check GPS & location settings: Ensure your device’s location services are enabled and Tinder has permission to access them.
- Restart the app: Close Tinder completely and reopen it to force a location refresh.
- Clear cache or log out/log in again: This can help the app update your IP-based or GPS location.
- Use VPN or check network: If using a VPN or proxy, make sure it is connected properly and your internet connection is stable.
Read more:
3. Risks and considerations
Changing your location on Tinder can expand your matches, but there are some important risks and considerations:
- Using third-party apps or fake location methods may violate Tinder’s terms of service, potentially leading to temporary or permanent account bans.
- Always consider using official methods like Tinder Passport for a safer and more reliable experience.
- Avoid frequently changing locations manually, as Tinder may detect unusual activity, which could flag your account.
4. FAQs
Even after learning the main methods, many users still have questions about how to change your location on Tinder, especially when using non-premium methods or experiencing issues with updates. This FAQ section addresses the most common concerns and provides detailed guidance for a smooth experience.
Can I change my Tinder location for free?
Yes, it is possible to change your location on Tinder for free using methods like VPNs or proxy servers. However, these non-premium methods come with certain risks, such as potential detection by Tinder, slower performance, or security concerns. They may also require manual setup and are generally less reliable than using Tinder Passport.
How to use Tinder Passport effectively?
To make the most of Tinder Passport, activate it via Profile > Settings > Location > Change Location. Select the city you want to explore and start swiping. Planning ahead for trips or exploring matches in new regions can help you maximize your experience and discover opportunities that would not appear in your current area.
Will Tinder know if I fake my location?
Tinder may detect unusual activity if you frequently change location using third-party apps, proxies, or manual IP changes. Inconsistent or extreme location changes could trigger warnings or lead to temporary account restrictions, so always be cautious when using non-official methods.
How often can I change my location on Tinder?
If using Tinder Passport, you can change your location as often as needed, without limitations. For non-premium methods, frequent changes may raise flags and increase the risk of account detection, so it’s best to limit how often you switch locations manually.
Why is my Tinder location not updating?
A Tinder location may fail to update due to several reasons, such as GPS being turned off, outdated app cache, network issues, or incorrect device settings. Following troubleshooting tips, like restarting the app, clearing cache, checking GPS permissions, or using a VPN/proxy correctly, usually resolves the problem.
5. Conclusion
Knowing how to change your location on Tinder gives you the ability to discover new matches, explore different cities, and expand your dating opportunities beyond your immediate area. Whether you choose the official Tinder Passport feature, update your location through iOS or Android settings, or use advanced methods like VPNs or proxy servers, following the correct steps is essential to avoid errors, account issues, or detection by Tinder.
Key points to remember:
- Passport: The safest and most reliable method to change your location. Ideal for exploring matches in new cities or planning for travel.
- VPN or proxy: Useful if you don’t have a premium subscription, but comes with risks like potential account restrictions or privacy concerns.
- Troubleshooting: If your location isn’t updating, try restarting the app, clearing cache, or checking GPS and network settings.
- Account safety: Avoid third-party apps or unauthorized tools that may violate Tinder’s policies, as these can lead to temporary or permanent account issues.
By following these guidelines, you can confidently change your Tinder location while maintaining your account’s security and enjoying a smooth swiping experience. For more detailed, step-by-step tutorials on Tinder and other dating apps, visit Tech How-To Simplified category on Safelyo to explore additional practical guides.