Is your internet suddenly crawling to a halt? Are videos buffering endlessly while your work files take forever to upload? Before you blame your internet provider, the real culprit might be a single device or application quietly consuming all your bandwidth.
Pinpointing these bandwidth hogs is the single most important step to reclaiming your internet speed. As a tech troubleshooter who has diagnosed countless “slow Wi-Fi” complaints, I know that most of the time, the issue isn’t a faulty connection but a hidden process operating in the shadows. Learning how to check bandwidth usage isn’t just for IT pros; it’s an essential diagnostic skill for any modern internet user.
In this comprehensive guide, you will discover:
- How to instantly check what is using bandwidth on your Windows or Mac computer.
- The step-by-step process for checking usage for all devices directly on your router.
- Our top recommendations for the best free bandwidth monitoring tools.
- How to interpret the data you find and what to do next.
Stop guessing why your connection is slow. Let me give you the tools to find out exactly what’s using your bandwidth and take back control of your network.
1. First, understand what a ‘bandwidth hog’ is
If your internet connection feels sluggish and videos are constantly buffering, it’s easy to assume your internet speed is just “slow.” However, the more likely culprit is something we call a “bandwidth hog” – a single device, application, or process that is using a disproportionately large share of your internet bandwidth.
Think of your home’s total bandwidth as the main water pipe coming into your house. Normally, you can have multiple taps running – someone showering, the dishwasher on, the garden hose watering plants – and everything works fine. But a bandwidth hog is like someone opening up a fire hydrant in the front yard. Suddenly, the water pressure for everyone else drops to a trickle. This is network congestion in a nutshell.
Identifying these “hogs” is the key to solving your problem. They usually fall into one of three categories:
- The Obvious (But Legitimate) Hogs: These are activities you know use a lot of data. From my experience, a single 4K video stream can easily saturate a standard internet plan.
- 4K video streaming services (Netflix, YouTube TV, Disney+)
- Large file downloads (especially video games, software updates, or torrents)
- High-quality video calls (Zoom, Microsoft Teams in HD)
- The Sneaky Background Hogs: These are the ones that often cause the most frustration because you don’t realize they’re running.
- Cloud service syncing (Google Drive, Dropbox, or iCloud Photos uploading an entire camera roll in the background)
- Automatic software updates (Windows Update is notorious for this)
- Peer-to-peer (P2P) applications running silently
- The Malicious Hogs: Sometimes, excessive bandwidth consumption isn’t from a legitimate program but is a sign of a problem.
- Malware or viruses on a computer can use your connection to send out spam or participate in botnet attacks, consuming significant bandwidth.
The good news is that you don’t have to guess. The following methods will help you become a network detective and find bandwidth hogs on your network, so you can take back control of your connection.

2. Level 1: Check bandwidth usage on your computer
The first and easiest place to start your investigation is on your own computer. If your PC or Mac is the device experiencing slow internet speeds, chances are an application running on it is the culprit. Both Windows and macOS have excellent built-in tools to help you check what is using bandwidth in just a few clicks.
2.1. On Windows: Using task manager & resource monitor
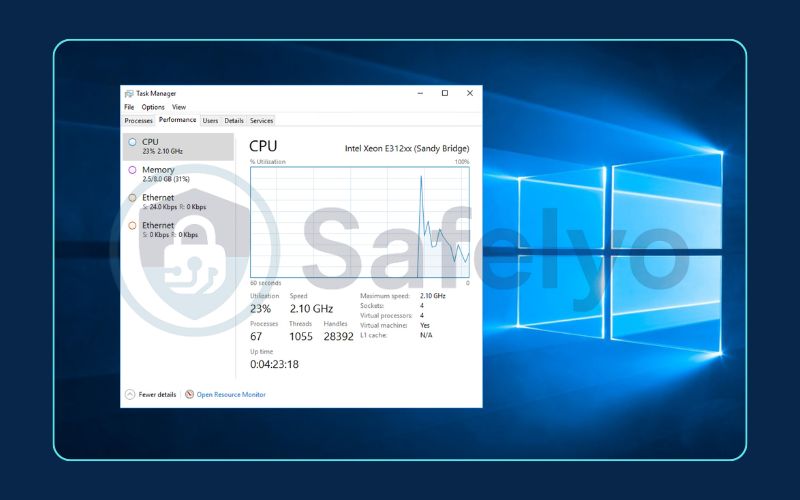
If you’re a Windows user, your best friend for bandwidth monitoring is the trusty Task Manager. I use this tool daily to quickly diagnose performance issues on PCs.
How to use the task manager:
- Open Task Manager: The quickest way is to press Ctrl + Shift + Esc on your keyboard.
- Go to the “Processes” tab. If you only see a simple list of apps, click “More details” at the bottom.
- Click the “Network” column header. This will sort all running processes by their current network traffic, with the biggest consumers at the top.
In an instant, you can see exactly which application – be it your web browser, a game launcher, or a cloud sync service – is using the most bandwidth. The task manager network usage view is the definitive answer to the question, “What’s slowing down my PC right now?”
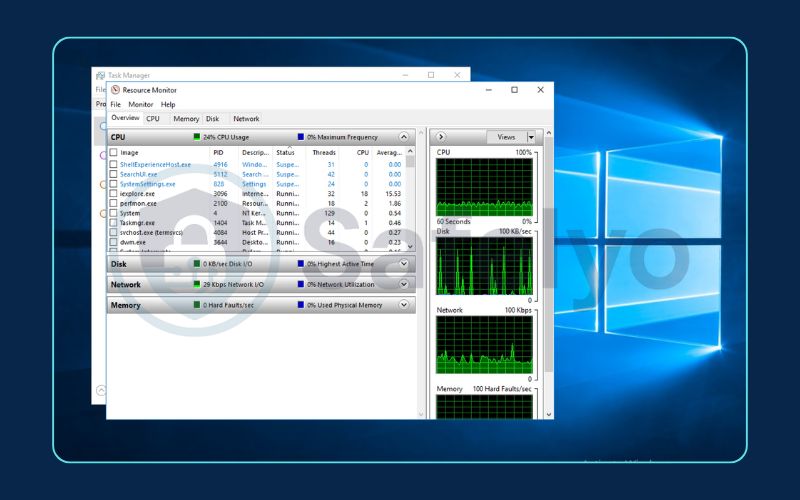
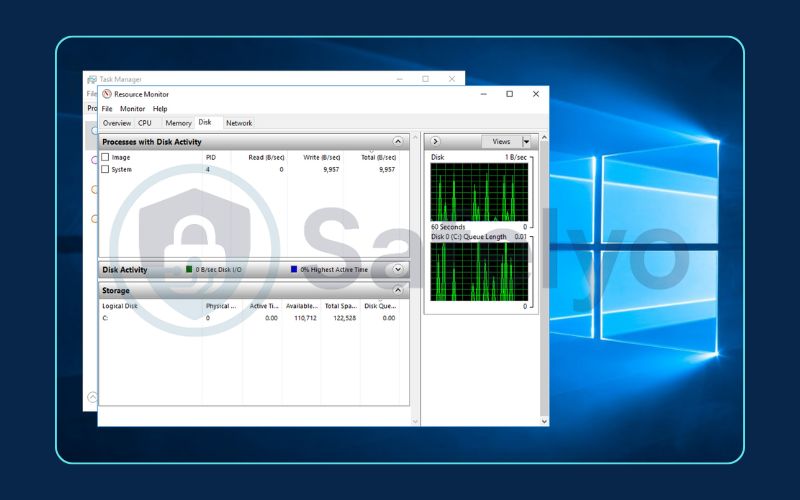
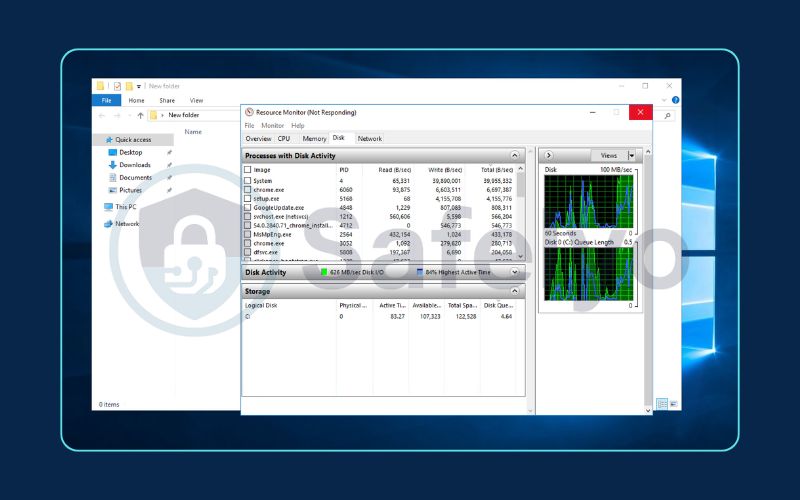
For a more detailed view, you can click the “Performance” tab, select your Wi-Fi or Ethernet connection, and then click “Open Resource Monitor.” The “Network” tab here will show you not only which processes are using your connection but also the specific internet addresses they are communicating with.


2.2. On a Mac: Using Activity Monitor
Mac users have an equally powerful tool called Activity Monitor. It provides the same essential insights into your network performance.
How to use the activity monitor:
- Open Activity Monitor: Press Command + Spacebar to open Spotlight, type “Activity Monitor,” and press Enter. (You can also find it in your Applications > Utilities folder.)
- Click the “Network” tab at the top of the window.
- Sort by data received or sent. By default, the list shows processes with the most activity. You can click the “Sent Bytes” or “Rcvd Bytes” column headers to see which applications have transferred the most data since they were opened.
This Mac bandwidth monitor is perfect for identifying a browser tab gone rogue or a background process that’s quietly uploading large files. It gives you the real-time data you need to pinpoint the source of a slowdown on your Mac.
3. Level 2: Check bandwidth usage on your router
Checking individual computers is great, but what if the bandwidth hog isn’t your PC? It could be your smart TV streaming in 4K, a gaming console downloading a massive update, or a family member’s tablet stuck in a sync loop. To get a complete picture of your entire home network, you need to go to the source: your router.
Learning how to check bandwidth usage on a router is the most effective way to monitor bandwidth usage by a device. Your router is the central traffic cop for your network; every piece of data to and from the internet passes through it. Many modern routers have built-in tools that let you see exactly which network devices are the most active.
Best for:
Getting a bird's-eye view of your entire network and identifying which specific device is causing the slowdown.
Here’s the general process (it may vary slightly by router brand):
- Find your router’s IP address. This is usually printed on a sticker on the router itself. Common addresses are 192.168.1.1 or 192.168.0.1.
- Log in to your router’s admin panel. Open a web browser, type the IP address into the address bar, and press Enter. You’ll be prompted for a username and password (also often found on the router’s sticker, unless you’ve changed it).
- Look for a “Traffic Meter,” “Bandwidth Monitor,” or “QoS” section. The name and location of this feature vary widely. I’ve seen it under “Advanced Settings,” “Network Management,” or sometimes right on the main status page. You may need to explore the menus a bit.
- Analyze the data. Once you find it, the tool should show you a list of all connected devices (often by their name, like “Sarah’s iPhone” or “Living-Room-TV”). Alongside each device, you’ll typically see real-time bandwidth usage for both download and upload, often displayed in Mbps or KB/s.
This is the definitive way to settle the debate of who’s slowing down the internet. The data doesn’t lie. If you see one device consuming 90% of the bandwidth, you’ve found your culprit.
Read more:
4. Level 3: Using third-party bandwidth monitoring tools
While the built-in tools on your computer and router are fantastic for quick spot-checks, they often lack advanced features like historical data, detailed reports, and real-time alerts. If you need to conduct more serious bandwidth monitoring – perhaps to track down an intermittent issue or to monitor a small office network – it’s time to call in the specialists.
These dedicated bandwidth tools provide a much deeper and more user-friendly view into your network traffic.
Best for:
Users who need detailed, ongoing bandwidth consumption tracking with advanced features and a simple interface.
Here are a couple of the best free bandwidth monitoring tools for home and small office users that I’ve personally used and recommend.
4.1. GlassWire (for Windows)
GlassWire is my top recommendation for individual Windows users. It’s a beautiful and incredibly intuitive Windows bandwidth monitor that acts as both a network monitor and a firewall.
- What it does best: GlassWire excels at visual representation. Its “Graph” tab shows your real-time data usage in an easy-to-understand chart, letting you see spikes in activity as they happen. The “Usage” tab breaks down bandwidth usage by application over any time period (day, week, month), making it easy to see long-term trends.
- Killer feature: My favorite feature is its alert system. GlassWire will notify you the first time a new application accesses the internet. This is not only great for identifying new bandwidth hogs but also a powerful security feature for spotting potential malware.
4.2. NetWorx (for windows & mac)
NetWorx is a lightweight yet powerful tool that has been a favorite among tech enthusiasts for years. It’s less flashy than GlassWire but provides excellent, no-nonsense data.
- What it does best: NetWorx is all about precise measurement and reporting. It can sit in your system tray, providing a live graph of your bandwidth usage. It’s fantastic for generating historical reports on your daily, weekly, and monthly usage, which is perfect for users with data caps.
- Killer feature: It includes a built-in speed test and a “Quota” tool that allows you to set up alerts when you approach a specific data usage limit. It’s a simple, reliable, and powerful bandwidth analyzer.

5. I’ve found the bandwidth hog – now what?
Congratulations! Using the tools above, you’ve successfully completed your network investigation and identified the device or application that’s causing your slow internet speeds. But finding the culprit is only half the battle. Now you need to take action.
Here’s a practical checklist of what to do next, moving from the simplest solutions to the more impactful ones.
1. Close the offending application
This is the most direct solution. If you checked Task Manager or Activity Monitor, you might find a specific program causing the issue. This could be a game launcher, a cloud sync client, or a browser with 50 tabs open. Simply closing that application will free up bandwidth. This change will benefit everyone else on the network.
2. Pause large downloads and updates
If the culprit is a legitimate but massive download, it could be a new game from Steam or a major Windows update. In this case, the best course of action is often to pause it. You can resume the download later, during off-peak hours (like overnight) when no one else needs the internet connection.
3. Change application settings
Many streaming services and video conferencing tools allow you to adjust the video quality. If Netflix is hogging the bandwidth on your 4K TV, try lowering the streaming quality to 1080p in the account settings. The difference is often negligible, but the bandwidth consumption savings can be huge. Similarly, applications like Google Drive or Dropbox have settings where you can limit their upload and download rates.
4. Use your router’s QoS (quality of service) feature
This is a more advanced but incredibly powerful solution. Most modern routers have a QoS setting that lets you tell the router which devices or types of network traffic are most important. For example, you can prioritize traffic for your work laptop or your gaming console over traffic from other network devices. When network congestion occurs, the router will ensure your priority devices get the first “slice” of the bandwidth. This is a key tool for improving network performance without changing your plan.
5. Scan for malware
If you’ve identified that the bandwidth hog is a strange or unrecognized process, it’s crucial to run a full antivirus and malware scan on that device immediately. Unexplained, high bandwidth usage can be a classic sign that a device is compromised.
6. FAQs about checking bandwidth usage
Diagnosing your network is a powerful skill. Here are quick answers to some of the most common questions about bandwidth monitoring.
How do I check what is taking up my bandwidth?
The quickest way is to use your computer’s built-in tools. On Windows, open Task Manager (Ctrl+Shift+Esc), go to the “Processes” tab, and sort by the “Network” column. On a Mac, open Activity Monitor, go to the “Network” tab, and sort by “Bytes Sent” or “Bytes Received.” This will show you exactly which application is using the most bandwidth on that specific device.
How do I track bandwidth usage on my router?
Log in to your router’s web-based administration panel by typing its IP address (usually 192.168.1.1) into a browser. Look for a section named “Traffic Meter,” “Bandwidth Monitor,” “QoS,” or “Connected Devices.” This feature, if available, will show you the real-time bandwidth usage for every device connected to your network.
What is the tool to check network bandwidth?
There are many tools. For a quick internet speed test, Speedtest.net is the standard. To monitor usage on a PC, Task Manager is built in, but third-party apps like GlassWire offer more features. For your whole network, the best tool is often the monitoring feature built into your router’s admin page.
What is high bandwidth usage?
“High” is relative to your internet plan’s speed. Generally, activities like streaming video in 4K (which can use 25 Mbps or more), downloading large video games, or continuous cloud syncing are considered high-bandwidth activities. If a single device or application is consistently using 80-100% of your total available bandwidth, it is causing high usage and will slow down other devices.
7. Conclusion
Learning how to check bandwidth usage is the first and most critical step in troubleshooting a slow internet connection. Instead of guessing, you now have the tools and knowledge to become a network detective. You can pinpoint the exact devices and applications causing slowdowns. This allows you to take targeted action to fix the problem.
Here’s your action plan for diagnosing a slow network:
- Start with your computer: Use the built-in Task Manager (Windows) or Activity Monitor (Mac) to instantly see which apps are using your connection.
- Get the big picture: Log into your router’s admin panel to monitor bandwidth usage by device and get a complete overview of your entire network.
- Call in the specialists: For more detailed analysis and historical data, use one of the best free bandwidth monitoring tools like GlassWire to keep a constant watch on your traffic.
- Take action: Once you find bandwidth hogs, you can close them, pause downloads, or use your router’s QoS settings to prioritize important traffic.
By mastering these simple diagnostic steps, you can ensure you’re getting the network performance you pay for. To learn more about optimizing your digital life and taking control of your technology, explore the other expert guides in our Tech How-To Simplified section here on Safelyo.


