
Knowing how to clear history on X (formerly Twitter) is more important than many users realize. Every time you search for accounts, hashtags, or trending topics, X automatically saves that information. While this can make it convenient to revisit recent searches, it also creates potential issues: your history may clutter your search bar, influence your recommendations, or even reveal your private interests if someone else uses your device or account.
In this step-by-step guide, you’ll discover how to:
- Clear your entire X search history on a desktop browser for a fresh start
- Remove recent searches on mobile devices, including both iOS and Android
- Delete individual search entries without erasing your full history
- Clear browser cache linked to X for added privacy and smoother performance
By the end, you’ll not only know how to clear history on X, but also how to keep your account more private, your feed more relevant, and your overall experience cleaner across all platforms.
1. Why should you clear history on X?
Every time you type something into the search bar on X, the platform saves your query. This can be convenient when you want to revisit a trending topic, a profile, or a hashtag you checked earlier. However, keeping a long record of searches also raises several privacy and usability concerns. That’s why regularly clearing your history is a smart habit.
Here are the main reasons why it matters:
- Protect your privacy: If someone borrows your phone or uses your computer while you’re logged in, they can instantly see what you’ve searched for. This could expose sensitive topics, personal interests, or even professional research you don’t want others to know about. Deleting your history ensures your browsing activity on X stays private.
- Remove outdated or irrelevant searches: Over time, your search bar may fill up with entries that are no longer useful, such as old accounts you no longer follow, past events, or topics that don’t interest you anymore. By clearing history, you can get rid of digital clutter and keep only the things that are relevant.
- Get cleaner recommendations: X uses your past searches to shape your suggestions and content feed. If your search history is full of unrelated or one-time lookups, your recommendations may feel off-target. Deleting these searches helps the algorithm better reflect your current interests, making your experience more personalized and accurate.
- Maintain account security: In cases where you log into X from a shared device or a public computer, leaving search history behind could put you at risk. Someone else might be able to track your activity or misuse it. Clearing your history after each session reduces this risk significantly.
In short, managing your search history on X is about more than just tidying up, it’s about keeping your online activity private, relevant, and secure.
2. How to clear history on X for desktops
If you often use X on your computer, clearing your search history is a quick and simple process. With just a few clicks in your browser, you can delete all past searches or remove specific ones individually. Doing this not only helps keep your search bar uncluttered but also provides better privacy and security, ensuring that your previous queries no longer appear every time you access the platform.
Step-by-step guide:
Step 1. Open X in your browser
Go to twitter.com using any desktop web browser, such as Chrome, Edge, or Firefox. Sign in to your account if you aren’t already logged in.

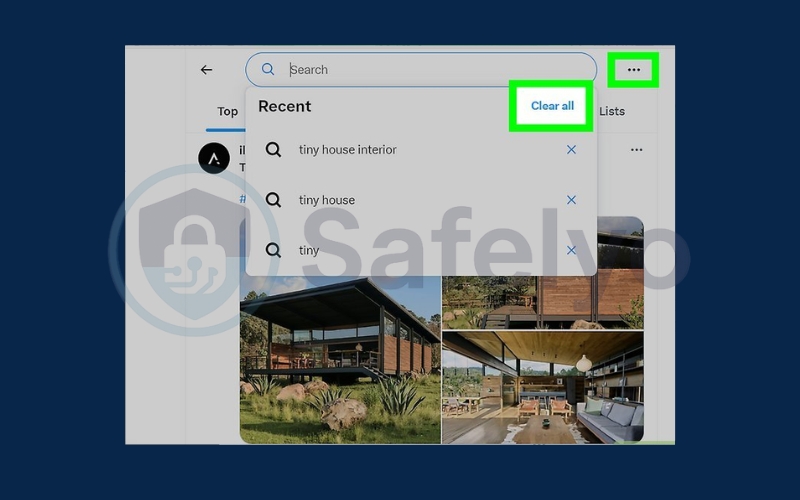
Step 2. Access the search bar
At the top-right corner of the page, click inside the search field to display your recent searches.

Step 3. Choose how to remove searches
Next to the “Recent” section, click Clear all to erase your entire search history. If you only want to remove specific entries, select the small X icon next to each search term.
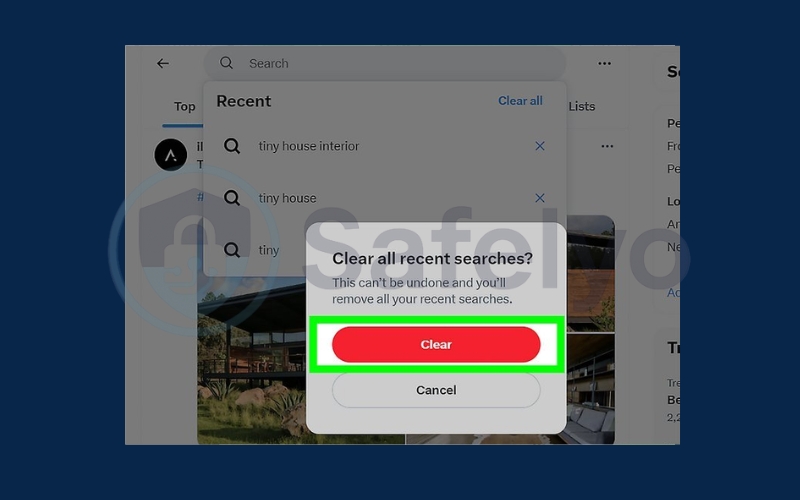
Step 4. Confirm deletion
When the confirmation window appears, press the red Clear button. Your search history will now be removed from the desktop version of X.
3. How to clear history on X for mobile devices
The process of learning how to clear history on X is just as simple as on desktop. However, the layout may vary slightly depending on whether you’re using an iPhone or an Android device. By following the steps below, you can quickly manage and remove your recent searches to keep your app experience more private and organized
Steps to clear all searches:
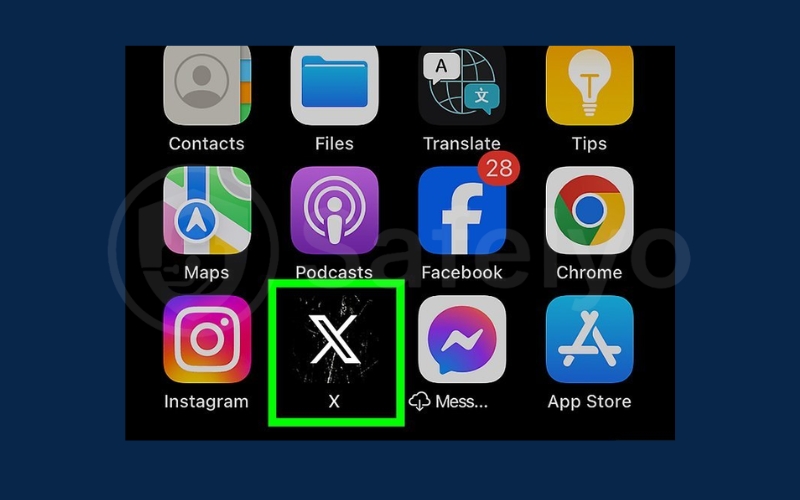
Step 1. Launch the X app
Find the black-and-white X icon on your home screen, app drawer, or through your device’s search. Tap to open it and log in to your account if necessary.
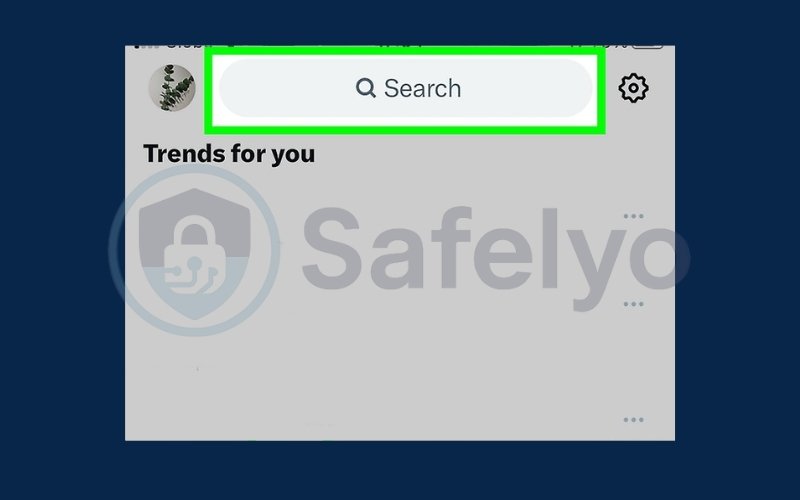
Step 2. Open the search tab
At the bottom of the app, tap the magnifying glass icon to access the search screen.

Step 3. View your recent searches
Tap inside the search bar. Your keyboard will appear, along with a list of your past searches.
Step 4. Clear your search history
On the right side of the “Recent searches” header, tap the small X icon to delete your search history.
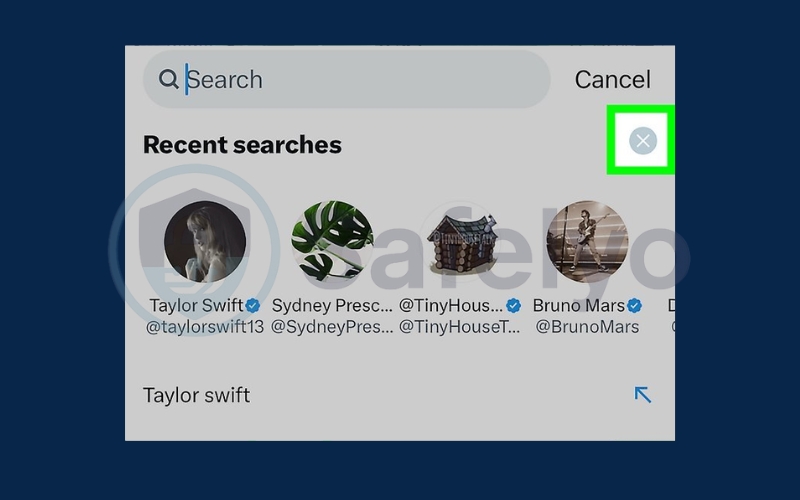
Step 5. Confirm deletion
When prompted, tap Clear. Your search history for people, topics, and keywords will now be removed from the mobile app.
4. How to delete individual searches on X
Sometimes you may not want to erase everything but just remove a few entries. This option helps if you only need to delete sensitive or irrelevant searches.
- On desktop: Open the search bar → hover over the unwanted entry → click the X icon.
- On mobile: Open the search tab → tap the X icon next to the search you want to delete.
This way, you keep the useful searches while removing only what you don’t need.
Read more:
5. FAQs about how to clear history on X
If you still have questions about managing your search activity, this FAQ section covers the most common concerns. Understanding the details will help you use the how to clear history on X steps more effectively and avoid confusion about what actually happens when you delete your searches.
Does X automatically delete search history?
No. X does not automatically delete your search history. All your past queries remain saved in the app or browser until you manually remove them. This means that unless you take action, anyone with access to your account or device can still see your past searches.
Will deleting search history affect my account?
No. Clearing your search history only removes records of your searches. It does not impact your tweets, retweets, followers, likes, or other account data. Think of it as cleaning up your search bar without changing your actual activity on X.
Can I delete my entire X activity at once?
No. You cannot delete your entire account activity in one step. While you can clear all your searches at once, your tweets, likes, and followers remain separate and must be managed individually if you want to remove them.
Does X still keep my data after I clear history?
Yes. Even after you delete your history from your account, X may still retain some data internally for analytics, advertising, and platform improvements. This means you won’t see it on your profile, but the platform could still use anonymized versions of your search data.
6. Conclusion
Mastering how to clear history on X is more than just a quick cleanup, it’s an important step toward safeguarding your privacy and creating a smoother, distraction-free experience. By removing outdated searches and keeping your feed aligned with your current interests, you stay in full control of your digital footprint.
- Protect your privacy by preventing others from seeing your past searches.
- Declutter your search bar for a cleaner, more efficient interface.
- Take charge of your settings to maintain long-term privacy and security.
When you pair routine history deletion with smart adjustments to your privacy settings, X becomes a platform that works for you, not against you. Explore more expert guides in our Tech How-To Simplified category on Safelyo and learn how to take charge of your digital life with confidence.


