Learning how to set up a NAS for home use is the first step toward taking back control of your digital world, freeing yourself from monthly cloud fees and creating a private media hub for your entire family. It might sound like a project for a network engineer, but the reality is much simpler.
With over a decade of hands-on experience setting up home networks, from simple Synology boxes for family members to more complex DIY builds for my own media obsession, I’ve seen how this one piece of hardware can transform how you manage and enjoy your data. A NAS isn’t just for tech gurus anymore; it’s a practical, powerful tool for anyone who wants a secure and centralized home for their files.
In this comprehensive guide, you’ll discover:
- The essential hardware you’ll need to get started.
- A step-by-step walkthrough of the easy path using a pre-built NAS.
- How to access your new personal cloud from any device.
- Exciting next steps, like creating a media server and automating backups.
Stop renting space for your data. Let Safelyo walk you through building the private, powerful home server you’ve always wanted. Starting now!
A QUICK COMPARISON:
Why choose a home NAS over Cloud Storage?
Before we start plugging in cables and clicking through setup screens, let’s tackle a question you’ve probably asked yourself: “Why not just stick with Google Drive or Dropbox?” While cloud services are convenient, building your own home NAS is a fundamentally different approach to data ownership.
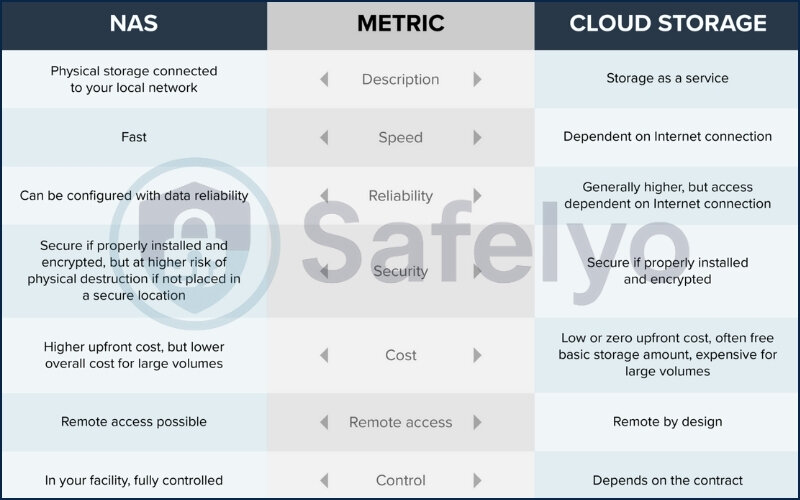
Think of it this way: With cloud storage, you’re renting an apartment. With a NAS, you own the entire building.
Here’s a quick breakdown of what that ownership really means for you:
| Feature | Home NAS | Cloud Storage (e.g., Google Drive, Dropbox) |
| Cost | One-time hardware investment. No recurring fees for storage space. | Monthly or annual subscription fee. The cost grows as your storage needs increase. |
| Data Ownership | 100% yours. Your data lives on a device inside your home, under your complete control. | You’re a tenant. Your data is on someone else’s servers, subject to their terms and conditions. |
| Privacy | Maximum privacy. No one is scanning your personal photos or documents for advertising or analytics. | Limited privacy. Files are often scanned to enforce terms of service, gather data, and target ads. |
| Local Access Speed | Blazing-fast. Transfer large video files or photo libraries in seconds or minutes on your home network. | Internet-dependent. Speed is limited by your internet connection, making large file transfers slow. |
| Flexibility | A powerful multi-tool. It can be a media server (Plex), a backup hub, a download station, a surveillance recorder, and more. | Primarily a storage locker. Its main purpose is storing and syncing files, with limited extra functionality. |
If having ultimate control, unmatched privacy, and long-term cost savings sounds like a good trade-off for a little bit of initial setup, then you’re in the right place. Convinced? Great. Let’s get started by gathering your gear.
1. Before you start: What do you need to set up a home NAS?
Getting started with a home NAS is surprisingly straightforward. You don’t need a specialized toolkit or a deep understanding of network architecture. Think of it as assembling a simple tech kit.
Here’s everything you'll need on your checklist.

   1. The NAS device itself
   2. NAS-rated hard drives
   3. A stable network connection
   4. A simple screwdriver
1.1. The NAS device itself
This is the brain of the operation, and you have two main paths to choose from:
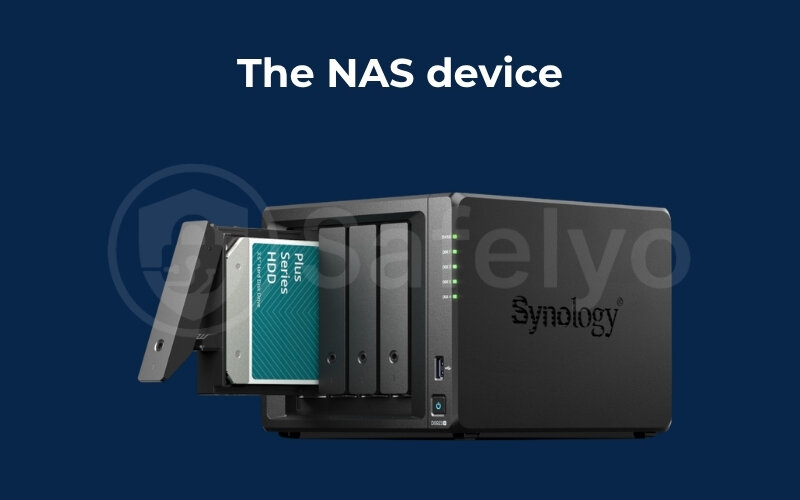
The recommended path for beginners: A pre-built NAS.
These are dedicated, all-in-one appliances designed to be as user-friendly as possible. Brands like Synology are famous for their polished, easy-to-use software (DSM), while QNAP is often praised for offering powerful hardware. For your first setup, a pre-built device is the fastest way to get up and running.
The hobbyist path: A DIY NAS.
If you enjoy tinkering, you can repurpose an old computer into a powerful NAS. Using free, open-source software like TrueNAS Scale or OpenMediaVault, you get maximum control and flexibility. This path requires more technical know-how but can be incredibly rewarding.
1.2. NAS-rated hard drives
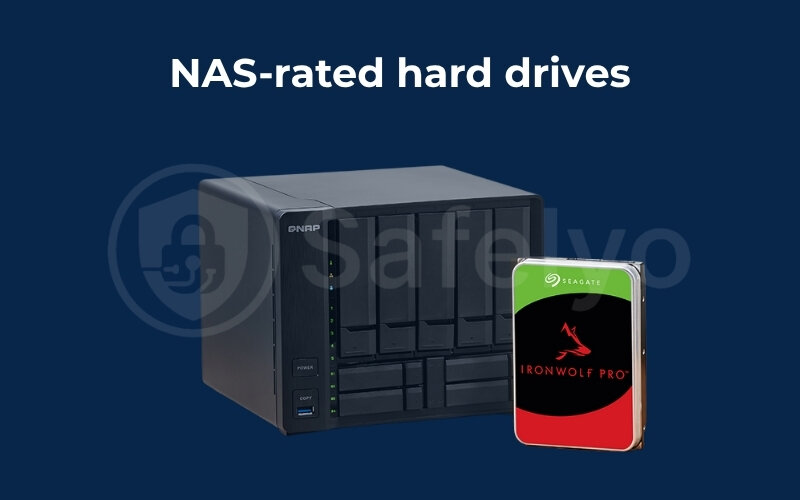
This is the most critical component for the health of your data. While you can use standard desktop hard drives, it’s a bad idea. You need drives specifically built for a NAS environment.
Why? NAS drives, like the WD Red Plus or Seagate IronWolf series, are engineered to run 24/7. They are built to better withstand the constant vibration and heat of multiple drives working side-by-side in a small enclosure. Think of them as marathon runners, while desktop drives are sprinters, built for different kinds of work.
1.3. A stable network connection
You’ll need a reliable Wi-Fi router that your devices are already connected to. More importantly, you will need at least one Ethernet cable. A direct, wired connection from your NAS to your router is essential for the initial setup and for ensuring the fastest, most stable performance.
1.4. A simple screwdriver
That’s it. For most pre-built NAS enclosures, a standard Phillips-head screwdriver is all you’ll need to secure the hard drives in their trays. No soldering irons or complex tools required.
2. The easy path: Setting up a pre-built NAS
Welcome to the straightforward route. We’re using a Synology NAS for this walkthrough because its software is incredibly polished and perfect for beginners. The steps are very similar for other brands like QNAP or Asustor, so the principles remain the same.
This is the exact path I recommend to friends and family who just want something that works reliably without a steep learning curve. Think of it like building with a LEGO set, you have all the right pieces and a clear set of instructions to follow.
2.1. Step 1: Hardware installation
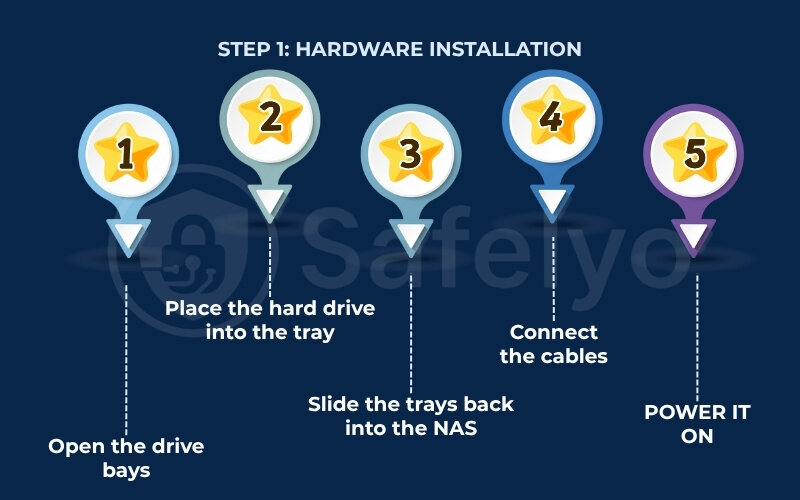
This is the physical part, and it’s often done in less than five minutes. Don’t be intimidated – it’s easier than assembling most furniture.
- Open the drive bays. Most modern NAS devices have trays that you can pull straight out from the front, often without any tools.
- Place the hard drive into the tray. The drive will only fit one way. On many Synology models, you’ll see plastic clips on the side of the tray. Just pop them off, place the drive in, and snap the clips back on to secure it. It’s a satisfying, tool-free click.
- Slide the trays back into the NAS. Push them in gently until you feel or hear a solid click. That’s the sound of your drive connecting properly.
- Connect the cables. Plug one end of the Ethernet cable into your NAS and the other end into a spare port on your Wi-Fi router.
- Power it on. Connect the power cord and press the power button. You’ll see some lights blink and hear the drives spin up. Now, the real magic begins on your computer.
2.2. Step 2: Initial software setup via web browser
Your NAS is now a mini-computer on your home network, but it needs its operating system installed. You don’t need to be a network wizard to find it.
On a computer connected to the same Wi-Fi network, open a web browser like Chrome or Safari and go to: find.synology.com
This clever web page scans your local network for the new device. In a few moments, you should see your NAS appear in the list, usually with a status that says “Not Installed.” This is the first “it’s working!” moment.
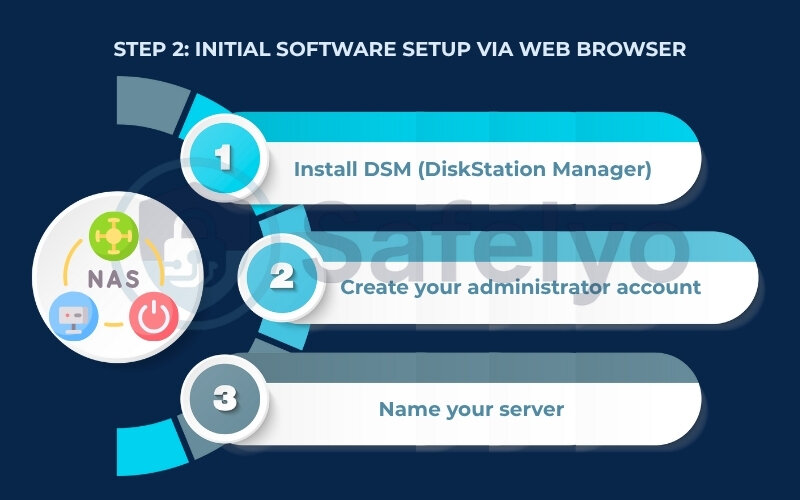
From here, the setup wizard will guide you. It will ask you to:
- Install DSM (DiskStation Manager): This is the operating system for your NAS. Just click “Install,” and it will automatically download and set up the latest version.
- Create your administrator account: This is the most important account. Choose a strong, unique password and write it down somewhere safe. From personal experience, I can tell you that losing this password is a major headache.
- Name your server: Give your NAS a simple, memorable name like HomeNAS or DataHub. This is how you’ll find it on your network later.
2.3. Step 3: Creating your storage pool and volume
Now that the OS is running, you need to tell the NAS how to use the hard drives you installed. This is the most critical step for data safety.
In the DSM interface, open the main menu and find the Storage Manager.
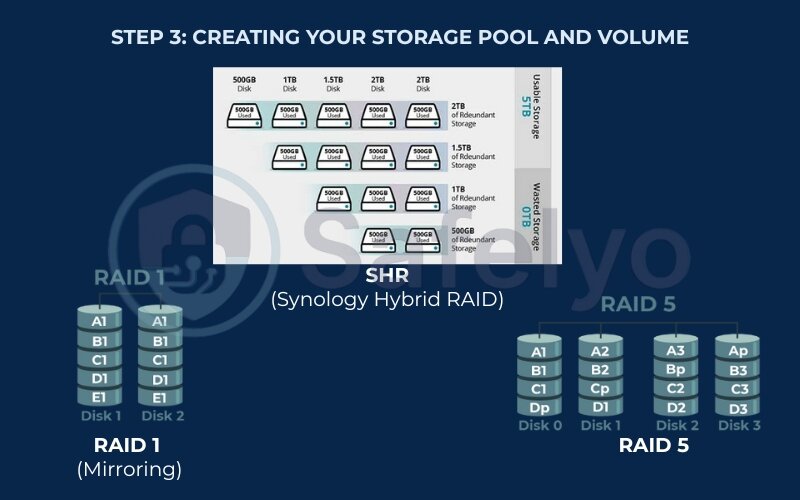
The wizard will guide you, but you’ll face an important choice: the RAID type. RAID (Redundant Array of Independent Disks) is simply a way to combine multiple drives to protect your data or improve performance.
Here are your best options, explained simply:
- SHR (Synology Hybrid RAID): This is the one I strongly recommend for 99% of home users. Think of SHR as a smart financial advisor for your storage. It automatically manages your drives in the most efficient way and makes it incredibly easy to add or upgrade drives in the future. It provides “redundancy,” meaning if one drive fails, all your data is still safe on the other(s).
- RAID 1 (Mirroring): This is for 2-drive setups. It creates an exact 1-to-1 copy, a perfect mirror, of all your data on both drives. If one drive fails, the other is a perfect clone.
- RAID 5: This is for 3 or more drives. It balances storage space and safety. It uses a clever method to spread data and “parity” (safety information) across all the drives.
After you choose your RAID type (go with SHR!), the NAS will create a “Storage Pool.” Think of the pool as the foundational plot of land. Next, it will ask you to create a “Volume” on that pool. The volume is the house you build on the land – it’s the actual space where your files will live. For home use, you can just use the maximum available size.
IMPORTANT NOTE ON USABLE CAPACITY:

When you set up a NAS with data protection (like shr or raid 1), your total usable space will be less than the combined size of your drives. For example, if you install two 4TB drives, your usable capacity will be only 4TB, not 8TB.

Don't panic, this is a good thing! It means the other 4TB is being used as a real-time backup copy of your data. You're trading raw capacity for peace of mind, which is the whole point of a NAS.
2.4. Step 4: Creating users and shared folders
Your NAS is almost ready. The final step is to create the digital “rooms” and “keys” for your data.
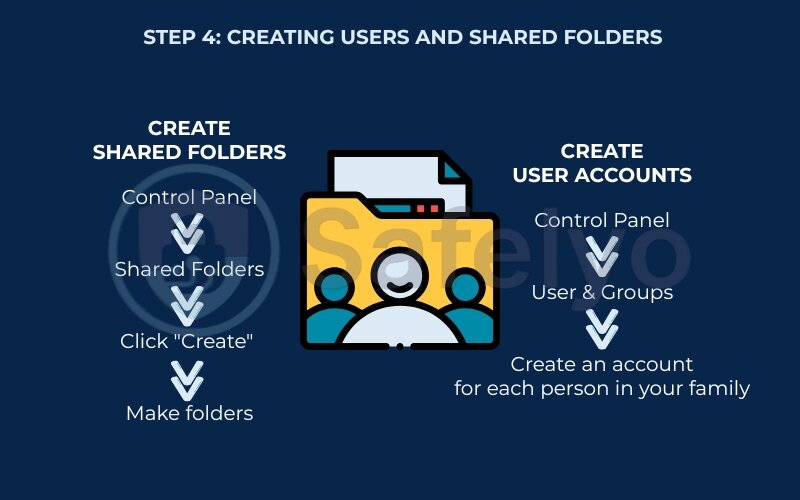
- Create Shared Folders: Go to Control Panel > Shared Folders. Click “Create” and make folders for how you’ll organize your life. I always start with a few basics: Photos, Documents, Movies, and Backups.
- Create User Accounts: Go to Control Panel > User & Groups. Create an account for each person in your family (e.g., John, Jane).
Now, you can assign permissions, deciding who gets the “key” to each “room.” For instance, you can give everyone access to the Movies folder, but only give yourself access to the Work_Documents folder.
My pro tip for beginners:
After creating your main admin account, create a separate, non-admin user account for your own day-to-day use. Think of the admin account as the master key to your entire house. You don’t want to use it for everyday tasks and risk accidentally changing a critical setting. Use your daily account for uploading files and streaming media. It’s a simple habit that dramatically improves security.
3. How to set up a NAS for home use?
Congratulations, your private cloud is officially online! The drives are spinning, the software is configured, and your data has a safe new home. But how do you actually put files onto it or stream that movie you just saved?
Accessing your NAS is like opening a folder on your computer, just with one extra step. Here’s how to do it on your devices.
3.1. On a Windows PC
The easiest way to connect on a Windows computer is directly through File Explorer.
- Open File Explorer (the folder icon in your taskbar).
- In the address bar at the top, type two backslashes \\ followed by the name you gave your NAS. For example: \\HomeNAS
- Press Enter. You’ll be asked for the username and password you created, and then you’ll see the shared folders you made.
For more permanent access, you can “map” a network drive. This assigns a drive letter (like Z:) to your NAS folder, making it appear in “This PC” just like your main C: drive.
- To do this, right-click on “This PC” in File Explorer and select “Map network drive…”.
- Choose a drive letter, enter the path to your shared folder (e.g., \\HomeNAS\Movies), and check the box to “Reconnect at sign-in.”
This is my preferred method on my Windows machine. It makes saving files or accessing my photo library feel instant and seamless, with no need to type in the address every time.
3.2. On a Mac
Connecting on a Mac is just as simple using the Finder.
- Open Finder.
- From the menu bar at the top of the screen, click Go > Connect to Server.
- In the server address box, type smb:// followed by your NAS name. For example: smb://HomeNAS
- Click “Connect.” You’ll be prompted for your credentials, and a new icon representing your NAS will appear on your desktop and in the Finder sidebar.
SMB is just the name of the network language that Macs and Windows PCs use to talk to file servers. Once connected, you can drag and drop files to and from your NAS as if it were a USB drive.
3.3. On your phone or tablet
This is where the magic of a personal cloud really shines. Brands like Synology have a suite of fantastic mobile apps. Search for apps like Synology Photos and DS file in your phone’s app store.
After logging in with your credentials, you can browse your files, stream videos, and, most importantly, set up automatic camera roll backups. This is how you can completely replace services like Google Photos or iCloud, automatically saving every picture you take directly to the safety of your own home server.
4. Taking your NAS to the next level
You’ve successfully set up a fantastic central file hub. But a modern NAS is so much more than just a digital filing cabinet. It’s a versatile server capable of running all sorts of useful applications. Think of it as a Swiss Army knife for your digital life. Here are a few powerful things you can do right now, turning your new device into the true heart of your home network.
4.1. Create a personal media server with Plex
This is, by far, my favorite use for a NAS and the reason many people buy one in the first place. Plex is an application that scans all your movies, TV shows, and music files, automatically organizes them with beautiful artwork and descriptions, and lets you stream them to virtually any device, your TV, phone, tablet, or laptop, anywhere you have an internet connection.
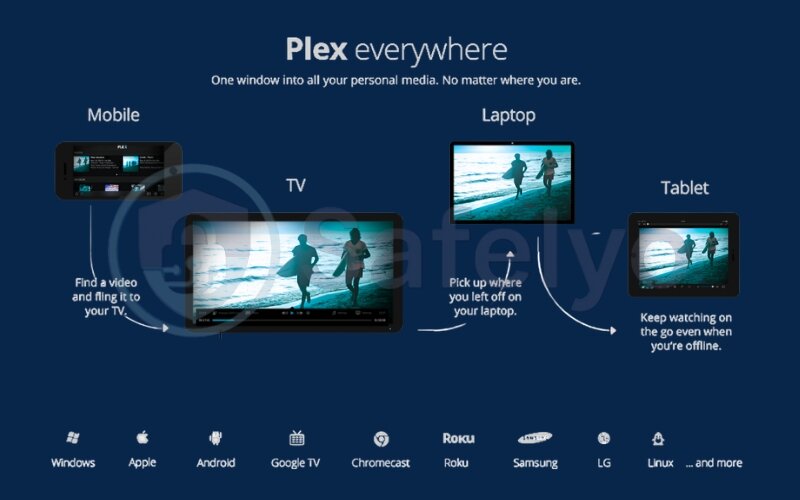
How it works: Simply go to the Package Center (Synology’s app store) on your NAS, search for “Plex Media Server,” and click install. Once it’s running, you tell Plex where you store your Movies and TV Shows folders. It handles the rest, giving you a private, personalized Netflix-style experience with your own media library.
>> You may also be interested in:
4.2. Automate all your backups
A NAS is the perfect “set it and forget it” backup solution. No more plugging in external drives.
For your PC/Mac:
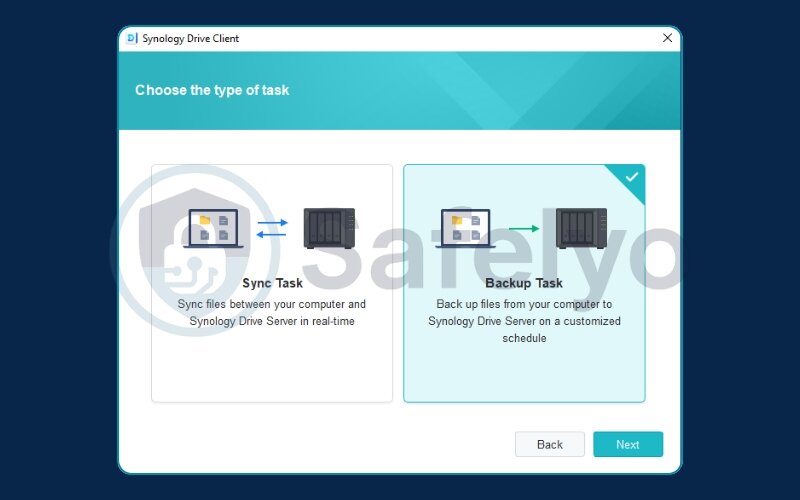
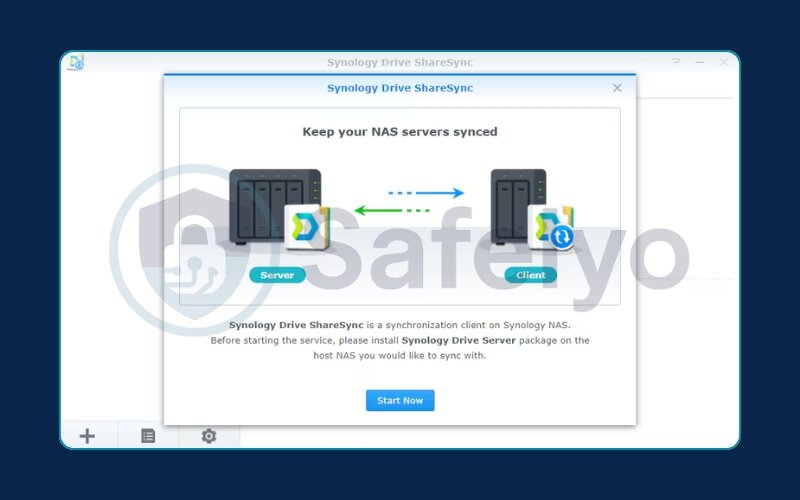
Synology offers an app called Synology Drive Client. Once installed on your computer, you can select folders (like “My Documents” or your entire user profile) to be continuously backed up or synchronized to the NAS. Any time you change a file, the change is instantly saved on the server. I rely on this daily; it’s saved me from accidental file deletions more times than I can count.
For your phone:
The Synology Photos mobile app is a game-changer. It can automatically back up every photo and video you take, just like Google Photos or iCloud does. The difference? The storage is yours, it’s private, and there are no monthly fees. I haven’t worried about losing a single family photo since setting this up years ago.
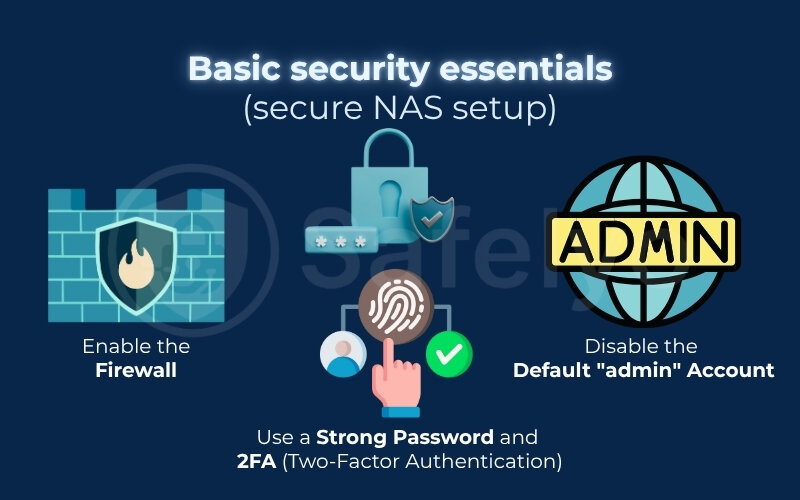
4.3. Basic security essentials (secure NAS setup)
Your NAS holds your most important data, so taking a few minutes to harden its defenses is crucial. Here are three non-negotiable steps everyone should take:
- Enable the Firewall: In the Control Panel, find the Firewall settings and turn it on. The default rules are a great starting point and act as a digital gatekeeper, blocking unwanted connection attempts.
- Use a Strong Password and Two-Factor Authentication (2FA): You’ve already set a password, but enable 2FA for your admin account. This means that even if someone steals your password, they can’t log in without a temporary code from an app on your phone. It’s one of the single most effective security measures you can take.
- Disable the Default “admin” Account: After creating your own personal administrator account, you should disable the default “admin” account. Hackers and bots always try to attack this standard username first, so simply turning it off removes their primary target.
4.4. Access your files from anywhere (the safe way)
Synology offers a brilliant and secure service called QuickConnect. During the initial setup, you were likely asked to create a QuickConnect ID. This gives you a secure web address (like QuickConnect.to/YourID) that lets you log into your NAS from any browser in the world, without any complicated network configuration.
SECURITY WARNING: AVOID PORT FORWARDING!
You might find older guides or forum posts telling you to set up “port forwarding” on your router to access your NAS from the internet. Do not do this. Port forwarding directly exposes your device to the public internet, making it a visible and vulnerable target for hackers and ransomware attacks.
Always use the manufacturer’s recommended secure access method, like Synology’s QuickConnect, or learn to set up a personal VPN server on your NAS for the most secure connection. Your data’s safety is worth it.
5. The DIY path: A brief introduction to building your own NAS
While a pre-built NAS from Synology or QNAP is the perfect solution for most people, there’s another path, one for the tinkerers, the hobbyists, and those who love having complete control over every component. This is the Do-It-Yourself (DIY) route.
Think of this as cooking a meal from scratch instead of buying a meal kit. It requires more effort and knowledge, but you get to choose every single ingredient to perfectly suit your taste.
The core components
Instead of a single box, you’ll be assembling a computer. This often involves:
- Hardware: An old desktop PC you have lying around can be a perfect starting point. The key components are a decent CPU, enough RAM (8GB is a good start), a case with room for multiple hard drives, a reliable power supply, and, of course, your hard drives.
- A free NAS operating system: This is the special software that turns a standard computer into a powerful storage server. Two of the most popular choices are:
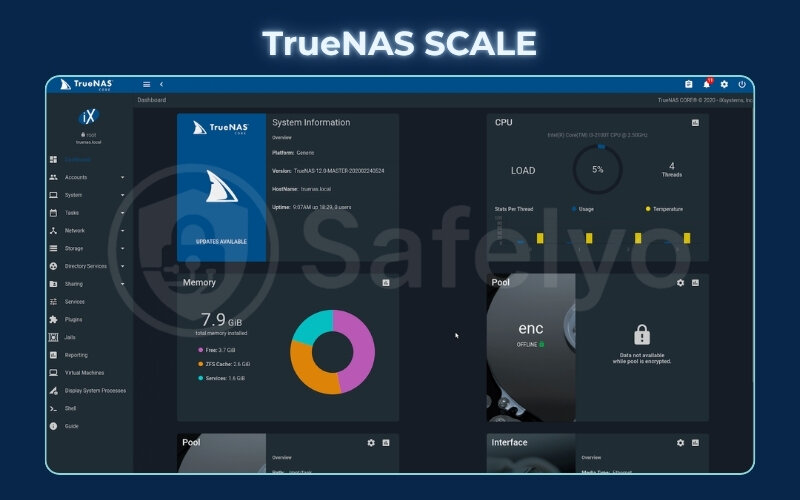
- TrueNAS SCALE: This is a powerhouse system based on Linux. It’s incredibly robust and famous for its use of the ZFS file system, which is legendary for its data integrity features. TrueNAS also has excellent support for Docker containers and virtual machines, making it extremely flexible.
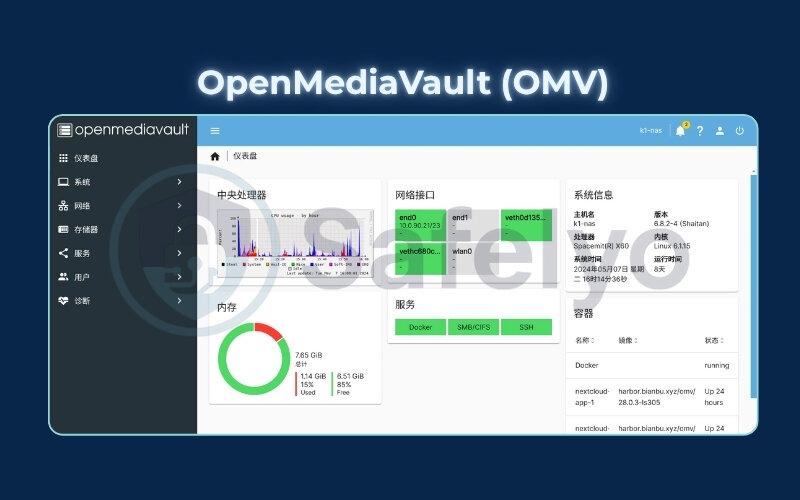
- OpenMediaVault (OMV): This is a lighter-weight option that’s perfect for less powerful or older hardware. It’s known for being simple, stable, and having a huge library of plugins to add functionality.
I’ve built several DIY NAS boxes over the years, and the feeling of bringing an old machine back to life as a powerful, custom-tailored server is incredibly satisfying.
However, it’s important to be realistic. This path demands more of your time for research, setup, and troubleshooting. But suppose you’re not afraid to get your hands dirty in command-line interfaces and system configurations. In that case, the reward is a server that is uniquely yours, with maximum performance and flexibility for your investment.
6. FAQ about NAS for home use
Is a NAS worth it for home use?
Absolutely. If you value complete data ownership, superior privacy, and want to escape lifelong cloud subscription fees, a NAS is a fantastic investment. It serves as your personal cloud for secure backups, a powerful media server for entertainment, and a central hub for all your family’s digital files.
What is the cost of setting up a NAS?
A good, entry-level home setup typically ranges from $300 to $600+. A solid 2-bay NAS enclosure from a brand like Synology costs around 200 – 300. You then need to add the cost of at least two NAS-rated hard drives, which can be 80 – 150 each, depending on the storage capacity you choose.
What is the main disadvantage of a NAS?
The primary disadvantage is the upfront cost and initial setup effort. Unlike cloud services with a low monthly fee, a NAS requires an initial investment in the device and hard drives. While this guide makes the process much easier, it still requires more hands-on time than simply entering a credit card number for an online account.
NAS vs. cloud storage (Google Drive, Dropbox), which is better?
A NAS is better for long-term cost, privacy, and control. Cloud storage is better for pure convenience and low initial cost. With a NAS, you own your data completely; with the cloud, you’re renting space under someone else’s rules.
Should I run my NAS all the time?
Yes, NAS devices and their specialized hard drives are designed and built for 24/7 operation. Keeping it on ensures your files are always accessible and that automated backups can run without interruption. However, if you’re conscious of power usage, nearly all NAS systems have a built-in scheduler to turn on and off at times you define automatically.
Can I use a NAS to download torrents?
Yes. Most NAS brands, like Synology, offer a built-in application called “Download Station.” It allows you to download torrents and other files directly to the NAS without needing to keep your main computer running.
What is my usable storage with two 4TB drives in RAID 1?
In a RAID 1 (Mirroring) setup, your total usable capacity will equal the size of a single drive. So, with two 4TB drives, you will have 4TB of highly protected storage, not 8TB. The second drive is used as a real-time mirror for data safety.
7. Conclusion
Congratulations on successfully setting up your first NAS for home use! You’ve moved beyond renting digital space and have built a powerful, private cloud that puts you in complete control. From centralizing your files to streaming your favorite movies, you now have a reliable foundation for your entire digital life.
This journey has taken you through all the essential stages of how to set up a NAS for home use. You’ve learned how to:
- Select the right hardware, especially the crucial NAS-rated hard drives.
- Assemble the physical components and install the operating system.
- Configure storage pools for data protection using SHR.
- Unlock powerful features like a Plex media server and automated backups.
Remember, this is just the beginning. A NAS is an incredibly flexible tool with countless applications to explore. Now that your server is up and running, the single most important factor for its longevity and reliability is the health of the drives inside.
To ensure your data has the safest home possible, explore the comprehensive review of the best NAS hard drives of 2026 and make a wise investment for your new personal cloud with Safelyo. We cover everything you need to know in our Tech How-To Simplified guides.

