Congratulations, you just got a new VPS! You’ve got power and freedom, but with it probably comes a blank, black terminal screen and the big question: “Now what?” This initial moment can feel intimidating, turning excitement into uncertainty.
Don’t worry. As a sysadmin who has guided countless developers and entrepreneurs through this exact process, I know that this initial hurdle is the biggest one. Learning how to set up a VPS for the first time seems daunting, but it’s completely manageable when you have a clear, security-first roadmap.
This VPS setup guide is designed specifically for beginners. We’ll walk you through:
- The essential first steps for securing a new VPS.
- How to connect securely and create a new user.
- The simple commands to update your server and set up a basic firewall.
- How to prepare your VPS for any application, including WordPress.
Let me turn that empty server into a secure fortress, ready for your project.
1. Before you begin: Is an unmanaged VPS right for you?
Before we type a single command, let’s address the most important question: Are you sure an unmanaged VPS is the right choice for your project and skill level? Answering this honestly can save you a lot of time and potential frustration.
A VPS, or Virtual Private Server, is a fantastic step up from shared hosting. It gives you a guaranteed slice of a server’s resources (CPU, RAM) and, most importantly, complete control over your software environment. However, that control comes with responsibility.
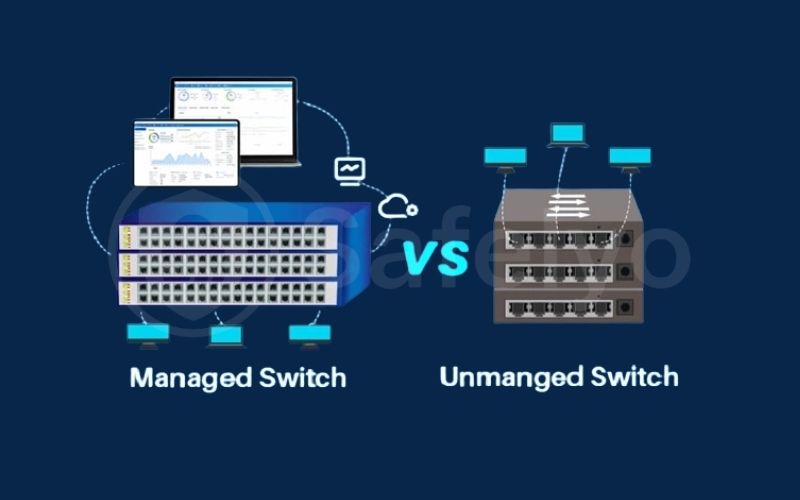
This leads to the big question: Managed vs. Unmanaged?
- Managed VPS: Your hosting provider handles the technical heavy lifting – security updates, server maintenance, troubleshooting, and backups. It’s like renting a serviced apartment: It’s more expensive and less flexible, but someone else takes care of the plumbing.
- Unmanaged VPS (This guide is for you): You are the system administrator. You have the keys to the kingdom. It’s cheaper and offers ultimate flexibility, but you are 100% responsible for security, updates, and all other server maintenance. It’s like owning your own house.
Quick quiz to help you decide:
- Are you comfortable working in a command line interface (a black screen with text)?
- Are you willing to learn basic Linux commands and troubleshoot issues using online guides?
- Is your main goal complete control and customization, rather than convenience?
If you answered “yes” to these questions, then you are absolutely in the right place! An unmanaged VPS is an incredibly rewarding tool. Let’s get started on your initial VPS server setup.
2. How to set up a VPS: 6 steps to a secure server
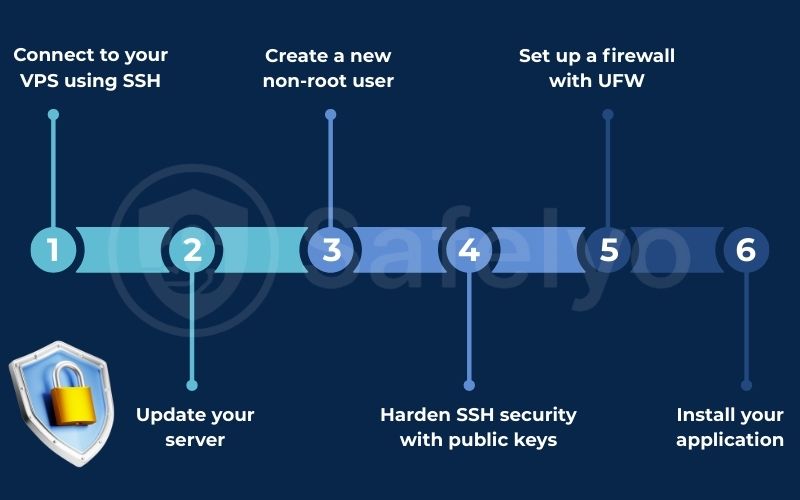
Welcome to your new server! The following six steps represent the first things to do with a VPS. I’ve used this exact checklist for every new server I’ve launched for years. By completing this initial configuration, you’ll build a strong, secure foundation before you even think about installing your website or application.
2.1. Step 1: Connect to your VPS using SSH
First, you need a way to talk to your server. You do this using SSH (Secure Shell), which creates a secure, encrypted tunnel from your computer directly to your VPS. All the commands you type on your local machine will be executed on the server as if you were sitting right next to it.
What you'll need (your hosting provider will email you this):
- Your VPS IP Address (e.g., 192.0.2.1)
- Your initial username (this is almost always root)
- Your root password
How to connect to a VPS using SSH:
- For macOS/Linux users: Open the Terminal app and type the following command, replacing the IP address with your own: <>Bash
ssh root@YOUR_VPS_IP - For Windows users: The easiest way is with a free tool called PuTTY. Download and open it, enter your VPS IP address in the “Host Name” field, and click “Open.”
The first time you connect, you’ll see a security alert about an “RSA key fingerprint.” This is a normal security step. I always just type yes and press Enter. The server will then prompt you for your root password. Type it in (you won’t see the characters as you type) and press Enter.
Congratulations, you’re in!
2.2. Step 2: Update your server
Think of your new VPS like a brand-new phone. The very first thing you should do is install all the latest software updates. This ensures your operating system has the most recent patches for any known security vulnerabilities.
The command: Copy and paste the command that matches your Linux distribution. The -y flag automatically answers “yes” to any prompts.
- For Ubuntu/Debian: <>Bash
apt update && apt upgrade -y - For CentOS/RHEL: <>Bash
yum update -y
This process can take a few minutes, so be patient while it runs.
2.3. Step 3: Create a new non-root user
Operating your server as the root user is like walking around a nuclear power plant with the master key. One wrong command – a small typo – can cause catastrophic damage to your entire system. It’s a huge security risk.
We are going to create a new user VPS account for our daily work. We’ll then give this user “sudo” privileges, which allows them to run administrative commands when needed, but in a much safer, more controlled way.
The commands (replace yournewusername with a name you choose):
- Create the new user: <>Bash
adduser yournewusernameFollow the on-screen prompts to set a strong password for this new user. - Give the user admin privileges:
- For Ubuntu/Debian: <>Bash
usermod -aG sudo yournewusername - For CentOS/RHEL: <>Bash
usermod -aG wheel yournewusername
- For Ubuntu/Debian: <>Bash
This is a critical step in basic user management and securing a new VPS.
2.4. Step 4: Harden SSH security with public keys
While passwords are okay, they can be vulnerable to “brute-force” attacks where bots try thousands of passwords per second. A much more secure method of authentication is using SSH keys. This involves a pair of digital keys: a public key that lives on your server and a private key that stays on your computer. They work together like a lock and a unique physical key.
The process (simplified): This is a slightly more advanced step, but I highly recommend it. The basic process is:
- Generate an SSH key pair on your local computer.
- Copy your new public key to your VPS for the new user you just created.
- Test that you can log in as the new user with your key.
- Once confirmed, you can edit the SSH configuration file (/etc/ssh/sshd_config) to disable password-based logins and root logins entirely.
This might seem complex at first, but it is one of the most effective ways to harden your server’s primary entry point.
2.5. Step 5: Set up a firewall with UFW
A firewall is a digital gatekeeper that controls what traffic is allowed to enter and leave your server. The easiest way to set up a firewall VPS on Ubuntu/Debian is with UFW (Uncomplicated Firewall).
The essential commands:
- Allow SSH traffic. THIS IS THE MOST IMPORTANT STEP. If you don’t do this, you will lock yourself out of your own server when you enable the firewall.
<>Bashufw allow OpenSSH - Enable the firewall.
<>Bashufw enable
Press y to confirm. - Check the status.
<>Bashufw status
You should see that OpenSSH is allowed. - Allow web traffic (if needed). If you plan to host a website, you’ll also need to allow HTTP and HTTPS traffic.
<>Bashufw allow http ufw allow https
Your basic firewall configuration is now complete.
2.6. Step 6: Install your application
Now that your fortress is secure, you can start building inside. This is where you’ll install the software you actually want to run, like a website, a game server, or a cloud storage application.
This typically involves installing a “stack” of software: A web server (like Nginx or Apache), a database server (like MySQL), and a scripting language (like PHP).
For beginners, installing this stack manually can be challenging. A much easier path is to use a free server control panel or script. Tools like CyberPanel or WordOps can automate the entire process, setting up the complete environment you need for WordPress with just a few simple commands.
For a detailed walkthrough, check out our guide on how to set up a VPS for WordPress.
Read more:
3. What’s next? Maintaining your VPS
Completing the initial setup checklist is a huge milestone, but the work of a server administrator is never truly done. Owning an unmanaged VPS means you’re responsible for its ongoing health and security. Think of it like buying a car; the initial purchase is just the beginning. You still need to perform regular maintenance to keep it running smoothly and securely.
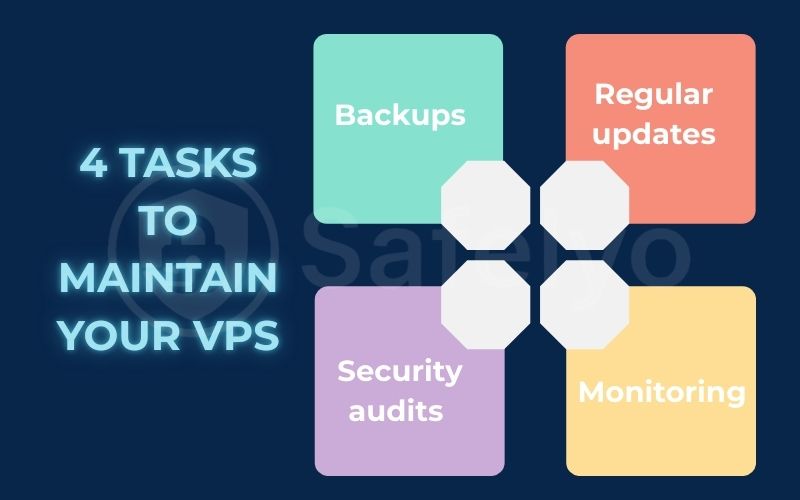
Here are the key ongoing tasks you should be aware of. I recommend setting calendar reminders for these until they become a habit.
- Regular updates: Just like in Step 2, you should periodically log into your server. I aim to do this at least once a month. Then, run the
apt updateandapt upgradecommands. This ensures you always have the latest security patches for all your installed software. - Backups: This is non-negotiable. Sooner or later, something will go wrong – a bad update, a misconfiguration, or a hardware issue. You must have a backup strategy. Most VPS hosting providers offer an automated backup service for a small monthly fee. I highly recommend enabling this. It’s the best insurance policy you can buy for your data.
- Monitoring: Keep an eye on your server’s performance. Your hosting control panel will have graphs showing your CPU, RAM, and disk space usage. Monitoring these resources will tell you if your application is running efficiently and will signal when it might be time to upgrade to a more powerful plan.
- Security audits & troubleshooting: Occasionally, it’s a good idea to check your server’s logs (like /var/log/auth.log) to look for suspicious login attempts. Learning basic troubleshooting by reading these logs is a key skill in managing your own server.
4. FAQ about how to set up a VPS
Just starting out with your first VPS? Here are some quick answers to common questions.
What Linux distribution should I choose for my VPS?
For beginners, Ubuntu LTS (Long-Term Support) is an excellent choice. It has a massive and helpful community, extensive online documentation, and is widely supported by most applications and hosting providers. It’s the perfect distribution to learn from.
I got locked out after setting up the firewall! What do I do?
This is a common mistake, which is why we stress allowing SSH before enabling the firewall. If it happens, don’t panic. Most VPS providers offer a web-based “emergency console” or “VNC access” in their main control panel. This gives you direct access to your server‘s terminal, bypassing the network firewall, so you can log in and fix the UFW rules.
Managed vs. unmanaged VPS: which is better?
It depends entirely on your needs. If you want total control, flexibility, and are willing to handle your own security and maintenance, an unmanaged VPS is cheaper and more powerful. If you prefer convenience and want the hosting provider to manage the technical aspects for you, a managed VPS is the better, albeit more expensive, option.
5. Conclusion
Completing your initial VPS server setup is a major accomplishment. You’ve officially transitioned from being just a user of the internet to an administrator of your own small piece of it. While the command line can seem intimidating at first, by following a clear, security-focused roadmap, you can build a powerful and stable foundation for any project you can dream of.
Let’s review the essential VPS setup guide checklist you’ve just completed:
- [✓] Safely Connected: You’ve logged in securely using SSH.
- [✓] System Updated: Your server‘s software is patched and up-to-date.
- [✓] New User Created: You’re no longer operating as the all-powerful root user.
- [✓] SSH Hardened: You’ve taken steps to secure your primary entry point.
- [✓] Firewall Active: You have a basic but effective firewall protecting your VPS.
By ticking off these boxes, you have successfully transformed a raw, vulnerable server into a hardened fortress ready for development. This foundation will serve you well, whether you plan to host a blog, run a game server, or develop the next big web application.
But this is just the beginning of your journey. To become a true VPS expert, you need to manage, optimize, and scale your new server. Explore the other advanced guides in our Tech How-To Simplified section. You can find them here on Safelyo.


