Whether you’re capturing an entire screen, a single window, or just a specific section, macOS offers powerful screenshot and screen capture tools built right in. Knowing the right keyboard shortcuts, like Cmd-Shift-3 or Cmd-Shift-4, can save time, improve communication, and streamline your daily workflow. Personally, I’ve found that mastering these shortcuts has made daily tasks like creating tutorials or sending quick feedback much easier and faster.
In this guide, I’ll walk you through how to take screenshot on Mac using only native tools, without downloading any extra apps.
You’ll learn:
- The 3 easiest ways to take screenshot on Mac
- How to capture full screen, a selected portion, or a specific window
- Pro tips to edit, copy to the clipboard, or change the storage location
- Answers to common Mac screenshot questions
Let’s dive into the fastest and most effective ways to capture anything on your Mac screen.
1. How to take screenshot on Mac?
There are several answers to the question of how to take a screenshot on a Mac using keyboard shortcuts and tools built into macOS. Here are the top 3 methods you need to know:
Full-Screen Screenshot: Press Command + Shift + 3
Partial Area Screenshot: Press Command + Shift + 4
Capture Specific Window:  Press Command + Shift + 4, then Spacebar
Record the screen: Press Command + Shift + 5
1.1. How to take a full-screen screenshot on Mac?
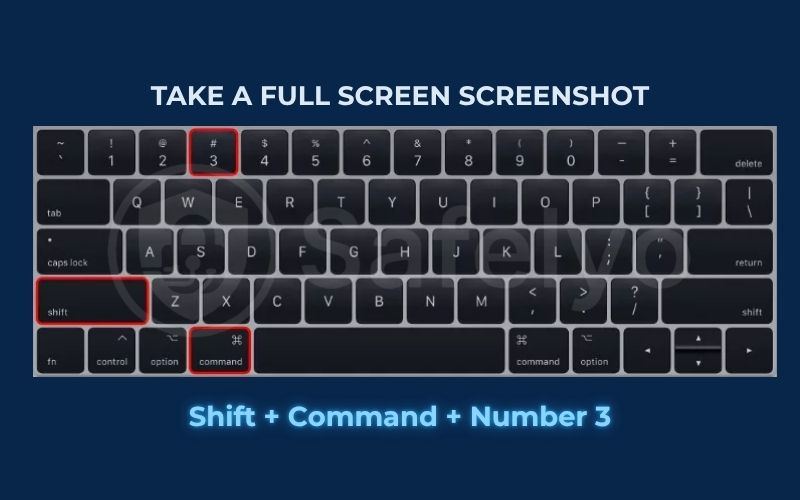
To take a full-screen screenshot on Mac, press Command (⌘) + Shift + 3
This shortcut captures the entire screen, and a floating thumbnail will briefly appear in the corner of your screen. You can click the thumbnail to edit the screenshot immediately. This is also the most common shortcut for beginners who have just learned Cmd-Shift-3.
1.2. How to take a partial screenshot on Mac?
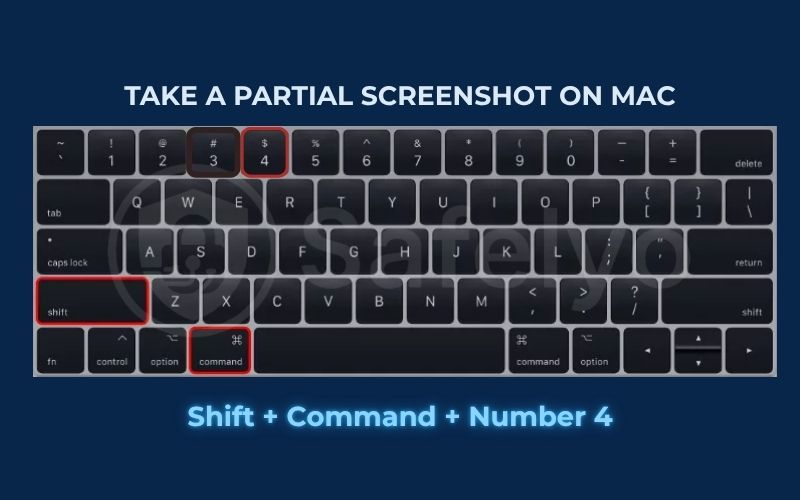
To capture a selected portion of the screen, use: Command (⌘) + Shift + 4
Your cursor will turn into a crosshair so you can define a selection area before capturing. When you release the mouse, macOS saves the screenshot automatically. Then take any of these actions:
- To take the screenshot, simply release your mouse or trackpad.
- To cancel the capture, press the Esc (Escape) key.
- To move the selection area without resizing it, hold down the Spacebar while dragging.
1.3. How to take screenshot on Mac for a specific Window?
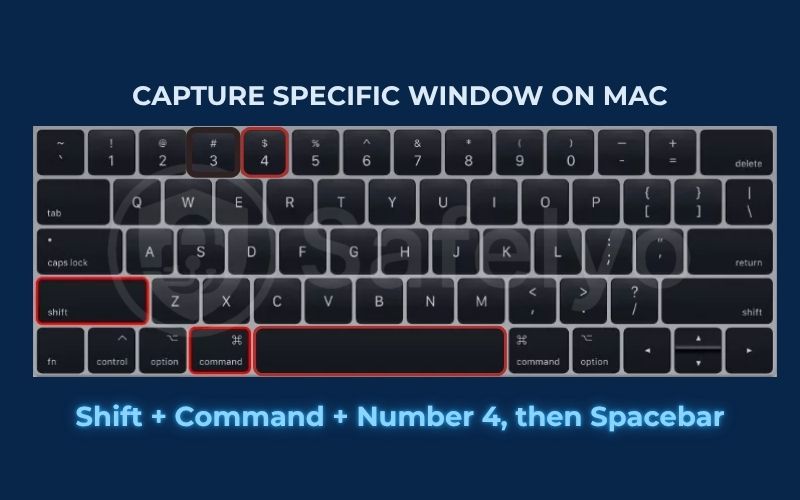
To capture a window on Mac, you need to press Command (⌘) + Shift + 4
After pressing Command (⌘) + Shift + 4, you get access to several advanced screenshot features depending on what you do next. Here’s how to use them effectively:
Press and Release the Spacebar
- The crosshair cursor will change into a camera icon.
- Move the camera over any open window, then click to capture just that window.
- The resulting screenshot includes a white border and subtle drop shadow to match macOS aesthetics. On newer MacBook models with Touch Bar, the captured window will still include a border that reflects Apple’s design style.
Press and Hold the Spacebar (After Dragging to Select an Area)
- If you drag to select a screenshot area but it’s slightly off, hold the Spacebar before releasing the mouse or trackpad.
- This locks in the shape and size of your selection but lets you reposition the entire box.
- It’s perfect for fine-tuning your selection before taking the screenshot.
Hold the Shift Key (After Dragging to Select an Area)
- Once you’ve drawn your selection, hold Shift (before releasing the mouse).
- This locks all sides of the box except the bottom edge.
- Move your mouse to adjust the bottom edge only.
To adjust a different edge:
- Release the Shift key (but keep the mouse button held down), then press it again.
- Now you’ll be able to adjust the right edge instead.
>> Read more:
2. Why taking screenshots on Mac matters?
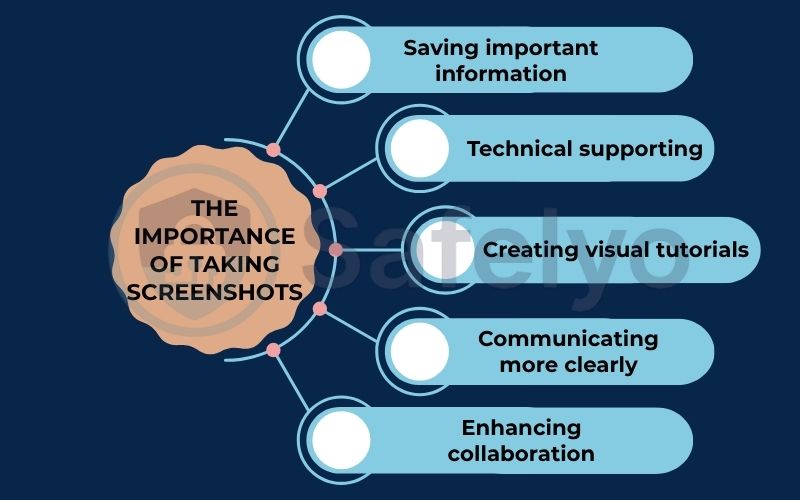
Taking screenshots is one of the simplest yet most powerful tools available on your Mac. Whether you’re saving important information from a website, capturing error messages for technical support, or creating visual tutorials, screenshots make it easy to share exactly what’s on your screen.
In today’s remote work and online learning environments, knowing how to take screenshot on Mac allows you to communicate more clearly and efficiently. Instead of explaining something step by step in words, you can show it instantly with a single image.
Whether you’re a casual user or a professional, mastering screenshot shortcuts puts you in better control of your workflow, boosts productivity, and enhances how you collaborate with others. Some users even use advanced features like setting a delay before capture or including the mouse pointer for tutorials.
3. Where are screenshots saved?
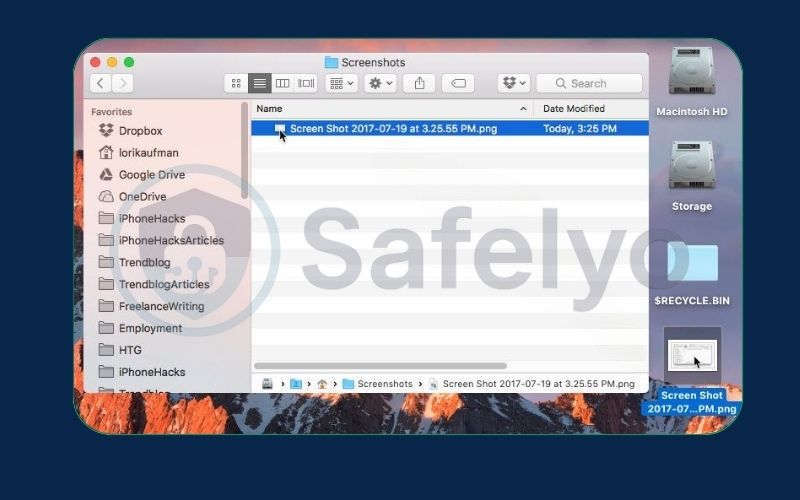
By default, macOS saves your screenshots to the Desktop with filenames like Screen Shot [date] at [time].png.
If you want to change the save location, press Cmd-Shift-5 to open the Screenshot toolbar, then click on “Options.” From there, you can select a new destination, such as Documents, Clipboard, or a custom folder. macOS will remember this location for future screenshots.
4. How to record the screen on your Mac
Whether you’re creating a tutorial, capturing a meeting, or saving a video call, macOS makes it easy to record your screen using built-in tools. Here’s how to do it with both methods.
4.1. Using the screenshot app
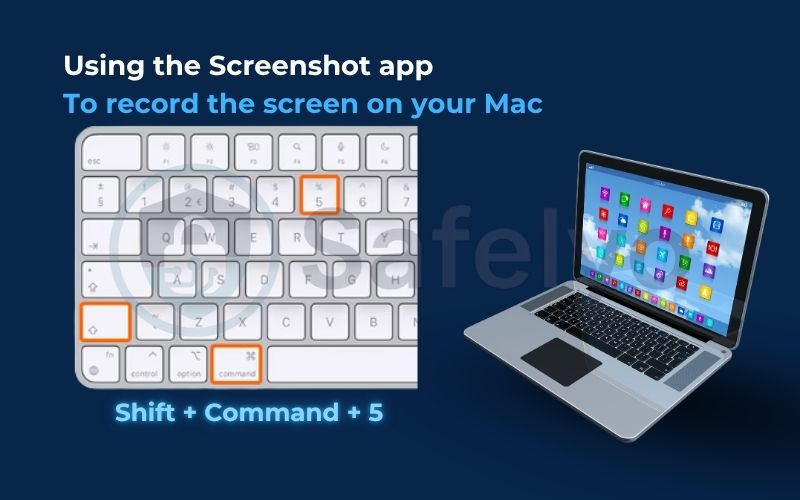
To record the screen, you press Command (⌘) + Shift + 5.
This opens the Screenshot toolbar at the bottom of your screen. After that, simply follow these steps to start recording your screen:
- Click Options before recording to choose where to save, set a timer, or include microphone audio.
- Click Record Entire Screen to capture the whole display or click Record Selected Portion to drag and select a specific area. On some newer Macs, screen video recording can preserve extended color ranges in HDR, which is especially useful for creative professionals.
- Click the Record button to begin recording.
- To stop recording, click the Stop button in the menu bar (top-right corner).
- When a thumbnail of the recording appears in the corner of your screen, click it to start editing, or you can wait for the recording to save to your desktop.
4.2. Using the QuickTime Player
To record your screen using QuickTime Player, just follow these simple step-by-step instructions.
- Open QuickTime Player from the Applications folder or via Spotlight Search.
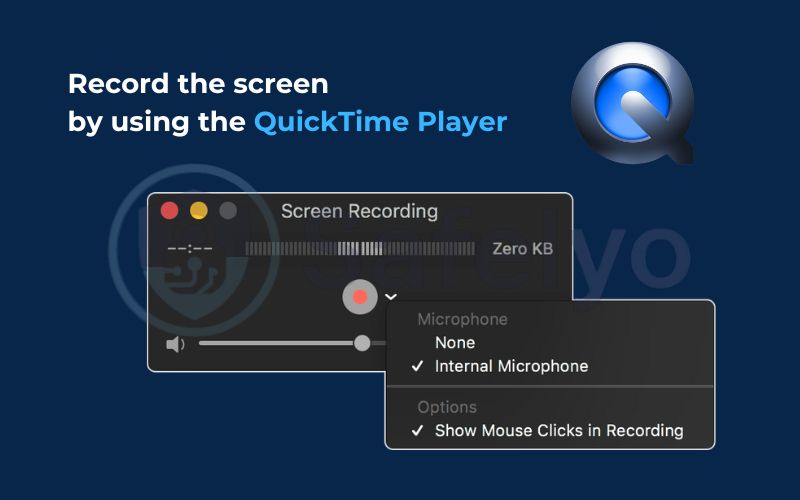
- In the menu bar, click File > New Screen Recording.
- A small recording window will appear. Click the arrow next to the Record button to choose options like microphone input or whether to show mouse clicks.
- Click the Record button to begin. You can either click anywhere to record the entire screen or drag to select a portion.
- To stop recording, click the Stop button in the menu bar (top-right corner).
- Once finished, the recording opens in a new window. QuickTime also allows light editing applications, such as trimming, before export. QuickTime recordings are exported in standard SDR, but you can convert them later to HDR if needed for higher dynamic range content. You can preview it, then choose File > Save to store it in your desired location.
>> Explore more:
5. FAQs about how to take screenshot on Mac
Whether you’re new to macOS or a longtime user, you may still have questions about how screenshots work on a Mac. Below are some of the most frequently asked questions – from editing and formatting a file to advanced features like copying to the clipboard or taking scrolling screenshots.
How to edit screenshots on Mac?
After taking a screenshot, click the thumbnail that appears in the corner of your screen to open markup and use built-in editing tools. This lets you crop, draw, highlight or add text before saving the image.
If you missed the thumbnail or closed it, don’t worry, because your screenshot is still saved (usually on the Desktop). You can open it later using Preview or any image editor like Photoshop to make edits just like a regular photo. For simple annotation or cropping, the built-in Preview app is often enough.
Can I copy a screenshot to the clipboard instead of saving it?
Yes, you can copy a screenshot to the clipboard instead of saving it. Just hold the Control key while using the usual screenshot shortcut.
For example:
Press Command + Control + Shift + 3 to copy the full-screen screenshot. Then, open an app like Notes, Mail or Messages and press Command + V to paste it.
What file format are Mac screenshots saved in?
Screenshots are saved as PNG files by default, which is a high-quality format of a file, but you can switch to JPG or PDF via Terminal. You can change the format to JPG, PDF, etc., using a Terminal command.
How to take a scrolling screenshot on Mac?
MacOS does not support scrolling screenshots natively. Some third-party apps even support capturing in both HDR and SDR modes, useful for designers. Use third-party tools like CleanShot X or Snagit to capture full-page content in browsers, apps, or documents.
6. Conclusion
Mastering how to take screenshot on Mac is a valuable skill that can boost your productivity and make communication more efficient. Whether you’re capturing a full screen, a selected portion, or a specific window, macOS offers powerful tools right at your fingertips. With just a few shortcuts, you can quickly capture, edit, and share exactly what you see on your screen – no extra software needed. Whether it’s a quick copy to the clipboard or a detailed capture with Cmd-Shift-4, everything is built right in.
Before you go, here are the key points to remember:
- Command + Shift + 3: Capture the entire screen instantly.
- Command + Shift + 4: Take a screenshot of a selected portion or a specific window (with Spacebar).
- Command + Shift + 5: Access the Screenshot toolbar to take screenshots or record your screen.
- Screenshots save to your Desktop by default and you can change the destination in Options.
- Record your screen using either the built-in Screenshot app or QuickTime Player.
- macOS doesn’t support scrolling screenshots natively
Knowing how to take screenshot on Mac puts you in control of your workflow and communication. Don’t waste time searching for third-party tools. For more practical Mac tips, visit Tech How-To Simplified category on Safelyo and stay ahead with smarter, faster tech habits.


