Trying to figure out how to disable VPN if I’m using Parallels on Mac can feel like a frustrating tech puzzle. By default, your virtual machine automatically tunnels all its traffic through your Mac’s active VPN. While that’s great for security on your host machine, it can completely block you from essential tasks inside your VM.
You’ve likely run into this exact problem if you’re trying to:
- Access banking websites or streaming services that actively block VPN connections.
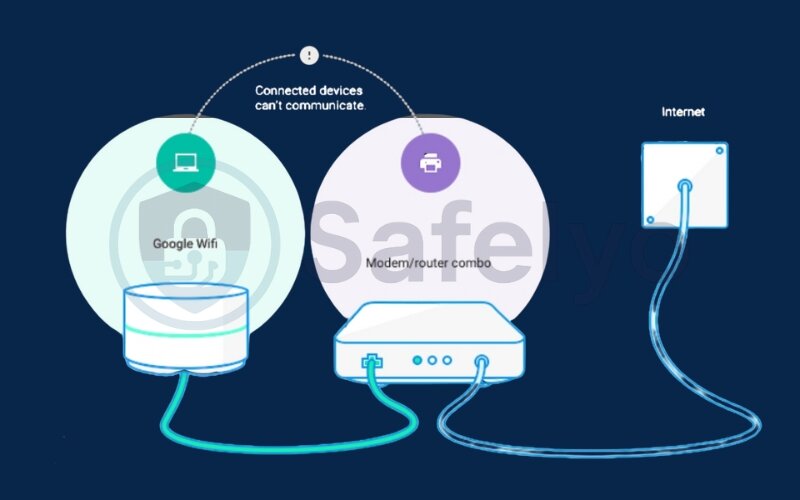
- Connect to local network devices like a printer or a shared office drive.
- Test a website or application from your home’s real IP address, not the VPN server‘s.
As someone who constantly juggles development work inside a VM and secure browsing on my Mac, I’ve wrestled with this exact networking quirk myself. The good news is that the fix is surprisingly straightforward and doesn’t require any complex commands or third-party tools.
This guide will walk you through the simple, step-by-step process of reconfiguring your Parallels network, allowing your VM to bypass the VPN and connect directly to the internet.
Don’t let network settings interrupt your workflow. Let’s get it sorted.
1. Why does my Parallels VM use my Mac’s VPN by default?
The reason your Parallels virtual machine automatically uses your Mac’s VPN comes down to one default setting: Shared Network mode.
Think of it this way: in Shared Network mode, your virtual machine is like a passenger in a car driven by your Mac. The Mac is the one connected to the road (your internet), and if the Mac decides to drive through a private, encrypted tunnel (your VPN), the passenger has no choice but to go along for the ride. Your VM is essentially “borrowing” your Mac’s internet connection.
This is fundamentally how Parallels handles network connections out of the box. It doesn’t give your VM its own separate identity on your local network. Instead, your Mac acts as a router, sharing its own IP address and connection details with the VM. As a result, any network traffic from your VM is routed through the Mac first, forcing it to pass through the same VPN tunnel.
This setup is the core of the problem. To solve it, we need to understand the key difference between Parallels Shared Network vs Bridged Network and switch to the correct mode for your needs.
2. Shared network vs. bridged network
You’ve successfully switched to Bridged Mode, but understanding the fundamental difference between these two modes is key to mastering your Parallels network settings for any situation, not just for dealing with a VPN.
In short, the choice between them determines whether your virtual machine acts like a guest in your Mac’s house or a neighbor with its own separate address.
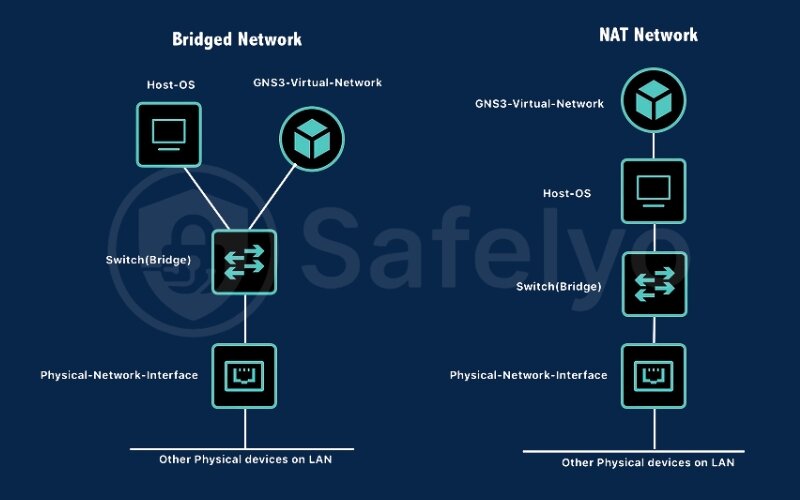
Shared Network
This is the default mode. Think of it as your VM “hiding” behind your Mac. It shares your Mac’s IP address and is invisible to other devices on your local network (like printers or other computers). All its traffic is routed through the Mac, which is why it’s forced to use the Mac’s VPN connection.
Bridged Network
This mode creates a virtual “bridge” to your physical router. Your router sees the Parallels VM as a completely separate computer on the network. Because of this, it assigns the VM its own unique IP address, just like it does for your phone or smart TV. A Parallels virtual machine with a different IP is exactly why it can form its own direct path to the internet, completely bypassing your Mac’s active VPN connection.
For a clear overview, here’s a direct comparison of Parallels Shared Network vs Bridged Network:
| Feature | Shared Network (Default) | Bridged Network |
|---|---|---|
| IP Address | Shares the Mac’s IP address. | Gets its own unique IP from your router. |
| VPN Usage | Forced to use the Mac’s VPN connection. | Bypasses the Mac’s VPN entirely. |
| Visibility on LAN | Invisible to other devices on the network. | Appears as a separate device on your network. |
| Best For | Simple web browsing where you want the VM to have the same security/IP as the Mac. | Accessing LAN devices (like printers), bypassing a VPN, or network testing. |
3. Step-by-step guide: How to disable VPN if I’m using Parallels on MAC
Now that you understand we need to switch from “Shared” to “Bridged,” let’s walk through exactly how to do it. It’s much simpler than it sounds.
QUICK STEPS (the TL;DR version)
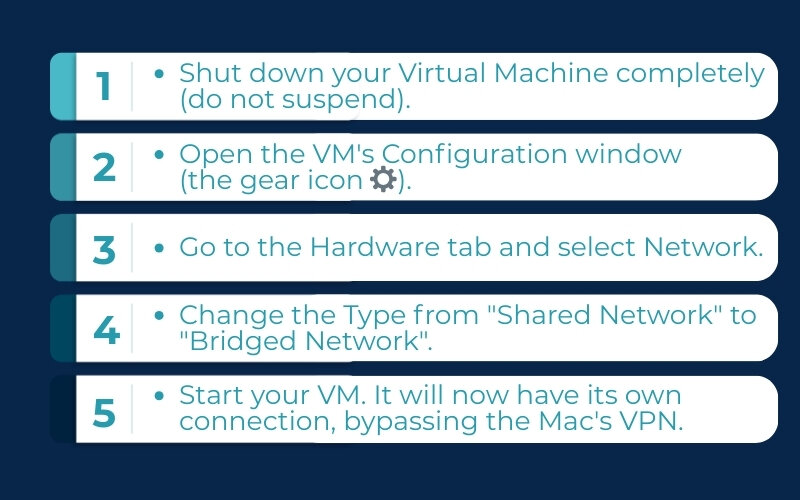
- Shut down your Virtual Machine completely (do not suspend).
- Open the VM’s Configuration window (the gear icon ⚙️).
- Go to the Hardware tab and select Network.
- Change the Type from “Shared Network” to “Bridged Network”.
- Start your VM. It will now have its own connection, bypassing the Mac’s VPN.
3.1. Important prerequisite: shut down your virtual machine
This is the most common step where users get stuck – I’ve encountered it many times in my own setups. You cannot change core hardware settings while the machine is running or suspended.
Think of “suspending” like putting your laptop to sleep; the programs are still held in memory, just paused. A “shutdown” is like turning it completely off. To change something fundamental, like how the machine connects to a network, it needs to be fully powered down. I can’t count the times I’ve stared at a greyed-out settings menu, only to realize I’d just suspended the VM. Always perform a full shutdown to save yourself the headache.
3.2. Access Parallels configuration settings
Once your VM is fully off, look for the little gear icon in the Parallels Control Center. This is your gateway to the machine’s control panel.
Think of this gear icon just like the “Settings” app on your phone or computer. It’s the central hub where you can adjust all the under-the-hood components of your virtual machine.
3.3. Navigate to the network settings tab
After clicking the gear, a new window will pop up. At the top, click the Hardware tab. A list of virtual components will appear on the left. Find and click on Network.
The list on the left can look a bit technical but don’t worry. It’s just a digital version of all the parts inside a real computer. We’re simply looking for the virtual “network card” to adjust its settings.
3.4. Switch from shared network to bridged network
This is the click that makes all the difference. You’ll see a dropdown menu next to the word Type, which currently says “Shared Network.”
Click on it and select Bridged Network.
This single click is the “aha!” moment. You’re telling Parallels, “Stop routing this VM’s traffic through the Mac. Instead, connect it directly to my router.” You can leave the “Source” option as “Default Adapter” – this just tells Parallels to cleverly use whatever connection your Mac is using (Wi-Fi or cable) without you needing to specify.
3.5. Restart and verify your connection
Now, close the configuration window and start your virtual machine back up. Once it’s running, it’s time for the moment of truth.
The easiest way to check is to open a web browser inside your Windows or Linux VM and go to a site like whatismyip.com. Then, open the same website in a browser on your Mac.
If it worked, you’ll see two different IP addresses. Your Mac will show the VPN’s IP (e.g., an address in London), while your VM shows your real home IP address. It’s a satisfying visual confirmation that you’ve successfully given your VM its own lane on the internet highway.
4. Important considerations and potential issues
Switching to Bridged Mode is a fantastic solution, but like any tech fix, it’s worth knowing about a few potential curveballs. Based on my own experiences and troubleshooting sessions, here are a few things to keep in mind.
4.1. Is bridged mode always safe?
This is a really important question. While Bridged Mode is perfectly safe on your home network, you should think twice before using it on public or untrusted Wi-Fi, like at a coffee shop or airport.
Here’s a simple way to think about it: In Shared Mode, your VM is hidden behind your Mac’s firewall and security. In Bridged Mode, your VM is out in the open on the network, just like your laptop itself. If that network is not secure, your VM becomes a visible target. I once made the mistake of using Bridged Mode on a hotel Wi-Fi network, and my Windows VM’s firewall immediately started throwing alerts.
MY RULE OF THUMB
If you wouldn’t connect a separate physical laptop to a network without a VPN, don’t connect your VM to it in Bridged Mode without its own protection (like a good antivirus and firewall).
4.2. What if I want the opposite? (VM uses VPN, Mac does not)
It’s a common scenario! Maybe you need your Windows VM to connect to your office’s VPN for work, but you want your Mac to stay on your regular home connection for everything else.
The solution here is actually the reverse of what we’ve been doing.
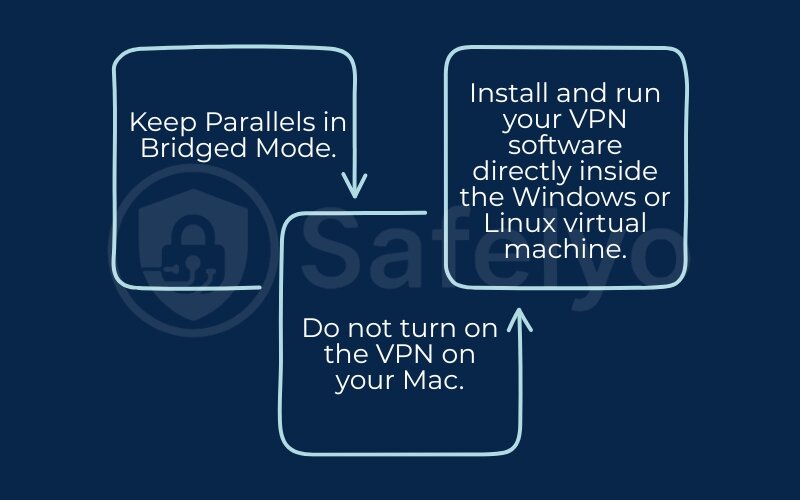
- Keep Parallels in Bridged Mode.
- Do not turn on the VPN on your Mac.
- Install and run your VPN software directly inside the Windows or Linux virtual machine.
This way, only the VM’s traffic gets routed through the VPN tunnel, leaving your Mac’s connection completely unaffected. It’s the perfect setup for separating your work and personal digital lives.
4.3. Is split tunneling a better option?
If you have a premium VPN service, you might have a more elegant feature at your disposal: split tunneling.
Split tunneling is a feature that lets you choose which apps on your Mac use the VPN and which ones bypass it. In this context, you could tell your VPN app, “Hey, encrypt all my traffic except for anything coming from the Parallels Desktop app.”
I often use this feature when I need a quick fix without reconfiguring my VM’s network. It’s a fantastic “set it and forget it” solution if your VPN provider supports it. You’re essentially creating a special exception for Parallels. This is a more advanced technique, but it’s incredibly powerful for fine-tuning your connections.
>> If this level of control sounds appealing, it might be time to see if your current VPN offers this. You can explore Safelyo’s guide to the best VPNs with advanced split tunneling features to learn more.
5. FAQ about disabling VPN when using Parallels on a Mac
How do I change the network mode in Parallels?
You need to completely shut down your virtual machine, open its Configuration (the gear icon), go to the Hardware tab, select Network, and then change the ‘Type’ dropdown from Shared Network to Bridged Network.
How do I shut off the VPN on my Mac itself?
To turn off a VPN on your entire Mac (not just for Parallels), you should open your VPN application and click the ‘Disconnect’ or ‘Turn Off’ button. This is different from the Bridged Mode method, which only affects your virtual machine.
Can I use this method for any virtual machine in Parallels (e.g., Linux, not just Windows)?
Yes, absolutely. These network settings are part of Parallels itself, not the operating system running inside the VM. The process is identical whether you are running Windows, a Linux distribution like Ubuntu, or even another instance of macOS.
Will switching to Bridged Mode slow down my internet connection?
No, you should not notice any slowdown. In fact, your VM is getting a more direct connection to your router, much like any other device on your network. Performance should be just as fast as your Mac’s direct connection.
>> Read more: Does VPN slow down internet? YES, but here’s why & 10 ways to fix it!
Do I need to change any settings on my router to use Bridged Mode?
In 99% of cases, no. As long as your home router is set up to automatically assign IP addresses (which is the default for virtually all routers), it will treat your Parallels VM like any new device and give it an IP address VPN without you having to do anything.
What should I do if Bridged Mode isn’t working or my VM has no internet?
This can happen sometimes, but it’s usually an easy fix. Here are a few troubleshooting steps I’ve used myself:
- First, double-check that your Mac itself has a stable internet connection.
- Try restarting your home’s Wi-Fi router. A simple reboot can solve many network hiccups.
- Go back into the Parallels Network settings and, under ‘Bridged Network’, try changing the ‘Source’ from “Default Adapter” to your specific connection (e.g., “Wi-Fi” or “Ethernet”).
- Check if a firewall on your Mac or router is blocking the new device (your VM) from connecting.
6. Conclusion
Figuring out how to disable VPN if I’m using Parallels on Mac turns out to be much simpler than it seems. By changing one simple setting, you can instantly give your virtual machine the network independence it needs, freeing it from your Mac’s VPN connection and resolving those frustrating access issues.
Here are the main points to remember from this guide:
- Shared Network (the default) forces your VM to use your Mac’s VPN.
- Bridged Network gives your VM its own direct connection, bypassing the VPN.
- Always shut down your VM completely before changing network settings.
You now have full control over your virtual machine’s network, allowing for a more seamless and productive workflow across both your Mac and your VM.
For more practical guides and tech tips designed to make your digital life easier, be sure to explore the Tech How-To Simplified category here on Safelyo.


