It is alarming to see a “Not Secure” warning on your website, knowing it scares away visitors and hurts your search engine rankings. While Apache is a powerful web server, navigating its configuration files to get that green padlock can feel like solving a puzzle without a picture.
Learning how to install SSL certificate on Apache server correctly ensures your site is encrypted and trusted by browsers.
-
Upload certificate files
Transfer your
.crt,.key, and intermediate bundle files to a secure directory like/etc/ssl/on your server. -
Locate the config file
Find the correct
httpd.conforsites-availablefile where your VirtualHost configuration is stored. -
Configure the VirtualHost
Edit the file to include the paths for
SSLCertificateFile,SSLCertificateKeyFile, and chain files within the port 443 block. -
Enable SSL modules
Run
sudo a2enmod ssl(on Ubuntu) or installmod_ssl(on CentOS) to ensure Apache can process secure connections. -
Enable security features
Add directives for OCSP Stapling and HSTS headers to speed up validation and force secure connections.
-
Restart the Apache service
Save your changes and run
sudo systemctl restart apache2orhttpdto apply the new configuration settings. -
Test the installation
Use a browser, command line tool, or SSL Labs to confirm the certificate chain is complete and the padlock appears.
1. Overview of SSL certificates for Apache
Before diving into how to install SSL certificate on Apache server, it’s critical to understand what an SSL certificate does and what files you’ll need for a successful Apache setup. This section provides a foundational overview to help you make informed choices later.
1.1. Why SSL/TLS matters
SSL (Secure Sockets Layer) and its successor, TLS (Transport Layer Security), encrypt the connection between your server and a user’s browser. This prevents third parties from intercepting sensitive information such as login credentials or payment data.
According to the U.S. Cybersecurity & Infrastructure Security Agency (CISA), unencrypted HTTP traffic is vulnerable to interception and manipulation, making HTTPS mandatory for any serious web project. Without proper SSL support, even sites that look secure can expose users to hidden risks.
Without SSL/TLS:
- Browsers mark your site as “Not Secure”
- SEO rankings can be negatively impacted
- Data transmissions are exposed to potential attackers
With SSL/TLS:
- Data is encrypted in transit
- Visitors see the secure padlock
- You meet industry standards and compliance requirements
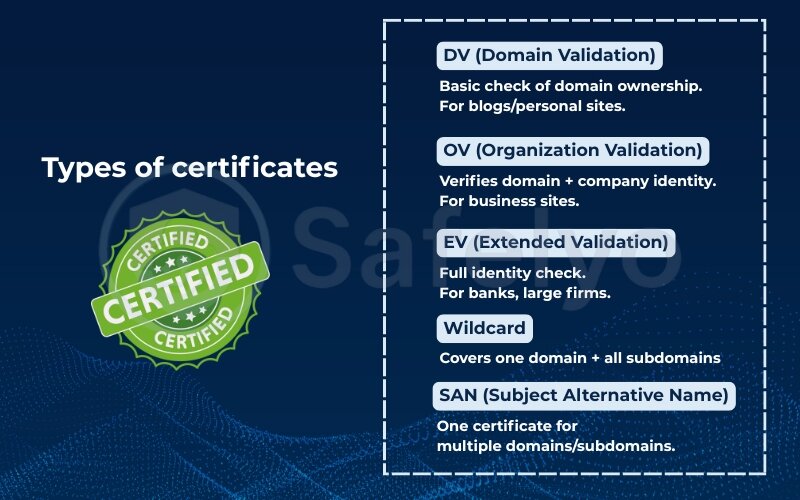
1.2. Types of certificates (DV, OV, EV, wildcard, SAN)
There are several types of SSL certificates you can install on Apache, each serving different use cases:
- DV (Domain Validation): Basic level; validates only domain ownership. Ideal for personal websites and blogs.
- OV (Organization Validation): Verifies domain ownership and organization identity. Recommended for business sites.
- EV (Extended Validation): Highest level of verification, triggering the full company name in browsers. Used by banks and high-profile entities.
- Wildcard: Covers one domain and all subdomains (e.g., *.example.com)
- SAN (Subject Alternative Name): Supports multiple domains and subdomains in a single certificate
I once worked with a startup that switched from a DV to a SAN certificate when they expanded internationally. It simplified management, cut costs, and reduced renewal issues.
1.3. Required files (private key, certificate, chain, full-chain)
Installing an SSL certificate on Apache requires a few critical files. Here’s what each one does:
- Private key (.key): Created during CSR (Certificate Signing Request) generation. Never share or expose it. When generating a CSR, always include the correct Common Name and Subject Alternative Names to avoid browser mismatches.
- Certificate (.crt or .pem): Issued by the Certificate Authority (CA) after verifying your CSR.
- Intermediate certificate(s): Bridges your certificate to a trusted root. Usually provided as a .ca-bundle file.
- Full-chain certificate: A concatenation of your certificate and all intermediate certificates. Some Apache setups require this.
TIPs: Keep your certificate and private key in a secure directory like /etc/ssl/private/. I’ve seen teams lose SSL access simply because of incorrect file paths or permission issues.
Now that you understand what SSL is and which files you’ll need, let’s move into the actual setup process.
2. How to install SSL certificate on Apache server
Apache is a flexible but sometimes confusing server, especially when configuration files vary by OS. I’ll guide you step-by-step based on what’s worked across dozens of production environments I’ve handled.
2.1. Step 1 – Upload certificate & key files
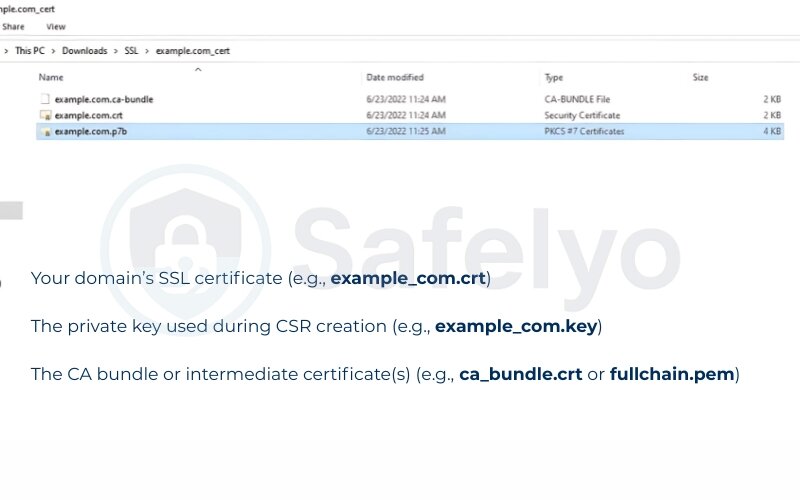
Before configuring SSL on your server, you need to download the following files from your SSL provider’s dashboard or confirmation email:
- Your domain installation’s SSL certificate (e.g., example_com.crt)
- The private key used during Certificate Signing Request CSR creation (e.g., example_com.key)
- The CA bundle or intermediate certificate(s) (e.g., ca_bundle.crt or fullchain.pem)
To download these files:
Log in to your SSL provider’s control panel (e.g., Namecheap, GoDaddy, DigiCert), navigate to your issued certificate, and download the appropriate files for your server type (Apache, NGINX, etc.). In some cases, a .zip file will contain all necessary files.
Once downloaded, upload them to your server using scp, rsync, or an SFTP tool like FileZilla. You can also generate keys and CSRs directly using OpenSSL, which remains the most widely used tool for certificate management on Linux servers.
Recommended directory structure on your server:
- SSL certificate and CA bundle →
/etc/ssl/certs/ - Private key →
/etc/ssl/private/
Example placement commands:
sudo cp example_com.crt /etc/ssl/certs/
sudo cp ca_bundle.crt /etc/ssl/certs/
sudo cp example_com.key /etc/ssl/private/
Note: The Private-Key must be protected.
Set permissions so only root can read it: sudo chmod 600 /etc/ssl/private/example_com.key
I once helped a client who accidentally placed their private key in a public web directory. Within hours, bots had detected and flagged the exposure. This was a critical security flaw that could’ve led to full compromise. Always verify that the key is stored securely and only readable by root.
2.2. Step 2 – Locate Apache config
Apache’s configuration depends on your OS and setup. Common files/paths include: Consistent SSL configuration helps avoid errors when moving between staging and production environments.
/etc/httpd/conf/httpd.conf(CentOS/RHEL)/etc/apache2/sites-available/(Ubuntu/Debian)/etc/httpd/conf.d/ssl.conf(modular SSL setup)
You’ll want to identify the <VirtualHost *:443> section where SSL directives are placed. Each site you secure with SSL needs its own virtual host block in Apache to define the domain, cert paths, and SSL rules. If not present, you may need to create it. On Ubuntu systems, I typically copy the default config in sites-available/default-ssl.conf and modify it for the target domain.
2.3. Step 3 – Configure <VirtualHost *:443> with SSLCertificate directives
Within the config file, your secure VirtualHost block should look like this:
ServerName www.example.com – Always specify the Fully Qualified Domain Name (FQDN) in the ServerName directive to prevent mismatches.
    DocumentRoot /var/www/html
    SSLEngine on
    SSLCertificateFile /etc/ssl/certs/example_com.crt|
    SSLCertificateKeyFile /etc/ssl/private/example_com.key
    SSLCertificateChainFile /etc/ssl/certs/ca_bundle.crt
    # Optional
    SSLOptions +StrictRequire
Note: If you’re using a full-chain file, replace the SSL Certificate File and skip SSL Certificate Chain File.
I’ve seen Apache silently ignore SSL if paths are incorrect, especially when a symlinked cert was unreadable. Always verify full paths.
2.4. Step 4 – Enable SSL modules
Depending on your Linux distro:
- Ubuntu/Debian: Run:
sudo a2enmod ssl - CentOS/RHEL: Ensure mod_ssl is installed:
sudo yum install mod_ssl
Once, I couldn’t figure out why SSL wasn’t working until I realized mod_ssl wasn’t installed at all. Enabling the module is essential.
2.5. Step 5 – Enable OCSP Stapling & HSTS
OCSP stapling helps speed up SSL handshakes and adds revocation status directly into the certificate response. HSTS forces browsers to connect over HTTPS, improving security.
Add these inside the <VirtualHost *:443> block:
SSLUseStapling on
SSLStaplingCache "shmcb:/var/run/ocsp(128000)"
Header always set Strict-Transport-Security "max-age=31536000; includeSubDomains"
2.6. Step 6 – Save & restart the Apache service
Once the configs are updated, reload or restart Apache to apply the changes:
- Ubuntu/Debian:
sudo systemctl restart apache2 - CentOS/RHEL:
sudo systemctl restart httpd
I always run apachectl configtest before restarting. It catches typos like missing closing tags or invalid directive names.
2.7. Step 7 – Test installation (browser, curl -v, SSL Labs)
After restarting, test your configuration:
- Browser: Visit https://yourdomain.com. Look for the padlock.
- Command line:
curl -vI https://yourdomain.com - Use the SSL Labs SSL Test tated during CSo obtain a comprehensive report on SSL status.
When working with staging servers, I often add temporary DNS entries and test using curl --resolve before going live.
Next up: I’ll show you how to automate SSL installation and renewal using Let’s Encrypt and Certbot.
3. Automating installation with Let’s Encrypt (Certbot)
Manually managing SSL certificates can quickly become tedious and error-prone, especially in multi-site or multi-server environments where consistent SSL support is required. That’s where Let’s Encrypt and Certbot come in. With a few commands, you can automate SSL provisioning, configuration, and renewal.
When I began managing 20+ client websites, forgetting a certificate renewal once led to unexpected downtime. After switching to Certbot, I never had to worry about expiry dates again.
3.1. Install Certbot on Ubuntu/CentOS/Debian
Certbot is available in most major distributions. Below are quick configuration steps for the most common ones:
Ubuntu/Debian:
sudo apt update
sudo apt install certbot python3-certbot-apache
CentOS/RHEL (via EPEL):
sudo yum install epel-release
sudo yum install certbot python3-certbot-apache
I always verify the package after configuration by running certbot –version to ensure it is installed correctly. Remember that every SSL setup begins with a Certificate Signing Request submitted to the Certificate Authority. If you’re running a minimal system without Apache bindings, use python3-certbot instead and manually configure.
3.2. certbot –apache – auto‑configure SSL
The simplest way to install an SSL certificate on Apache with Certbot is: sudo certbot --apache
This command:
- Detects existing VirtualHosts
- Prompts for domain selection
- Automatically edits config files
- Reloads Apache
You’ll be asked to choose whether HTTP traffic should be redirected to HTTPS.
One time, I forgot to enable redirection and had duplicate HTTP/HTTPS content indexed by search engines. Since then, I have always enabled redirection during Certbot setup.
If your Apache config is custom or uses non-standard paths, Certbot might not detect them. In that case, use the –certonly flag and manually configure the certificate.
3.3. Renewal cron jobs and verification
Let’s Encrypt certificates expire every 90 days, so automatic renewal is critical. Certbot installs a systemd timer or cron job by default.
To verify: sudo systemctl list-timers | grep certbot
You can manually test renewal with: sudo certbot renew --dry-run
After setting this up on a client server, I used a simple Slack webhook to get notified if dry-run renewals failed. It saved us during a DNS issue we wouldn’t have caught otherwise.
If you prefer cron over systemd, add this to /etc/crontab: 0 2 * * * root certbot renew --quiet
Let’s Encrypt is powerful, but not flawless. In the next section, I’ll guide you through security best practices to harden your Apache SSL configuration and avoid common pitfalls.
>> Read more:
4. Security best practices and configuration
Getting SSL working is a major step, but it’s not the end of the journey. To fully protect your site and visitors, you need to harden your Apache SSL setup. Misconfigured servers may still expose users to outdated ciphers or downgrade attacks, even with HTTPS enabled.
When I audited a client’s server after an SSL install, I found it was using TLS 1.0 and missing secure headers, leaving them vulnerable to MITM exploits. After applying the hardening measures below, their SSL Labs score jumped from a C to an A+.
4.1. Recommended TLS versions and cipher suites
Start by enforcing secure protocols and disabling obsolete ones. Enforcing the latest SSL protocol versions prevents downgrade attacks and ensures compliance.:
Apache SSL config example (inside <VirtualHost *:443>):
SSLProtocol all -SSLv2 -SSLv3 -TLSv1 -TLSv1.1A recommended SSLCipherSuite is SSLCipherSuite HIGH:!aNULL:!MD5:!3DES to block weak ciphers.
SSLHonorCipherOrder on
What this does:
- Disables weak protocols (SSLv2, SSLv3, TLS 1.0/1.1)
- Enforces strong cipher order
- Blocks broken algorithms like RC4, MD5. To enforce client-side certificates, enable SSLVerifyClient inside the VirtualHost block.
OWASP recommends disabling legacy TLS versions and enforcing forward secrecy for all SSL-enabled services.
4.2. Enabling HTTP/2 and secure headers (HSTS, X‑Frame‑Options)
Modern browsers support HTTP/2, which improves performance over HTTPS. Enabling it in Apache: a2enmod http2
Then, in your SSL VirtualHost: Protocols h2 http/1.1
Add security headers to defend against clickjacking, XSS, and other web attacks. Some administrators also use SSLRequire directives to enforce custom access control rules during HTTPS requests.:
Header always set Strict-Transport-Security "max-age=63072000; includeSubDomains; preload"
Header set X-Frame-Options DENY
Header set X-Content-Type-Options nosniff
Header set Referrer-Policy "strict-origin-when-cross-origin"
After deploying HSTS, remember it’s cached by browsers, so only add preload once you’re 100% HTTPS.
4.3. Disabling weak protocols (SSLv3, TLS 1.0/1.1)
While TLS 1.2 and 1.3 are widely supported, older versions (1.0/1.1) are still enabled by default in some Apache builds. Disabling them explicitly is crucial: SSLProtocol -all +TLSv1.2 +TLSv1.3
When I disabled TLS 1.0 on a production server, some legacy clients briefly broke. To solve this, I kept a fallback virtual host for internal apps using an isolated subdomain and strict firewall rules.
4.4. Validating OCSP stapling
OCSP stapling helps speed up certificate validation and reduce load on CA servers.
Enable it in Apache:
SSLUseStapling on
SSLStaplingCache shmcb:/var/run/ocsp(128000)
To verify it’s working: openssl s_client -connect yourdomain.com:443 -status
Look for a section like: OCSP response: no error
According to CISA, enabling OCSP stapling is a best practice for performance and privacy, especially when combined with short-lived certs. You can also monitor Apache logs to check whether each SSL session is being established correctly without handshake errors.
Next, I’ll walk you through common SSL-related errors and how to troubleshoot them effectively.
>> Read more:
5. Troubleshooting common errors
Even after a successful SSL installation, Apache may still encounter issues that can break HTTPS access or generate confusing browser warnings if SSL support is incomplete or misconfigured. Sometimes these problems arise from a misconfigured SSL environment, such as missing modules or outdated libraries.
I’ve helped dozens of users fix broken configurations, and most issues fall into a few common categories. Let’s walk through them one by one.
5.1. Apache failing to start (syntax, permissions)
Symptoms: Apache won’t restart after config changes, especially if the virtual host definitions contain syntax errors or invalid certificate paths.
Common causes:
- Incorrect file paths in SSL Certificate File or SSLCertificateKeyFile
- File permission errors (Apache can’t read cert or key)
- Typos or misplaced directives in the Virtual Host block
Fix:
- Run apachectl configtest to check syntax
- Make sure key and cert files are owned by root and readable:
sudo chown root:root /etc/ssl/private/your.key
sudo chmod 600 /etc/ssl/private/your.key
Real case: One client had an extra space in the SSL Certificate Chain File path—Apache failed silently. Once corrected and permissions set to 600, the service restarted cleanly.
5.2. Certificate mismatch/chain issues
Symptoms:
- Browser error: “Your connection is not private”
- SSL Labs score shows “incomplete chain”
Cause:
- Missing or incorrectly ordered intermediate certificates
- Wrong SSL Certificate Chain File used (or omitted)
Fix:
- Use the correct chain file from your Certificate Authority
- Optionally, use a full-chain PEM that includes all intermediate certs:
SSLCertificateFile /etc/ssl/certs/cert.pem
SSLCertificateChainFile /etc/ssl/certs/chain.pem
SSLCertificateKeyFile /etc/ssl/private/private.key
Tip: Run your domain through the SSL Labs Test to diagnose trust chain issues.
5.3. OCSP stapling errors in logs
Symptoms: Apache error log shows: SSL Library Error: stapling_cache_response_cb: OCSP response expired
Cause:
- Apache can’t reach the CA’s OCSP responder
- Firewall blocking outbound 80/443 traffic
- Clock skew on the server
Fix:
- Ensure outbound access to OCSP URLs (usually on ports 80 or 443)
- Sync server time with ntp or systemd-timesyncd
- Restart Apache after fixing connection issues
I once spent hours debugging this, only to realize outbound connections were blocked by UFW on a hardened Ubuntu install. Whitelisting outbound 443 resolved it instantly.
5.4. Renewal failures (DNS, permissions, rate limits)
Symptoms:
- Let’s Encrypt fails to renew automatically
- Certbot outputs domain validation or permission errors
Common causes:
- DNS A/AAAA records don’t point to the server
- Webroot path mismatch
- Certbot rate-limiting due to repeated failures
Fix:
Double-check DNS with: dig +short yourdomain.com
If using Webroot, verify it matches your Apache DocumentRoot
To check rate limits, visit: https://letsencrypt.org/docs/rate-limits/
I recommend setting up a –dry-run renewal job monthly: certbot renew --dry-run
These issues can seem daunting, but with a systematic approach, most can be resolved in minutes.
Next, let’s answer some frequently asked questions that new Apache admins often encounter when setting up SSL.
6. FAQs about installing SSL certificate on Apache server
When setting up or managing an SSL certificate on Apache, it’s common to run into questions that aren’t fully covered in typical how-tos. Below are beginner-friendly answers to the most frequently asked questions.
What is the difference between SSLCertificateFile and SSLCertificateChainFile?
SSLCertificateFile: This is your domain’s certificate – the one issued specifically for your server (e.g., yourdomain.com.crt).
SSLCertificateChainFile: This contains the intermediate certificates that link your domain cert to a trusted root certificate authority.
Using both ensures browsers trust the full certificate chain. Some CAs now provide a combined “fullchain.pem” file that includes both – in that case, just set SSLCertificateFile to the full chain and omit SSLCertificateChainFile.
How do I renew or replace an expired SSL cert on Apache?
To renew:
1. If you’re using Certbot, just run:
sudo certbot renew
2. For manual certs:
Get a new cert from your CA
Replace the existing .crt, .key, and .chain files
Reload Apache:
sudo systemctl reload apache2
Always check expiry with:
openssl x509 -enddate -noout -in /path/to/cert.pem
Why am I seeing ERR_CERT_COMMON_NAME_INVALID in the browser?
This error usually means the domain name in the browser doesn’t match the certificate’s Common Name (CN) or Subject Alternative Names (SAN).
Fix:
Double-check your cert is issued for the exact domain or subdomain you’re visiting (e.g., www.yoursite.com ≠ yoursite.com)
Consider using a wildcard or SAN certificate if hosting multiple subdomains
Can I serve HTTPS on a custom port instead of 443?
Yes, but users will need to explicitly specify the port in the URL (e.g., https://yourdomain.com:8443).
To do this:
1. Define a new VirtualHost in your Apache config:
<VirtualHost *:8443>
…
</VirtualHost>
2. Make sure the firewall allows that port:
sudo ufw allow 8443/tcp
Note: Custom ports can break some proxies and firewalls.
How can I verify OCSP stapling is working?
You can check with the openssl CLI:
openssl s_client -connect yourdomain.com:443 -status
Look for:
OCSP response: no error
Or use SSL Labs’ test — it shows stapling status under the “OCSP Stapling” section.
7. Conclusion
Learning how to install SSL certificate on Apache server is an essential skill for any web administrator in 2025. While the process may seem complex at first, breaking it down into clear, actionable steps. From uploading certificate files to configuring Apache and testing the setup, it makes it both manageable and repeatable.
To recap, I covered:
- What SSL/TLS is and why it’s critical for securing Apache web servers
- How to install SSL certificate on Apache web server manually and using Certbot
- How to automate certificate renewals and apply security best practices
- Common issues during configuration and how to troubleshoot them efficiently
When I first started managing production environments, one of my biggest mistakes was overlooking the certificate chain. That led to trust warnings in browsers and unnecessary downtime. Once I switched to a checklist approach and automated the process with Certbot, my SSL deployments became faster and more reliable, especially across multiple Apache web servers.
Keep in mind: securing your site with HTTPS isn’t a one-and-done task. Maintaining an SSL-secured Apache server requires periodic validation, automated renewals, and regular protocol updates to stay ahead of vulnerabilities.
Next steps:
- Bookmark this guide for future Apache server configurations
- Set up monitoring for certificate expiration and auto-renewal
Explore more SSL and security how-tos at Tech How-To Simplified on Safelyo. With these practices in place, you’ll ensure that your Apache SSL certificate configuration stays secure, compliant, and trusted by both users and browsers.


