Tired of relying on big tech email providers and want to take full control of your own data? The ultimate solution for digital privacy and sovereignty is learning how to make an email server with a VPS. It’s a powerful step that puts you in the driver’s seat of your most important communications.
However, as a systems administrator who has navigated this complex journey multiple times, I can tell you this project is not for the faint of heart. It requires technical diligence, a willingness to learn, and an understanding that you become responsible for your own security and maintenance.
This isn’t just another technical manual. It’s a strategic guide designed to help you succeed where many others fail. In this comprehensive guide, you will discover:
- The critical pros and cons to help you decide if hosting your own email is a good idea.
- How to choose the right VPS for your email server.
- The easiest, automated path to get your server running quickly.
- The step-by-step process for configuring email server DNS records to ensure your emails actually reach the inbox.
This project is a rewarding challenge. Let me be your guide to building a private, secure, and fully independent email server.
1. Before you start: The pros, cons, and essential checklist
Building your own email server is a deeply rewarding project, but it’s also a serious commitment. Before you purchase a VPS and dive in, it’s critical to have a clear-eyed view of what you’re getting into.
1.1. Is hosting your own email a good idea?
This is the most important question to ask, and the honest answer is: it depends. As someone who has run my own mail server for years, I can tell you the benefits are immense, but so are the responsibilities. Let’s break it down.
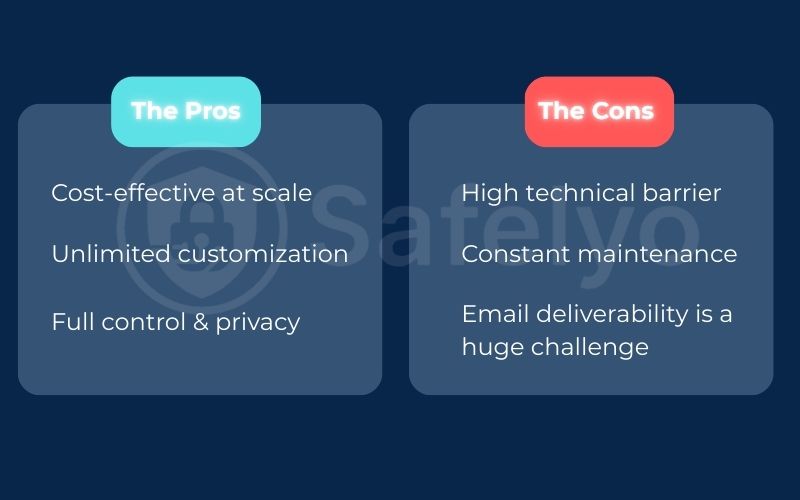
The Pros (The Rewards of Control):
- Full control & privacy: This is the number one reason. Your data resides on your server, and only you have access to it. There are no algorithms scanning your emails to serve you ads. This is the ultimate form of digital privacy.
- Unlimited customization: You can create as many email accounts, aliases, and forwarding rules as you want without paying per user. Need info@, sales@, and support@ all going to one inbox? No problem.
- Cost-effective at scale: If you need to manage dozens or hundreds of email accounts, a self-hosted email server can be significantly cheaper than paying for a business plan from a major provider.
The Cons (The Price of Freedom):
- High technical barrier: This is not a beginner-friendly project. You need a solid understanding of the Linux command-line, DNS, and basic server security principles.
- Constant maintenance: You are now the IT department. You are responsible for software updates, system backups, monitoring for issues, and fighting spam.
- Email deliverability is a huge challenge: This is the final boss of self-hosting email. Ensuring your emails land in the recipient’s inbox – and not their spam folder – is a non-stop battle that requires meticulous configuration and a good reputation for your IP address.
1.2. The essential preparation checklist
If you’ve weighed the pros and cons and are ready for the challenge, congratulations! Here’s what you’ll need to have ready before you start.
- [✓] A suitable VPS: Don’t just pick the cheapest plan. You need a VPS for an email server from a reputable provider that does not block port 25 (the standard SMTP port). Many large cloud providers block this by default to prevent spam.
- Minimum specs: 1 CPU, 2GB RAM, 25GB SSD Storage.
- Crucial requirement: A dedicated, static IP address.
- [✓] A domain name: You’ll need your own domain (e.g., yourdomain.com) to which your email addresses will be attached.
- [✓] Basic Linux command-line skills: You should be comfortable connecting to your server via SSH and running basic commands.
- [✓] Patience: I can’t stress this enough. Setting this up correctly takes time and attention to detail. This is a marathon, not a sprint.
2. The fork in the road: Choose your setup path
When it comes to building a modern email server, you don’t have to assemble every single component from scratch. There are two primary paths you can take, and the one you choose will drastically affect the complexity and time commitment of your project.
2.1. Path A: The “all-in-one” automated suites (recommended for most)
This is the path I strongly recommend for anyone who is not a seasoned system administrator. It involves using a pre-packaged software suite that automates almost the entire installation and configuration process.
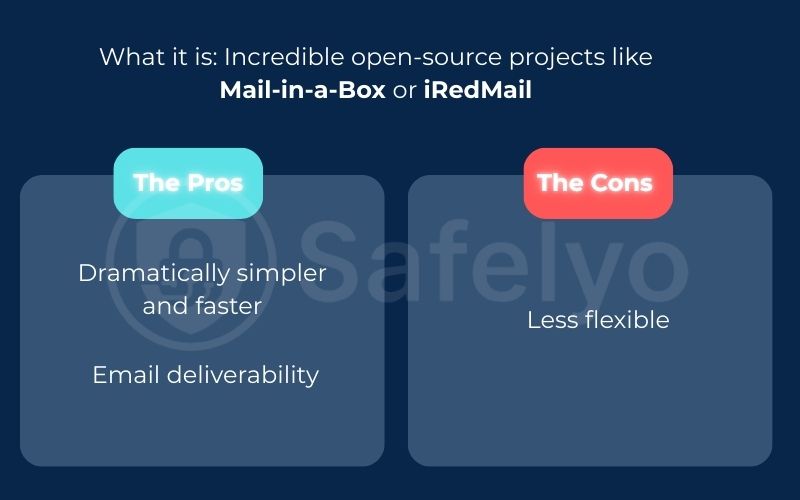
- What it is: Incredible open-source projects like Mail-in-a-Box or iRedMail are essentially “email servers in a box.” You run a single script and answer a few simple questions. The software takes care of the rest. It installs Postfix, Dovecot, the spam filter, and webmail. It also configures most of your initial security settings.
- Pros: Dramatically simpler and faster, reduces the chance of human error, and automatically sets up best practices for security and email deliverability.
- Cons: Less flexible if you want to do highly custom configurations.
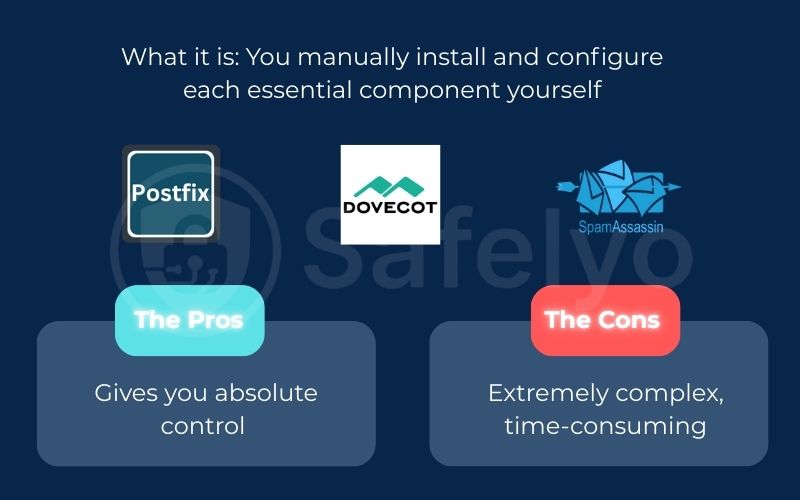
2.2. Path B: The manual “from scratch” setup
This is the traditional, old-school path where you act as the master architect, building your email server piece by piece.
- What it is: You manually install and configure each essential component yourself:
- Postfix (the Mail Transfer Agent, or MTA, that sends and receives mail).
- Dovecot (the service that lets your email client access your mailboxes via IMAP/POP3).
- SpamAssassin (a powerful spam filter).
- And many other small but critical pieces.
- Pros: Gives you absolute control and a deep understanding of how every part works.
- Cons: Extremely complex, time-consuming, and brutally unforgiving of small mistakes. A single typo in a config file can bring the whole system down.
For this guide, we will be focusing on Path A, using Mail-in-a-Box. From my experience, it provides the absolute best balance of control, privacy, and simplicity for anyone embarking on their self-hosted email server journey. It automates the tedious Postfix Dovecot setup while still giving you a fully functional, secure server that you own.
3. Step-by-step guide: Setting up your server with Mail-in-a-Box
You’ve chosen the automated path – an excellent decision! We’ll be using Mail-in-a-Box, a fantastic open-source project that lives up to its name. Follow these steps carefully, and you’ll have a fully functional email server up and running.
3.1. Setting up your VPS and domain
Before we can run the installer, we need to lay the groundwork.
- Launch a fresh VPS. Go to your chosen VPS provider and deploy a new server. The crucial requirement for Mail-in-a-Box is that you select Ubuntu LTS (Long-Term Support) as the operating system.
- Point your domain to the VPS. You’ll need to decide on a hostname for your mail server. The standard practice is to use a subdomain like box. So, your mail server’s name will be box.yourdomain.com. Go to your domain registrar’s DNS management panel and create an A record that points this hostname to your VPS’s static IP address.
- Type: A
- Name/Host: box
- Value/Points to: YOUR_VPS_IP_ADDRESS
- Set your server’s hostname. This is a step many people miss. Log in to your VPS provider’s control panel and find the setting to change your server’s hostname. Set it to be exactly the same as the subdomain you just configured (e.g., box.yourdomain.com). This is vital for email deliverability.
3.2. Running the mail-in-a-box installation script
This is where the magic happens. The Mail-in-a-Box script will handle the entire complex Postfix Dovecot setup, install Webmail, generate SSL certificates with Let’s Encrypt, and harden your server’s security settings.
- Connect to your VPS using SSH as the root user.
Run the single installation command directly from the official project website. This command downloads and executes the setup script: <> Bash curl -s https://mailinabox.email/setup.sh | sudo bash
- Follow the on-screen prompts. The installer is beautifully designed with text-based dialog boxes. It will walk you through a few simple questions:
- Your primary email address (e.g., admin@yourdomain.com).
- Your timezone.
- Confirming your hostname.
Just read each screen carefully and provide the requested information. The script will then run for 10-20 minutes, installing and configuring dozens of software packages. This is where all the hard work is done for you.
3.3. The most critical step: Configuring your DNS records
Once the installation script finishes, it will give you a URL to your new web-based admin panel and a password for your admin user. This next step is the one that determines whether your email server will be a success or a failure. Poorly configured DNS is the #1 reason self-hosted emails go to spam.
- Log in to your Mail-in-a-Box admin panel.
- Navigate to the “System > Status Checks” page. This is your command center. Mail-in-a-Box is brilliant because it analyzes your server and then tells you exactly what email server DNS records you need to set up, providing the precise values.
- Carefully copy and paste each record. Open your domain registrar’s DNS editor in another tab and meticulously create every single record that the Status Checks page tells you to. This will include:
- An MX record to tell the world that box.yourdomain.com is your mail server.
- SPF, DKIM, and DMARC records (as TXT records) to prove your emails are legitimate and not forged.
- Set up Reverse DNS (PTR record). This is non-negotiable, and the only step you can’t do yourself. You must contact your VPS provider’s support team. Send them a ticket that says: “Please set the Reverse DNS (PTR record) for my IP address YOUR_VPS_IP_ADDRESS to point to box.yourdomain.com.” They will handle this for you. Without a matching PTR record, many major email providers will reject your emails outright.
4. Testing and securing your new email server
Your server is built, and your DNS records are propagating across the internet. Now it’s time to verify that everything is working correctly and establish the good habits that will keep your email server healthy and secure for the long term.
4.1. Verifying your setup
This is the moment of truth. Let’s make sure your emails are not only sent but are also trusted by the rest of the internet.
- Check DNS status: First, be patient. DNS changes can take a few hours to be visible everywhere. Periodically go back to your Mail-in-a-Box admin panel and refresh the “System > Status Checks” page. Your goal is to see a wall of green checkmarks. If you see any red X’s after 24 hours, double-check that you copied the DNS record value correctly from the admin panel to your registrar.
- Test your email deliverability: This is the ultimate test. I use a fantastic free tool called Mail-Tester.com for every new server I set up.
- Visit the website, and it will give you a unique, temporary email address.
- From your new email account (using the webmail provided by Mail-in-a-Box), compose and send a simple email to that address.
- Go back to the Mail-Tester website and click the button to check your score.
The tool will analyze your email and provide a score out of 10. It will also give you a detailed report on your SPF and DKIM configuration. Additionally, it checks if your IP is on any blacklists and more. Your goal is a perfect 10/10. If your score is lower, the report will tell you exactly what you need to fix.
4.2. Essential security and maintenance tips
Your secure email server setup is complete, but the job of an administrator is ongoing. Here are the essential habits to adopt:
- Backups are your lifeline: Mail-in-a-Box has a fantastic built-in backup feature. Go to the “System > Backup Status” section of your admin panel and configure it immediately. You can have it automatically back up all your mail data to a remote location like Amazon S3 or even another server via SCP. Do not skip this step.
- Keep everything updated: About once a month, SSH into your server and run two commands. First, update the underlying operating system (sudo apt update && sudo apt upgrade -y). Second, run the Mail-in-a-Box update script itself (curl -s https://mailinabox.email/setup.sh | sudo bash). This keeps your entire system patched against the latest threats.
- Monitoring: Keep an eye on your server’s health through the admin panel. Watch for any unusual activity or error messages. A quick glance at the status page once a week is a great habit for proactive maintenance.
5. FAQ about how to make an email server with a VPS
Venturing into the world of self-hosted email can bring up a few questions. Here are some quick answers to the most common ones.
How much does it cost to run my own email server?
The primary cost is the VPS itself, which can range from $5 to $15 per month for a plan that meets the minimum requirements. Your domain name will cost around $10 – 20 per year. The software recommended in this guide, Mail-in-a-Box, is completely free and open-source.
Can I host multiple domains on one Mail-in-a-Box server?
While it’s technically possible with some advanced configuration, Mail-in-a-Box is designed and optimized for simplicity and works best by hosting a single, primary email domain per server. If you need to manage many different domains, a manual setup or a different software suite might be a better fit.
What happens if my VPS goes down?
If your VPS is offline, you will not be able to send or receive new emails. Incoming emails will be temporarily queued by the sender’s server and retried for a period (usually 1-3 days). Once your server is back online, you will receive them. This is why choosing a reliable VPS provider with high uptime and setting up monitoring is crucial.
Is hosting my own email more secure?
It can be, but only if you maintain it properly. A well-configured and regularly updated self-hosted email server gives you unparalleled privacy because you control the data. However, a neglected server can be less secure than a service like Gmail or Proton Mail. The security is entirely your responsibility.
6. Conclusion
Learning how to make an email server with a VPS is a challenging but immensely rewarding project that puts you in complete control of your digital communications. It’s a definitive step towards data sovereignty and away from reliance on big tech. While the path is technical, the sense of accomplishment is well worth the effort.
Here are the most critical takeaways from your journey:
- Self-hosting is a trade-off: You gain ultimate privacy and control in exchange for the responsibility of security and maintenance.
- Automation is your friend: Using a solution like Mail-in-a-Box drastically simplifies the complex Postfix Dovecot setup, making the project accessible even to non-experts.
- DNS is everything: The success or failure of your project hinges on your email server’s DNS records. Correctly configuring your MX, SPF, DKIM, DMARC, and especially your Reverse DNS (PTR record) is non-negotiable for email deliverability.
If you’ve followed this guide, you now have a private, secure, and functional email server to call your own. To continue mastering your digital world, explore more in-depth technical guides in our Tech How-to Simplified section here on Safelyo.


