Learning how to set up SmartDNS on router is the ultimate “set it and forget it” solution to unlock streaming content on every device in your home – from your smart TV to your gaming console.
Tired of tweaking settings on your laptop, then your phone, then your smart TV every time you want to watch something from another country? Imagine a single, simple change that grants your entire network – your PS5, Apple TV, and every other connected device – seamless access to global libraries on services like Netflix, Hulu, and BBC iPlayer. That’s exactly what this one-time router setup achieves.
As a tech expert who has configured dozens of home networks, I’ve seen firsthand how frustrating it is to have a fast internet connection but still be blocked by geo-restrictions on the big screen. A router-level SmartDNS setup isn’t just a clever trick; it’s the most efficient and powerful way to solve this problem for good.
In this comprehensive guide, we’ll walk you through everything, step-by-step:
- What you need to prepare before you even touch your router.
- The simple 4-step process applies to almost any router model.
- Detailed, illustrated guides for popular brands like Netgear, Asus, and TP-Link.
- The crucial final activation step that most people miss.
Stop juggling settings and start streaming. Let me show you exactly how to configure your router and unlock your home’s full entertainment potential.
1. SmartDNS on a Router vs. on a Device: Why the Router is better
Before we get our hands dirty with the technical steps, you might be asking yourself, “Why go through the trouble with my router? Can’t I just set this up on my Smart TV alone?”
It’s a fair question, but trust me on this. After setting up countless home networks, I can tell you that the initial 10 minutes you spend configuring your router will save you hours of frustration down the line. Think of it as installing a master switch for your entire home versus installing a separate light switch for every single bulb.
The difference is night and day. Here’s a quick breakdown:
| Aspect | Router Setup (The “Master Switch”) | Device-by-Device Setup |
| Coverage | Set it once, covers everything.
Your new PS5, your partner’s laptop, your smart fridge – if it’s on your Wi-Fi, it automatically uses SmartDNS. | One at a time.
You have to configure each device individually. It only works on the device you set it up on. |
| Convenience | Effortless and automatic.
You never have to think about it again. New devices that join your network are covered instantly. | Repetitive and tedious.
You’ll have to repeat the process on your TV, then your phone, then your tablet… It gets old, fast. |
| Compatibility | Universal.
This is the only way to get SmartDNS on devices that don’t let you change network settings, like many gaming consoles, Roku, or older Smart TVs. | Limited.
It’s simply not possible on some devices, leaving them locked out of the fun. |
The choice is clear. While setting up SmartDNS on a single device works in a pinch, configuring it on your router is the superior, long-term solution for a truly seamless streaming experience.
Now that you’re confident this is the right path, let’s get you prepared. Here’s exactly what you’ll need before you begin.
2. Before you begin: What you’ll need
Alright, you’re convinced that the router method is the way to go. Excellent choice. Before we dive into your router’s control panel, we just need to gather two essential “ingredients.” Think of it like a recipe: get your prep work done first, and the actual cooking is a breeze.
2.1. A reliable smart DNS service
First things first, a SmartDNS isn’t something your router can create out of thin air. It’s a service you subscribe to. Essentially, you need the special “key” (the SmartDNS server addresses) to unlock the door to global content.
Now, here’s a pro tip that I always give to friends and family: the best way to get a SmartDNS service is by signing up for a top-tier VPN that includes it in the package.
Why? Because you get two powerful tools for the price of one. You get the SmartDNS for effortless streaming on your TV and consoles, and you also get a full VPN for encrypting your connection and protecting your privacy on your laptop or phone when you’re on public Wi-Fi. It’s like buying a car that comes with a free, high-tech security system.

Services like ExpressVPN (with their “MediaStreamer” feature) or NordVPN (with their “SmartDNS”) are perfect examples of this two-in-one value.
Get Started Here: To move forward, you’ll need to choose a provider. We’ve personally tested and ranked the best VPN services that include a high-quality SmartDNS feature. Check out our recommendations to find the perfect one for your needs.
2.2. Your router’s login details
The second ingredient is the key to your router’s “cockpit” or admin panel. This is where we’ll make all the changes. You’ll need three pieces of information:
- Your Router’s IP Address: This is the web address for your router’s login page. For most people, it’s 192.168.1.1 or 192.168.0.1. Just type one of those into your browser’s address bar and see if a login screen appears.
- Your Username and Password: If you’ve never changed them, they are likely the default ones.

My advice? Before you go digging in your computer’s settings, just flip your router over. 99% of the time, there’s a sticker on the bottom or back that lists the IP address, username, and password you need. It’s the easiest place to start.
If the sticker is missing or unreadable, here’s how to find the IP address (also known as the “Default Gateway”) on your computer:
- On Windows: Open the Command Prompt (just search “cmd” in the Start Menu), type ipconfig, and press Enter. Look for the line that says “Default Gateway.” That’s the address you need.
- On macOS: Go to System Settings > Network, select your Wi-Fi or Ethernet connection, click Details, and then go to the TCP/IP tab. You’ll find the router’s address listed there.
Important Note on ISP Routers
Some routers provided directly by your Internet Service Provider (ISP) – like those from Comcast, Verizon, or Sky – come with locked-down settings. They do this to have more control over their network. If you follow our guides and can’t find the DNS options, this is almost certainly the reason. Don’t worry, you’re not doing anything wrong! In this situation, your best bet is to consider upgrading to a third-party router, which gives you full control over your own network.
3. The general 4-step setup process
I know that logging into a router can feel like stepping into the cockpit of an airplane – lots of buttons and blinking lights. But here’s the good news: you only need to touch one specific control.
No matter what brand of router you own, from a flashy new Asus to a trusty old Linksys, the fundamental process for setting up SmartDNS is always the same. I’ve done this on dozens of different models, and it always boils down to these four core steps.
Here’s the game plan:
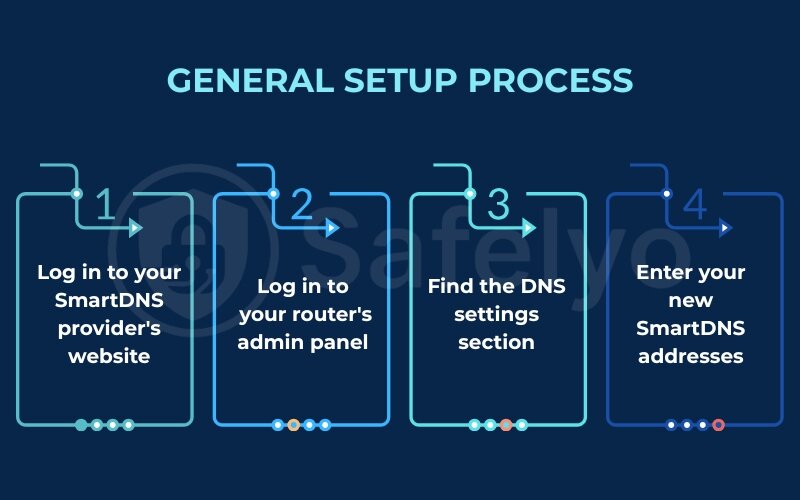
- Log in to your SmartDNS provider’s website. The first thing you’ll do is get the specific SmartDNS server addresses they want you to use.
- Log in to your router’s admin panel. This is where you’ll use the IP address and password we found in the previous section.
- Find the DNS settings section. This is the heart of the operation. It’s usually located under “Internet,” “WAN,” or “Network” settings.
- Enter your new SmartDNS addresses. You’ll simply replace the existing DNS server numbers with the ones from your provider, click “Save” or “Apply,” and then give your router a quick restart.
That’s it. While the exact name of the menu or the color of the button might change from one brand to another, the logic behind what you’re doing never changes.
In the next section, we’ll become your personal navigator. We’ll show you exactly where to look with detailed, illustrated guides for the most popular router brands.
4. Illustrated Guides: How to Set Up SmartDNS on Popular Router Brands
Okay, this is where the magic happens! We’ve talked about what SmartDNS is and why setting it up on your router is the smartest move. Now, let’s get specific. As an expert who’s helped countless users navigate these interfaces, I know how intimidating they can look. But don’t worry – I’m literally going to hold your hand through this.
Below, you’ll find precise, step-by-step instructions for the most common router brands. The beauty of these guides is that they’ll be accompanied by annotated screenshots (which you’ll see in the final published article!) that show you exactly where to click and what to type. No more guessing games!
Just find your router brand and follow along.
4.1. Configure SmartDNS on a Netgear router
Netgear routers, especially those running the Netgear Genie interface, are quite popular and generally user-friendly once you know where to look. I’ve often found their layout to be straightforward, almost like a well-organized file cabinet.
Here’s how to update your DNS settings:
- Access your Netgear Router Admin Panel: Open your web browser and type your router’s IP address (usually 192.168.1.1 or 192.168.0.1) into the address bar. Press Enter. You’ll be prompted for your username and password.
- Navigate to Internet Settings: Once logged in, look for the “Internet” tab or section. It’s often found on the left-hand menu or as one of the main tabs at the top of the dashboard. This is where all your connection-related settings live.
- Locate the DNS Address Section: Scroll down until you find a section clearly labeled “Domain Name Server (DNS) Address.” It might be under “Basic Settings” or “WAN Setup.”
- Select Manual DNS Entry: By default, it’s probably set to “Get automatically from ISP.” You need to change this. Select the option that says “Use these DNS Servers” or “Manual DNS Settings.”
- Enter SmartDNS Addresses: Your SmartDNS provider (e.g., ExpressVPN’s MediaStreamer page) will give you two specific DNS server addresses. Carefully type the primary DNS address into “Primary DNS” or “DNS Server 1” and the secondary into “Secondary DNS” or “DNS Server 2.”
- Apply and Save Changes: Click the “Apply” or “Save” button at the bottom of the page. Your router will likely take a minute or two to save the settings and may even restart automatically.
4.2. Configure SmartDNS on an Asus router
Asus routers, particularly those using the AsusWRT interface, are favorites among tech enthusiasts for their powerful features. They might look a bit more complex, but the DNS settings are actually quite logically placed. It’s like finding a specific tool in a well-organized workshop.
Follow these steps:
- Log into AsusWRT: Open your web browser and enter your router’s IP address (commonly 192.168.1.1). Enter your username and password when prompted.
- Go to WAN Settings: On the left-hand menu, you’ll see a category labeled “Advanced Settings.” Underneath that, click on “WAN” (which stands for Wide Area Network). This is where your internet connection settings are configured.
- Adjust DNS Settings: Within the WAN page, look for the “WAN DNS Setting” tab or section. You’ll usually see an option that says “Connect to DNS Server automatically.”
- Disable Automatic DNS: Change “Connect to DNS Server automatically” from “Yes” to “No” or “Manual.” This will reveal the fields where you can input your custom DNS servers.
- Input SmartDNS Addresses: Carefully enter the primary SmartDNS server address into the “DNS Server1” field and the secondary address into the “DNS Server2” field.
- Apply and Restart: Click the “Apply” button at the bottom right. The router will save the changes and might reboot itself, which is normal.
4.3. Configure SmartDNS on a TP-Link router
TP-Link routers are known for being reliable and affordable, and their interfaces are typically straightforward. I find them to be some of the most intuitive for first-time setup, almost like using a smartphone app – everything is clearly labeled.
Here’s how to configure SmartDNS on your TP-Link:
- Access TP-Link Admin Panel: Open your browser and type your router’s IP address (often 192.168.0.1 or 192.168.1.1) or tplinkwifi.net. Log in with your credentials.
- Go to Advanced Settings: Once inside, look for an “Advanced” tab or section. TP-Link often separates basic and advanced settings, and DNS falls under advanced.
- Navigate to Network > Internet: Within “Advanced,” expand the “Network” section, and then click on “Internet” (or “WAN”). This is similar to the Netgear and Asus setup, as it controls how your router connects to the internet.
- Find DNS Settings: Scroll down on the Internet/WAN page until you see the “DNS Settings” area.
- Choose Manual DNS: Select the option that says “Use the following DNS addresses” or “Manual DNS.”
- Enter SmartDNS Values: Input your primary SmartDNS address into the “Primary DNS” field and the secondary address into the “Secondary DNS” field.
- Save Your Changes: Click “Save” or “OK” to apply the new settings. Your TP-Link router will process the changes and restart if necessary.
4.4. Configure SmartDNS on a Linksys router
Linksys routers, especially those running Linksys Smart Wi-Fi, offer a sleek and modern interface. They tend to organize settings into logical categories, which makes finding the DNS options less of a treasure hunt. It’s like finding a specific app on a neatly organized tablet.
Here’s the process for Linksys:
- Log into Linksys Smart Wi-Fi: Open your web browser and type your router’s IP address (commonly 192.168.1.1 or 192.168.1.0) or linksyssmartwifi.com. Enter your login details.
- Access Connectivity Settings: On the left-hand navigation panel, find and click on “Connectivity.” This section handles various Internet and local network settings.
- Go to Local Network Tab: Within the Connectivity page, click on the “Local Network” tab. This is where you configure settings related to devices within your home network.
- Input Static DNS Addresses: Scroll down until you see fields for “Static DNS 1,” “Static DNS 2,” and potentially “Static DNS 3.” These are the spots for your SmartDNS server addresses.
- Enter SmartDNS Addresses: Carefully type in your primary SmartDNS address into “Static DNS 1” and the secondary address into “Static DNS 2.”
- Apply Settings: Click the “Apply” button, and then confirm with “OK” if a pop-up appears. Your Linksys router will then save the new settings and reboot.
Great. Now that the reader has successfully navigated their router’s settings, we need to guide them through the most critical and often-overlooked final step. This section adds immense value by preventing a common point of failure.
Read more:
5. The most important final step: Activate your IP address
Alright, you’ve done the “hard” part. You’ve navigated the technical menus and successfully told your router to use your new SmartDNS servers. High-five!
But wait, we’re not quite done. There’s one final, simple step that I absolutely must stress because this is the step most people forget. If you skip this, your SmartDNS will not work, and you’ll be left scratching your head, wondering why nothing changed.
Think of it this way: you just gave your router a special key (the SmartDNS addresses), but now you need to tell the lock (the SmartDNS service) that your key is authorized. You do this by registering your home’s public IP address with the service.

This process essentially tells the service, “Hey, it’s me! The user at this specific internet address. Please let me in!“
Here’s how to do it in four easy steps:
- Restart Your Router: If it didn’t restart automatically after you saved the settings, give it a manual reboot now. Unplug it, wait 30 seconds, and plug it back in. This ensures the new DNS settings are fully active.
- Go to Your Provider’s Website: On a device connected to your newly configured network, open a web browser and go to your SmartDNS provider’s website (e.g., NordVPN, ExpressVPN).
- Log in and find the SmartDNS Section: Log in to your account dashboard. Look for a section called “SmartDNS,” “MediaStreamer,” or sometimes it’s under “My Account” or “Dashboard.”
- Click the “Activate” Button: On this page, the service will automatically detect your current public IP address. You will see a big, prominent button labeled something like “Activate my IP address,” “Register my IP,” or “Enable SmartDNS.” Click it.
That’s it! The service will now recognize traffic coming from your home network and route your streaming requests correctly. You’ve officially completed the setup.
6. SmartDNS and dynamic IP: What you need to know
So, you’ve followed all the steps, everything is working perfectly, and you’re enjoying streaming content from around the world. Fantastic! But then, a few days or weeks later, it suddenly stops working. You haven’t changed a thing, so what gives?
Let me tell you from years of experience: if your SmartDNS mysteriously stops working, a changing IP address is almost always the culprit.
Here’s the simple explanation: Most Internet Service Providers (ISPs) assign you a “dynamic IP address.” Think of it like a temporary parking spot for your house on the internet. Your ISP can, and often does, change this address periodically without telling you. It might happen every few days, every week, or whenever you restart your modem.

Remember that critical “activation” step we just did? You told your SmartDNS service to trust your current IP address. When your ISP changes that address, your SmartDNS service no longer recognizes you. It’s like you’ve moved to a new parking spot, and the system’s guest list hasn’t been updated.
So, do you have to log in and click “Activate IP” every few days? Thankfully, no. That would be a huge headache.
The Solution: Dynamic DNS (DDNS)
Most top-tier SmartDNS providers have already thought of this and offer a clever solution, often called “Dynamic DNS” or “DDNS.”
This feature acts as a permanent forwarder for your ever-changing IP address. You get a unique, personal hostname (like yourname.smartDNSprovider.com) that automatically updates whenever your home IP address changes. It’s a one-time fix for this recurring problem.
Setting it up usually involves:
- Finding the “Dynamic DNS” or “DDNS” section in your SmartDNS provider’s account dashboard.
- Following their specific instructions to enable it. This might involve creating a unique hostname.
- Some advanced setups might require you to enter this hostname into a special “DDNS” section in your router’s admin panel, which automates the updates completely.
")
I highly recommend taking a few extra minutes to set this up. It’s the final piece of the puzzle for a truly “set it and forget it” system. It saves you from that future moment of frustration when your favorite show is about to start, and the dreaded “content not available” error pops up out of nowhere.
7. FAQ about how to set up SmartDNS on router
Now that you’re a router-level SmartDNS pro, you might still have a few lingering questions. It’s completely normal. From my experience helping people with their setups, these are the questions that pop up most often. We’ve answered them for you right here.
How to set up SmartDNS on a router?
In short, it’s a four-step process: 1. Get the SmartDNS server addresses from your chosen provider. 2. Log in to your router’s admin panel and find the DNS settings (usually under “Internet” or “WAN”). 3. Replace the existing DNS addresses with your new ones and save. 4. Finally, go back to your provider’s website to activate your current IP address.
How to configure DNS on a router?
Configuring DNS on a router follows the same general steps as setting up SmartDNS. You log in, find the DNS section, and input the new server addresses. People do this for various reasons: using a SmartDNS for streaming, switching to a public DNS like Google’s (8.8.8.8) for potential speed improvements, or using a family-safe DNS for parental controls.
What’s the difference between setting up on my router vs. my smart TV?
Think of the router setup as a “master switch.” It applies the settings to your entire network, so every device (TVs, consoles, phones) automatically uses it. Setting it on your TV only affects the TV itself. The router method is far more convenient and comprehensive.
Will SmartDNS slow down my internet connection?
No. This is a common myth. Unlike a VPN, a SmartDNS service does not encrypt your traffic. It only reroutes the tiny bit of data used for location checks (your DNS requests). Because of this, it has a negligible, virtually unnoticeable impact on your internet speed.
How to set up a vpn on a router?
Setting up a VPN client on a router is a different process. Instead of just changing DNS numbers, it typically involves uploading a configuration file (like an OpenVPN file) provided by your VPN service into a specific “VPN Client” section of your router’s firmware. This encrypts all traffic from every device on your network, providing security and anonymity, which is different from the simple geo-unblocking function of SmartDNS.
How to set up a proxy on a router?
Setting up a proxy directly on most standard consumer routers is uncommon and often not supported without custom firmware (like DD-WRT or Tomato). Unlike SmartDNS, a proxy reroutes your entire traffic through a third-party server, which can be slow. For most users, a SmartDNS (for speed) or a VPN (for security) is a much better and easier solution to configure at the router level.
Can I use SmartDNS and a vpn at the same time?
Not on the same device at the same time, as they can conflict. However, this is where the router setup shines! You can have SmartDNS active on the router for the whole network (perfect for streaming on TVs), and then turn on a full VPN app on a specific device (like your laptop) whenever you need encryption and privacy. You get the best of both worlds.
What if my router doesn’t let me change the DNS settings?
This happens with some routers supplied by Internet Service Providers (ISPs), as they lock these features. In this case, you have two main options: configure SmartDNS on each of your devices individually, or consider upgrading to a more flexible third-party router that gives you full control.
I’ve set up everything, but my streaming service is still blocked. What should I do?
Don’t panic! This is usually an easy fix. Run through this quick checklist: First, double-check that you have activated your IP address on your SmartDNS provider’s website (Step 5). Second, restart both your router and the device you’re using (e.g., your TV). Finally, try clearing the cache in your web browser or the streaming app. If it still doesn’t work, ensure the DNS addresses you entered are correct.
8. Conclusion
By following this guide, you now know exactly how to set up SmartDNS on router – a powerful move to unlock a world of content for your entire household. You’ve tackled what seems like a complex technical task and replaced it with a streamlined, efficient solution for bypassing geo-restrictions.
Let’s quickly recap the key points to remember:
- You learned to prepare by choosing a reliable service (ideally a VPN that includes SmartDNS) and finding your router’s login details.
- We’ve walked through the detailed, illustrated setup steps for major router brands like Netgear, Asus, and TP-Link.
- Crucially, you now understand the importance of the final activation step and how to handle potential issues with dynamic IPs.
You’ve now implemented a truly “set it and forget it” system for geo-unblocking. To explore even more ways to enhance your digital freedom and security, let Safelyo guide you. Dive into our other expert guides in the Streaming Unlock category and take full control of your online entertainment experience.


