Ever wish you had a private sandbox to build, break, and perfect a WordPress site without anyone watching? Think of a local server as your personal web development workshop – a place where you can experiment freely without paying for hosting or fearing you’ll ruin a live website.
Learning how to install WordPress on a local server is one of the most empowering skills you can acquire. Whether you’re a beginner eager to build your first site, a freelancer developing a project for a client, or a seasoned developer testing new themes and plugins, this offline environment is your secret weapon for faster, safer development.
As someone who has spent years developing websites, I can tell you that a local setup isn’t just a “nice-to-have” – it’s the professional way to work. It’s saved me from countless headaches and has been the starting point for every successful project I’ve launched. It’s a game-changer for everyone, not just tech wizards.
In this guide, we’ll walk you through everything:
- Why a local environment is a web developer’s best friend.
- The super-simple ‘1-click’ method to get started in minutes.
- The traditional, manual setup is for those who want to understand what happens under the hood.
- What to do after your site is installed to hit the ground running.
Stop dreaming about that website and start building it – risk-free. Let’s get your private WordPress workshop set up right now.
1. Why should you install WordPress locally?
Before we dive into the how, let’s quickly cover the why. Taking a few minutes to set up a local WordPress environment isn’t just a technical exercise; it’s one of the smartest moves you can make. Think of it as giving yourself a private, cost-free digital playground.
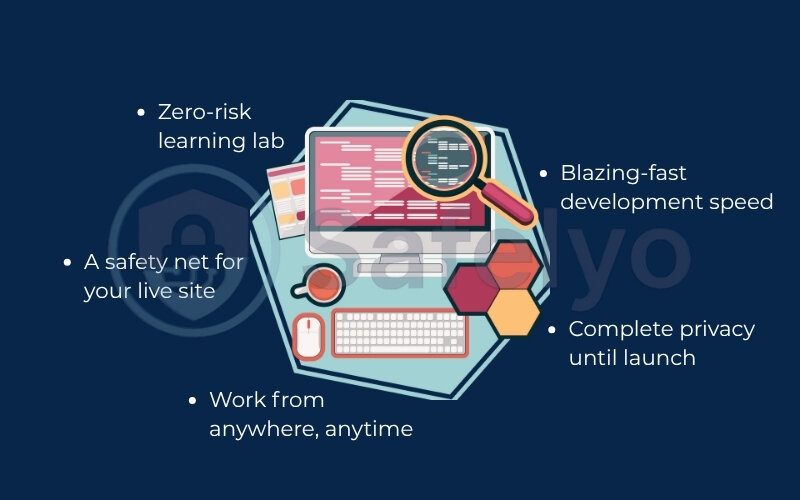
Here’s exactly what you gain by creating a local WordPress environment:
It’s a zero-risk learning lab.
Want to try a complicated new plugin? Go for it. Feel like completely changing a theme’s code? Do it. If you break something, who cares? You can delete it and start over in minutes with zero consequences and, more importantly, zero cost.
Work from anywhere, anytime.
No internet on your commute or at your favorite coffee shop? No problem. Your local site lives directly on your computer, giving you the freedom to build your project completely offline.
A safety net for your live site.
I’ve seen it happen countless times: A seemingly simple plugin update brings an entire live website down. A local server is the perfect staging area. You can test updates, code snippets, and new features here first. Once you confirm everything works perfectly, you can confidently deploy the changes to your public site.
Blazing-fast development speed.
Websites running on your own machine are incredibly fast because there’s no internet lag. This means faster page loads, quicker saves, and a much smoother workflow that saves you time and frustration.
Complete privacy until launch.
Your project remains your secret until you’re ready for the big reveal. No one – not search engines, not competitors, not even curious friends – can see your site until you decide to move it to a live web host.
2. Which method is right for you?
Alright, you’re sold on the benefits. Now comes the first big decision: Which path should you take? There are two main ways to create a local WordPress environment, and they cater to very different needs.
To put it simply, think of it like building furniture.
- Method 1 (Local by Flywheel) is like buying an IKEA flat-pack. You get a box with all the parts perfectly matched, clear picture-based instructions, and a special tool to put it all together. It’s fast, efficient, and designed to get you to the finished product with minimal fuss.
- Method 2 (XAMPP) is like going to a lumber yard. You pick out the wood, the screws, the glue, and the varnish yourself. You have to cut, drill, and assemble everything from scratch using your own tools. It gives you ultimate control, but it requires more knowledge and effort.
In my day-to-day work, I use both for different reasons. To help you choose the right one for you, here’s a quick comparison.
| Feature | Method 1 — Local by Flywheel | Method 2 — XAMPP (The Manual Way) |
|---|---|---|
| Difficulty | Easy (1-Click) It’s like installing an app on your phone. You click ‘next’ a few times, and the software handles all the complicated server stuff for you. |
Medium (Manual) This is more like building a PC. You have to manually start the server components (Apache & MySQL) and connect them to your WordPress files yourself. |
| Setup Time | ~5 Minutes Honestly, it takes about as long as it does to brew a cup of coffee. The process is almost entirely automated. |
~15–20 Minutes This includes downloading different pieces of software, creating a database by hand, and moving files into the right folders. It’s a small project in itself. |
| Best For | Beginners, designers, & freelancers. Perfect if your main goal is to just start building your WordPress site as quickly and easily as possible. |
Developers, students, & tech enthusiasts. Choose this if you’re curious about how a web server works or need precise control over things like your PHP version. |
| Key Feature | Automation & “Live Links” It automatically creates and manages everything. Its killer feature is a ‘Live Link’ that lets you share a temporary, live link of your local site with a client. It’s like magic. |
Full Control & Lightweight You are the captain of this ship. You have full control over the server environment, which is powerful but also means you’re responsible for fixing it if it breaks. |
My advice?
If you’re new to this, start with Method 1: Local by Flywheel. Get a quick win, build your site, and get a feel for WordPress. You can always explore XAMPP later if your curiosity gets the better of you.
3. Method 1 (the easy way): Install WordPress in 5 minutes with local
Welcome to the fast track. If you want to go from zero to a fully working WordPress site in the time it takes to make popcorn, this is the method for you. I recommend this approach to nearly everyone – friends, clients, and family – because it completely removes the technical headaches.
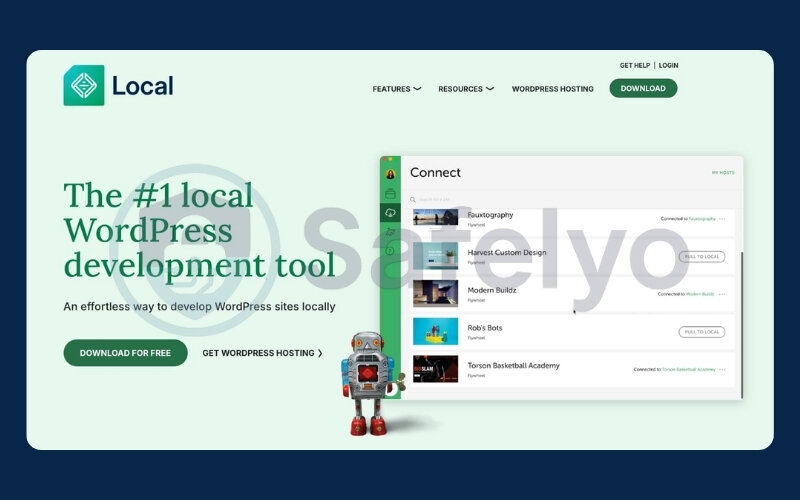
Local is a free app that acts like a smart assistant. You tell it you want a WordPress site, and it handles all the complicated server setup, database creation, and file configuration for you. Let’s get it done.
3.1. Step 1: Download and install the local
First things first, you need the tool itself.
- Head over to the official website: localwp.com.
- Click the big “Download” button. It will ask you to choose your platform (Windows, Mac, or Linux).
- A small form might pop up asking for some basic info like your name and email. Fill it out and download the installer.
- Once the download is complete, run the installer file. The process is just like installing any other app – just follow the on-screen prompts and click “Next” or “Agree.” Within a minute or two, Local will be ready to go.
3.2. Step 2: Create a new site
Now for the fun part. Open the Local app you just installed. You’ll be greeted by a clean, simple interface.
- Look for a big + button, usually in the bottom-left corner. Click it to start the process of creating a new website.
- The app will ask you to give your site a name. This is just for your own reference. Let’s call it my-first-site. You can change this later, so don’t overthink it. Click “Continue.”
3.3. Step 3: Choose your environment
This step sounds technical, but Local makes it incredibly simple. An “environment” is just the combination of server software (like PHP and MySQL) that WordPress needs to run.
- You’ll see two options: “Preferred” and “Custom.”
- Always choose “Preferred”. Think of this as the “Chef’s Special” at a restaurant. The developers of Local have already figured out the perfect, most compatible combination of settings for a standard WordPress site. Choosing this option prevents a ton of potential problems down the road.
- Click “Continue.”
>> Read more:
3.4. Step 4: Set up your WordPress user
You’re almost there! Now you just need to create the login details for your new WordPress dashboard.
- WordPress Username: Pick a username. Avoid using “admin” as it’s a security risk. Something unique to you is best.
- WordPress Password: Create a strong password.
- WordPress Email: Enter the email address you want to use for admin notifications.
- Click the “Add Site” button.
3.5. Step 5: Access your new local site
This is where the magic happens. Local will now work in the background for a couple of minutes. You’ll see it downloading WordPress, setting up the server, and creating the database automatically. You don’t have to do a thing.
Once it’s finished, your site will appear in the Local dashboard. You’ll see two prominent buttons:
- WP Admin: This takes you directly to your WordPress login screen.
- Open Site: This shows you the front end of your brand-new, blank WordPress website.
That’s it! You just installed WordPress on a local server. Click “WP Admin,” log in with the details you created in Step 4, and start exploring your new site.
3.6. Bonus tip: Share your local site with anyone using live links
Here’s a killer feature that makes Local an indispensable tool for me, especially when working with clients.
At the bottom of your site’s dashboard in the Local app, you’ll see a toggle for “Live Link.” Click “Enable,” and Local will generate a unique, shareable URL (something like random-words.loca.lt).
You can send this link to anyone in the world. When they click it, they will see the live version of the website running on your computer. It’s an incredible way to get feedback from a client or show progress to a teammate without ever having to move your site to a real web host. The link is temporary and secure, turning off as soon as you close Local or disable the feature.
4. Method 2 (the manual way): Install WordPress with XAMPP
Alright, are you ready to get your hands a little dirty? Welcome to the traditional method. If Local is the slick, modern power tool, XAMPP is the classic, reliable toolbox. This is the path for those who are curious about what’s really happening “under the hood” of a website.
When I was first learning web development, this was the exact process I followed. It was a rite of passage that taught me the fundamental components of a web server: Apache (the server itself), MySQL (the database), and PHP (the programming language). XAMPP is a free software package that bundles all these things together for you.
>> You may also be interested in: How to install SSL certificate on Apache server in 2026
Don’t worry, it’s not as scary as it sounds. We’ll go step-by-step.
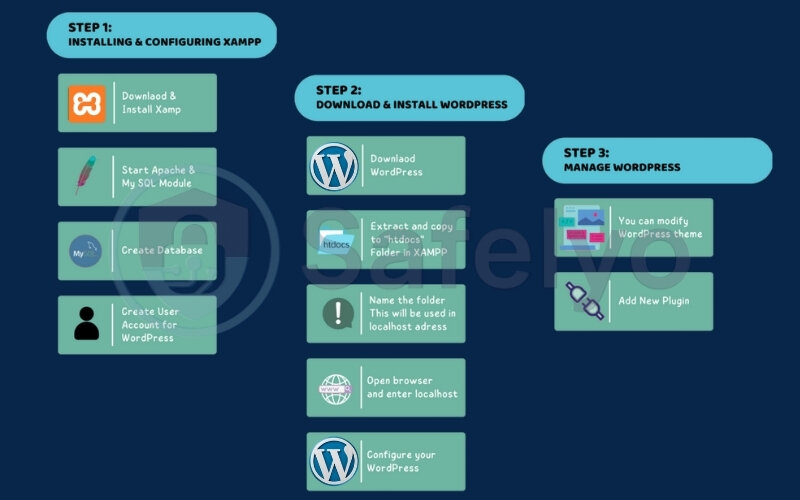
4.1. Step 1: Download and install XAMPP
First, we need to get our server software.
- Go to the official XAMPP website: apachefriends.org.
- You’ll see download options for Windows, Linux, and macOS. Download the version for your operating system.
- Run the installer you downloaded. During the installation, you can simply click “Next” through most of the options.
- Crucial Tip for Windows Users: The installer might warn you about installing XAMPP in the C:\Program Files folder. Listen to this warning! That folder has special permissions that can sometimes interfere with how your server runs. I always install it in a simpler location, like C:\xampp, to avoid any potential headaches.
4.2. Step 2: Start the Apache and MySQL modules
Once XAMPP is installed, you need to “turn on” the server.
- Find and open the XAMPP Control Panel.
- You’ll see a list of modules. The only two you need to worry about are Apache and MySQL.
- Click the “Start” button next to both of them.
- You’ll know they are working correctly when the module names are highlighted in green. If they are green, you’re good to go. Think of this as turning the ignition keys for your web server engine.
4.3. Step 3: Download WordPress
Now that your local server is running, you need the WordPress software itself.
- Go to the official download page: wordpress.org/download.
- Click the button to download the latest version. This will give you a .zip file containing all the necessary WordPress files.
- Important Note: Make sure you are at wordpress.org, not wordpress.com. The .org site is where you get the free, self-hosted software we need. The .com site is a for-profit hosting service.
4.4. Step 4: Create a database using phpMyAdmin
This is the step that sounds most intimidating, but it’s surprisingly simple. WordPress needs an empty database to store all its content – like an empty digital filing cabinet.
- Open your web browser and go to this address: http://localhost/phpmyadmin/.
- This opens the control panel for your MySQL database. It looks complex, but we only need to do one thing here.
- Click on the “Databases” tab at the top.
- In the “Create database” field, give your database a name. Let’s use wp_myproject.
- Click the “Create” button. That’s it! Your empty filing cabinet is now ready for WordPress.
4.5. Step 5: Place WordPress files in the right folder
Now we need to put the WordPress software where our XAMPP server can find it.
- Find the .zip file you downloaded from WordPress.org and unzip it. You will get a folder named WordPress.
- Next, navigate to the folder where you installed XAMPP. Inside, find a folder called htdocs. This is the main “public” folder for your local server. Anything you put here can be viewed in your browser.
- Copy the entire WordPress folder and paste it inside the htdocs folder.
- I highly recommend renaming the WordPress folder to something more descriptive of your project, like my-first-site. Trust me, this will prevent confusion later when you decide to create a second or third site. So, the final path will look something like C:\xampp\htdocs\my-first-site.
4.6. Step 6: Run the WordPress installation
You’ve set all the pieces on the board – now it’s time to connect them.
- Open your web browser again and navigate to your site’s URL. Based on the folder name we chose above, this will be: http://localhost/my-first-site/.
- If you did everything correctly, you will be greeted by the famous WordPress installation screen.
- It will ask you for your database information. This is where you connect WordPress to the “filing cabinet” you made in Step 4.
- Database Name: wp_myproject (or whatever you named it).
- Username: root (this is the default username for XAMPP).
- Password: Leave this field blank. (Yes, it feels strange, but the root has no password by default in XAMPP. You would never do this on a live server!).
- Database Host: localhost
- Table Prefix: wp_ (you can leave this as is).
- Click “Submit,” and then “Run the installation.”
- The final screen will ask you to set your Site Title, create your admin username and password, and enter your email. Fill this out, click “Install WordPress,” and you are done!
Congratulations, you’ve just manually installed WordPress. It was more work, but now you have a much deeper understanding of how the core parts of a website fit together.
5. Your site is ready! What’s next?
Congratulations! You’ve successfully built your private WordPress workshop. You have a fresh, clean installation ready for you to shape into anything you want. Logging into the dashboard for the first time can feel a bit like being handed the keys to a new car – exciting, but also a little overwhelming. Where do you start?
Based on my experience launching dozens of sites, here are the first four things you should do to get your project off to a great start.
5.1. Log in to your dashboard and get acquainted
First, let’s get you inside. Your login URL will almost always be your site’s address with /wp-admin at the end.
- For Local, it’s http://my-first-site.local/wp-admin (or whatever you named your site).
- For XAMPP, it’s http://localhost/my-first-site/wp-admin.
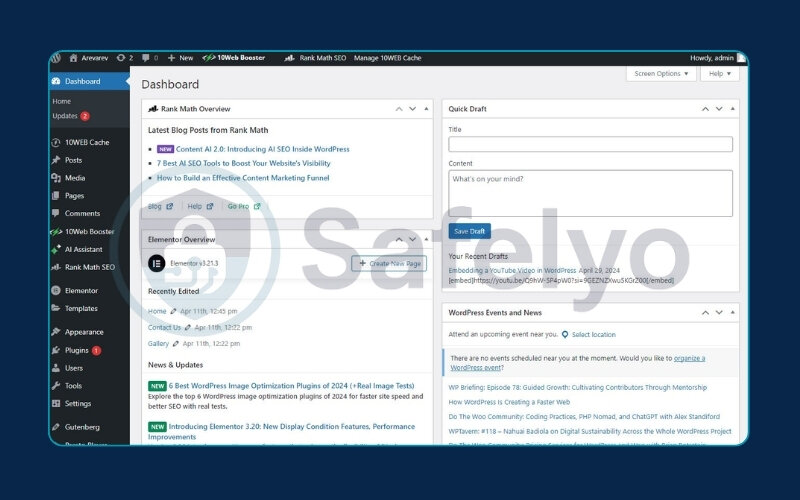
Log in with the username and password you created during setup. Take a moment to look around. On the left is your main navigation menu – this is your command center for everything from creating pages to changing your site’s appearance.
5.2. Tweak your essential settings
Before you do anything else, let’s adjust two fundamental settings that will pay off later.
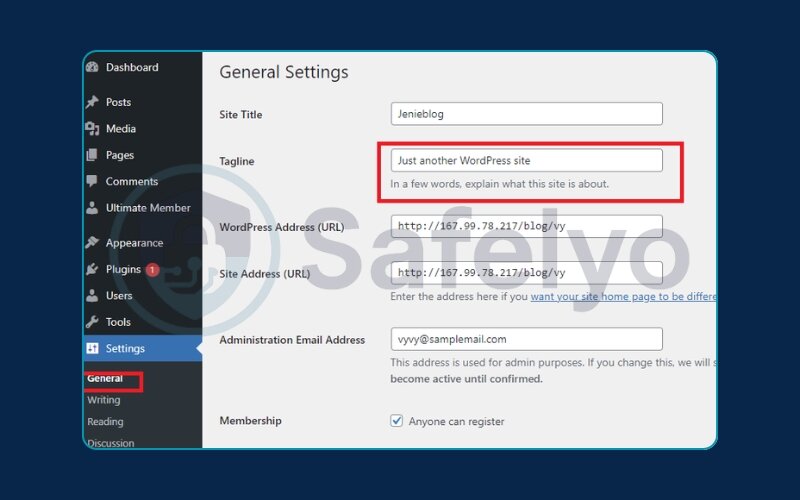
Set your Site Title and Tagline
Go to Settings > General. Here you can change your “Site Title” (e.g., “John’s Awesome Blog”) and “Tagline” (e.g., “A journey into tech and travel”). This is how your site identifies itself to the world (and to Google).
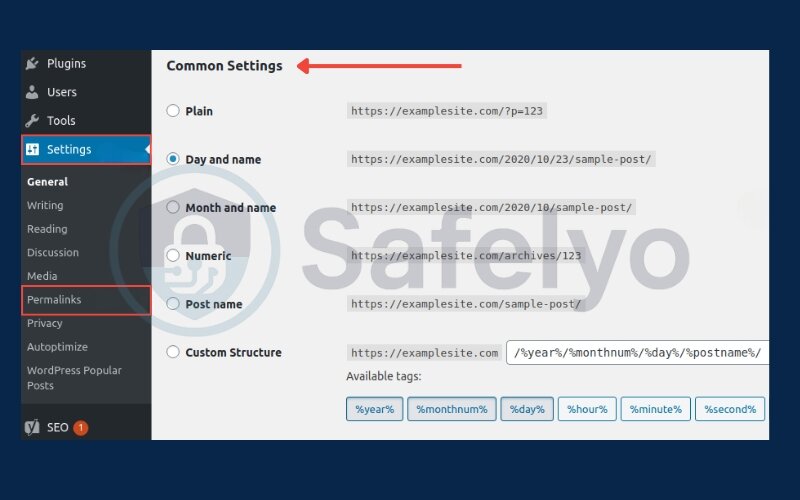
Fix your Permalinks
This is a huge one for SEO. Go to Settings > Permalinks. By default, WordPress uses a “Plain” structure that looks like yoursite.com/?p=123. This is ugly and bad for search engines. Select the “Post name” option. This will make your URLs clean and readable (e.g., yoursite.com/about-me). It’s a simple click that makes a world of difference.
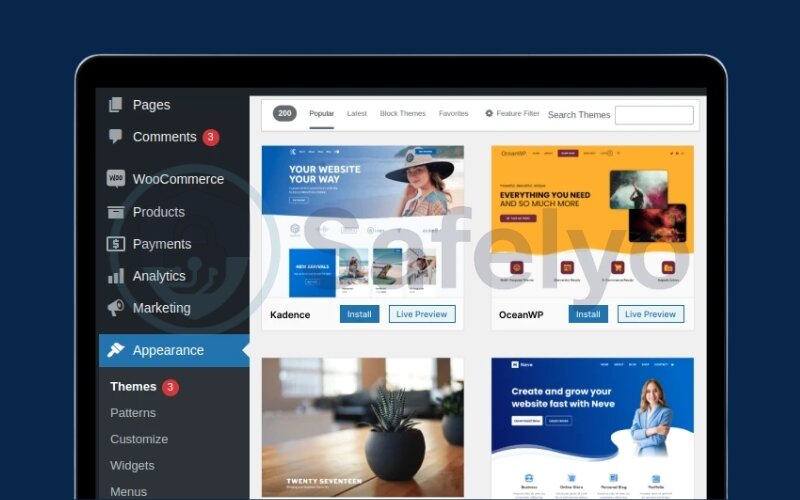
5.3. Install a beautiful theme
Your theme controls the entire look and feel of your website – the layout, the colors, the fonts. The default WordPress theme is fine, but you’ll probably want something that better fits your vision.
- Navigate to Appearance > Themes.
- Click the “Add New” button at the top.
- You can now browse thousands of free themes from the official WordPress directory. You can filter by layout, features, or subject.
- When you find one you like, hover over it and click “Install,” then “Activate.” Just like that, your site has a brand-new design.
5.4. Add essential plugins
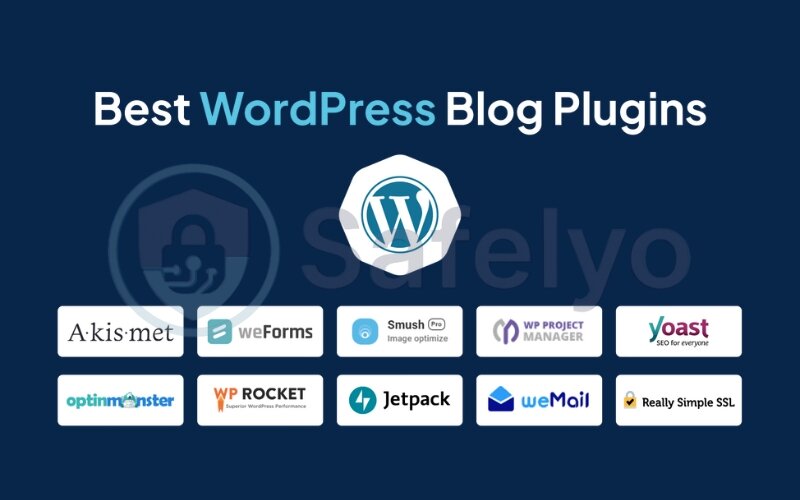
Plugins are like apps for your website; they add new features and functionality. While it’s tempting to install dozens, I always start with just a couple of essentials.
- Go to Plugins > Add New.
- Here are two types of plugins I recommend installing right away:
- A Page Builder: Tools like Elementor or Spectra give you drag-and-drop control over your page design, freeing you from the limitations of the standard editor. It’s like playing with digital LEGO.
- An SEO Plugin: A plugin like Yoast SEO or Rank Math will guide you on how to optimize your pages and posts to be found on Google. It’s like having a little SEO coach built right into your dashboard.
With these four steps completed, your site is no longer a blank slate. It’s a proper foundation, ready for you to start creating pages, writing blog posts, and bringing your vision to life.
6. Ready to go live? Moving from localhost to a live server
You’ve spent hours, days, or maybe even weeks crafting the perfect website on your local server. It’s fast, it looks great, and it works exactly how you want it to. Now, it’s time to share it with the world.
This process – moving your site from your private computer to a public web host – is called “migration.” If your local site is a car you built in your garage, migration is the process of getting it registered, insured, and out on the public roads. It can seem intimidating, but it breaks down into a logical sequence of steps.
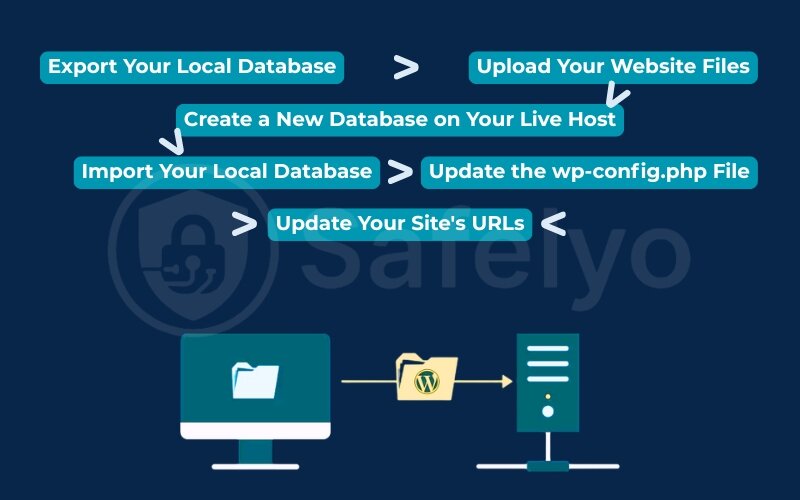
From my own experience, doing this manually the first few times was a nail-biting process. You’re essentially performing a digital transplant, and it’s easy to miss a step. Here’s a simplified overview of what that transplant involves:
- Export Your Local Database: This is the “brain” of your site – all your posts, pages, and settings. You’ll use a tool like phpMyAdmin on your local server to export this as a single .sql file. Think of this as taking a complete copy of your digital filing cabinet.
- Upload Your Website Files: These are the “bones” of your site – your themes, plugins, and images. You’ll use an FTP (File Transfer Protocol) program like FileZilla to copy your entire website folder from your computer’s htdocs or local sites directory to your new web host’s server.
- Create a New Database on Your Live Host: Your live host needs a new, empty filing cabinet ready to receive your old data. You’ll typically do this through your hosting provider’s control panel (like cPanel).
- Import Your Local Database: You’ll then use the phpMyAdmin tool on your live host to import that .sql file you saved in step 1. This effectively transfers the “brain” of your site into its new home.
- Update the wp-config.php File: This is a critical configuration file. You need to open it and tell WordPress the name and login details for the new database you just created on the live server. It’s like updating the address on your driver’s license.
- Update Your Site’s URLs: Finally, you need to run a search-and-replace on the database to change all instances of your local address (like http://localhost/my-first-site) to your new live domain name (like https://www.myawesomesite.com). This ensures all your internal links and images work correctly.
As you can see, the manual process has many steps where things can go wrong. Furthermore, the performance of your live site – how fast it loads for visitors – depends entirely on your hosting provider. I’ve seen beautifully built local sites become painfully slow after moving them to a cheap, low-quality host. A slow host can make all your hard work feel wasted.
To ensure your site is fast, secure, and reliable from day one, it’s crucial to choose the right foundation.
>> Explore Safelyo’s expert review of the Best WordPress Hosting Providers to find a partner that guarantees a smooth launch and excellent performance for your new website.
7. Troubleshooting common issues
Even with the best instructions, technology can sometimes have a mind of its own. It’s completely normal to hit a snag or two, especially when you’re setting up a server environment for the first time. I’ve been there, staring at a cryptic error message at 1 AM.
Don’t panic. Most problems have simple solutions. Here are some of the most common hurdles you might encounter and how to clear them. (On our site, we’ve tucked these into an easy-to-use accordion so you can find exactly what you need.)
COMMON ISSUES
ERROR:

"Error establishing a database connection"
This is the most common error of all. It’s WordPress telling you, “I can’t find or log into the database you told me to use.”
The Fix (for XAMPP): 99% of the time, this is a typo in your wp-config.php file. Double-check the database name, username (root), and password (it should be blank!) that you entered during the manual installation.
ERROR:

XAMPP Port Conflict (Apache won't start)
You click “Start” on Apache in the XAMPP control panel, but it immediately stops or stays yellow. This usually means another program on your computer is already using the standard web server port (Port 80). The most common culprit? Skype.
The Fix: The easiest fix is to close the conflicting application (like Skype) and try starting Apache again. If that’s not an option, you can configure Apache to use a different port, like Port 8080.
ERROR:

The White Screen of Death (WSOD)
You try to load your site and get nothing but a terrifying, blank white screen. This is almost always caused by a faulty plugin or theme.
The Fix: You need to find the culprit. Using your computer’s file explorer, navigate to your site’s folder (htdocs/yoursite or Local Sites/yoursite), find the wp-content folder, and rename the plugins folder to plugins_old. This deactivates all plugins. If your site comes back, you know a plugin was the problem. Rename the folder back and reactivate your plugins one by one until you find the one causing the issue.
>> You may also be interested in: How to set up two-factor authentication on WordPress in 2026
8. FAQ about how to install WordPress on a local server
How do you install WordPress on a local server?
You have two main options. The easiest way is to use a free app like Local, which automates the entire process into a few clicks. The manual method involves using software like XAMPP to set up a server environment, creating a database yourself, and then running the WordPress installation.
Can I build a WordPress site locally?
Yes, absolutely. Building a WordPress site locally is the recommended professional practice. It allows you to develop, test, and design your entire website on your personal computer for free and without the risk of breaking a live site.
How do I run an existing WordPress site locally?
To run a live site locally (often for testing or redesign), you need to migrate it down to your local server. The process involves exporting the live site’s database, downloading its files (from wp-content), setting up a new local site (with Local or XAMPP), and then importing the database and files into the new local environment.
How to put a WordPress website on a live server?
This process, called migration, involves five main steps: 1) Exporting your local database. 2) Uploading your WordPress files via FTP to your web host. 3) Creating a new, empty database on your live host. 4) Importing your local database into the new one. 5) Updating the wp-config.php file to connect to the new database.
What’s the difference between XAMPP, MAMP, and WAMP?
They all provide the same core function: a local server environment. XAMPP is Cross-Platform (works on Windows, Mac, Linux). WAMP is for Windows only. MAMP was originally for Mac only. We generally recommend XAMPP for its versatility.
Is Local by Flywheel really free?
Yes, all the core features needed to build and manage unlimited local WordPress sites are completely free. They offer optional paid plans for advanced agency and team features, which most individual users will not need.
Can I install multiple WordPress sites on the same localhost?
Yes. With Local, you simply click the “+” button to create a new, isolated site. With XAMPP, you create a new folder in htdocs and a new database for each website you want to build.
9. Conclusion
Congratulations! You’ve not only learned how to install WordPress on a local server, but you’ve also unlocked a powerful and professional workflow. You now have a private, risk-free space to build, experiment, and perfect your web projects. This is the foundational skill that separates casual hobbyists from serious creators.
Let’s quickly recap the key takeaways from this guide:
- A local server is your best friend: It’s free, fast, secure, and lets you work offline, providing the perfect sandbox for any WordPress project.
- Start with Local for an easy win: For beginners, designers, and anyone who wants to get building quickly, Local is the recommended tool. Its 5-minute, 1-click setup is unbeatable.
- Use XAMPP to understand the “how”: For developers and the technically curious, the manual XAMPP method provides a deeper understanding of how a web server’s components work together.
- Plan your next steps: After installation, focus on setting your permalinks, choosing a theme, and installing a few essential plugins to build a solid foundation.
You’ve taken the first, most important step on your web development journey. This local site is your canvas. When you’re ready to share your masterpiece with the world, choosing the right foundation is absolutely critical. In our Tech How-To Simplified series, Safelyo is committed to guiding you through every stage. Explore the expert review of the best WordPress Hosting providers to ensure your site has a smooth launch and the excellent performance it deserves.

