So you’ve decided to take control of your online privacy and are ready to learn how to set up a VPN. That’s a great choice! The process might sound technical, but getting started is far simpler than you might think.
As a cybersecurity analyst who has guided countless users through their first setup, I know that you don’t need a complex, jargon-filled manual. You need a straightforward path to security. Unlike many guides that overcomplicate things, this one focuses on the simple, app-based method that gets 99% of users protected in just a few minutes.
-
Choosing a trusted VPN
-
Sign up and download the app
Sign up for your chosen VPN service and download the official app for your computer or phone.
-
Install and log in
Install the app, open it, and log in with the account credentials you just created.
-
Connect to a server
Click the big “connect” button to instantly encrypt your traffic and hide your IP address.
-
Enable the kill switch
-
Choose the right protocol
-
Turn on auto-connect
Let me guide you through the entire process, from selecting a provider to establishing your first secure connection.
1. Step 0: The most important decision – choosing a trusted VPN
Before you download or install anything, the most critical step in learning how to set up a VPN is choosing the right provider. In my experience, this single choice will define your entire experience with security, speed, and ease of use.
Not all VPNs are created equal, and this is especially true for free services. A free VPN might not cost you money, but you often pay with slow speeds, intrusive ads, or worse – your data. A trustworthy, premium VPN is an investment in your privacy.
When you’re choosing a provider, look for these three non-negotiable criteria:
- A strict no-logs policy, clearly stated in their privacy policies: This is your guarantee that the VPN provider does not record your online activity. Look for services that have had their data retention policy verified by an independent audit.
- Strong security features: At a minimum, the service must include a kill switch (to protect you if the VPN disconnects), strong encryption, and use modern, secure protocols like WireGuard or OpenVPN.
- Easy-to-use apps: A good VPN will have user-friendly apps and allow for multiple simultaneous connections. This makes the setup process incredibly simple.
This first step is crucial for your security. If you haven’t chosen a provider yet, I highly recommend you see our expert rankings of the best VPN services of 2025 to make an informed decision. Making the right choice here is the difference between true privacy and a false sense of security.
2. The 3-step setup: Using the VPN app (the easy way for 99% of users)
Now for the main event. Forget complicated network settings or manual configurations. The absolute easiest and most reliable way to set up a VPN is by using the official application provided by your chosen VPN service. This is the method I use and recommend for everyone from beginners to tech experts because it’s fast and guarantees you get all the features, like the kill switch.
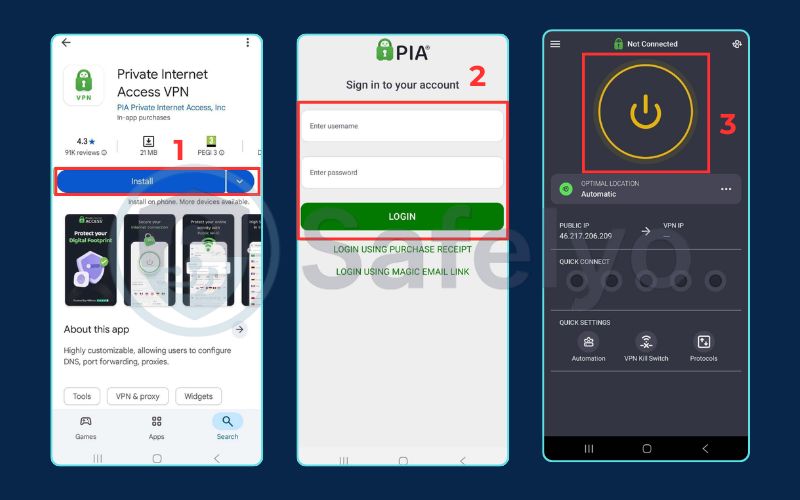
In a nutshell, the entire process boils down to these three simple actions:
- Step 1: Sign up for your chosen VPN service and download the official app for your computer or phone.
- Step 2: Install the app, open it, and log in with the account credentials you just created.
- Step 3: Click the big “connect” button to instantly encrypt your traffic and hide your IP address.
Now, let’s walk through each of these steps in more detail.
2.1. Step 1: Sign up and download the app
First, you need to get the software.
- Start by visiting the official website of your chosen VPN provider. I can’t stress this enough – always download from the official source to avoid malicious fake software.
- Choose a subscription plan that suits you and create your account. You’ll use these login details in the next step.
- After activating your account, go to the “Download” or “Apps” section on the website. It typically recognizes your operating system automatically. Then, get the suitable installer .exe for Windows or .dmg for Mac.
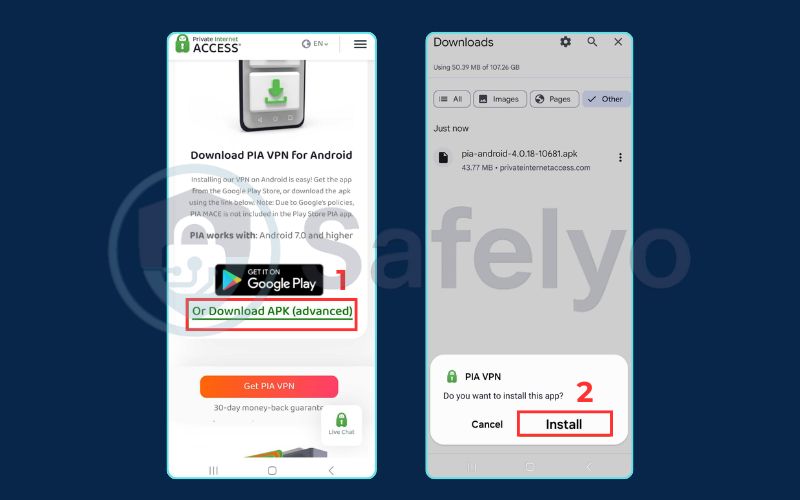
For your phone or tablet: The process is even simpler. Just open the Apple App Store (for iPhone/iPad) or the Google Play Store (for Android), search for your VPN provider’s name, and download the official app directly.
2.2. Step 2: Install and log in
This part is just like installing any other program you’re used to.
- On your desktop (Windows/Mac): Find the file you just downloaded and double-click it. An installation wizard will pop up and guide you through a few simple clicks. Just follow the on-screen prompts.
- On your phone (iPhone/Android): The app will install automatically after you download it from the store.
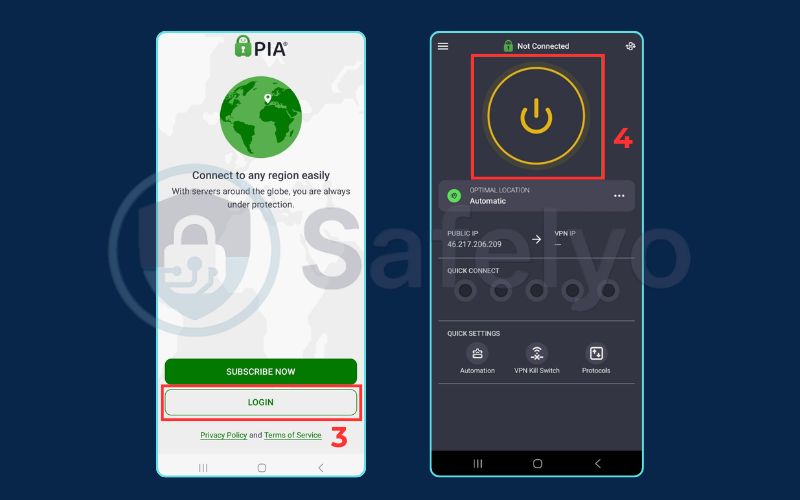
- Once installed, open the VPN app. You will be prompted to log in using the username and password you created in step 1.
- Important: On the first launch, the app will ask for authentication and permission to add VPN configurations to your device. You must click “Allow” or “Ok”. This is a standard and necessary security prompt that allows the app to manage your network connections and encrypt your traffic.
2.3. Step 3: Connect to a server
You’re at the final, and most satisfying, step.
- Most VPN apps have a large, obvious “Quick connect” button on their main screen. Clicking this will automatically connect you to the fastest or best server for your location. For your first time, this is the perfect option.
- Alternatively, you can click on the “server list,” “locations,” or “all countries” button. This will show you a list of countries. For tasks like location spoofing to access region-specific content, just find “United Kingdom” in the list and click connect.
Congratulations! Your connection is now encrypted, and your IP address is hidden. You’re browsing securely.
Safelyo’s expert tip
Verify your new connection in 10 seconds
You’re connected! But how do you know for sure it’s working? Open a new tab in your web browser and search for “what is my IP address“. The location and IP address shown should match the VPN server you connected to, not your real location. This simple check gives you 100% confidence that your VPN is active and protecting you.
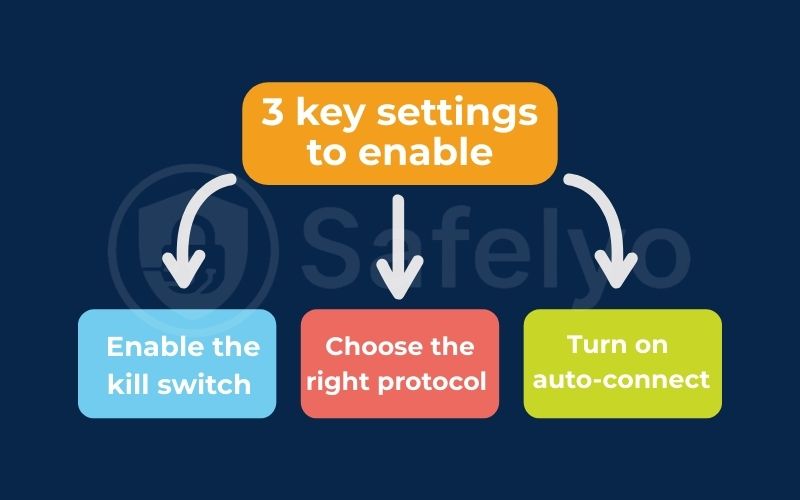
3. What to do next: 3 key settings to enable
Excellent, your VPN is installed and working. But to get the absolute most out of it, we need to activate a few crucial features. Think of this as putting on your seatbelt after starting the car. Taking 60 seconds to enable these settings will ensure you have maximum protection.
1. Enable the kill switch
The kill switch is the VPN’s most important security feature. You can think of it as an emergency brake for your connection. If the VPN drops even for a moment, it immediately stops all online activity, including sensitive P2P traffic, until the link is restored. This feature is crucial for sensitive tasks such as P2P sharing, as it keeps your real IP address from being exposed. For me, it is always the first option I turn on whenever I set up a new VPN.
- Where to find it: You’ll almost always find this in the app’s settings menu, often under a tab called “connection,” “general,” or “privacy features.”
2. Choose the right protocol (optional but good to know)
A VPN protocol is the technology a VPN uses to create its secure tunnel, and it’s different from features like split tunneling. Most apps are set to “automatic” by default, which is perfectly fine for beginners.
My recommendation: If you do want to choose manually, here’s a simple rule of thumb.
- If you see WireGuard as an option, select it. It’s the latest and fastest protocol, perfect for streaming, gaming, and everyday browsing.
- While there are many VPN protocols, OpenVPN is an excellent choice. Avoid older VPN protocols like L2TP/IPSec, SSTP, and especially the insecure PPTP. You can’t go wrong with either.
3. Turn on auto-connect
This is my “peace of mind” setting. Auto-connect tells the VPN app to automatically start and connect the moment you join an untrusted wi-fi network – like the one at a coffee shop, airport, or hotel. It means you’re protected automatically without even having to think about it.
- Where to find it: Look for settings called “Auto-connect“, “Connection rules“, or “Trusted networks“. You can often set it to activate on any Wi-Fi network except for your trusted home network.
4. How to set up a VPN on other devices
While the app method is perfect for your computer and phone, what about devices like your router, smart TV, or game console? These often require a different approach because they can’t run standard VPN apps.
To make it easier to see which method is right for you, here’s a quick summary:
| Device | Common Setup Method | Difficulty Level |
| Wi-Fi router | Manual configuration in the admin panel | Advanced |
| Smart TV (Android TV) | Download the VPN app from the Google Play Store | Easy |
| Smart tv (other) / Apple TV | Use Smart DNS or connect via router | Medium |
| Linux | Install and run via command line (terminal) | Medium |
Here’s a quick overview of the most common methods.
On a Wi-Fi router
The ultimate “set it and forget it” solution is to install the VPN directly on your router. The biggest benefit is that it automatically protects every single device connected to your Wi-Fi network, including your smart TV, game consoles, and guests’ phones. I often recommend this for families or tech-savvy individuals who want blanket coverage.
However, this is an advanced process. It requires a compatible router and involves logging into your router’s admin panel to manually install special configuration files provided by your VPN service. Always check your VPN provider’s website for their list of compatible routers and a specific setup tutorial.
On a smart TV / Apple TV
Most smart TVs (except for those running Android TV/Google TV) don’t have a native app store for VPNs. You have two great options here:
- Connect it to your VPN-enabled router: This is the easiest solution if you’ve already completed the step above.
- Use a “smart DNS” service: Most top VPNs offer this feature. Think of it as a lightweight tool designed specifically for streaming. It changes your virtual location to unblock content without the heavy encryption of a full VPN. It’s less secure, but perfect for a movie night.
On Linux
Most major VPN providers offer excellent support for Linux users, typically through a command-line interface (CLI) app. Instead of clicking buttons, you’ll use simple text commands in the terminal. The process usually involves downloading the installation package from the VPN’s website and running a few commands to install and connect.
>> You may also be interested in:
5. Appendix: A quick note on manual setup (for advanced users)
While 99% of users should stick with the dedicated app, I want to briefly mention the manual method for tech-savvy users who might have a specific need.
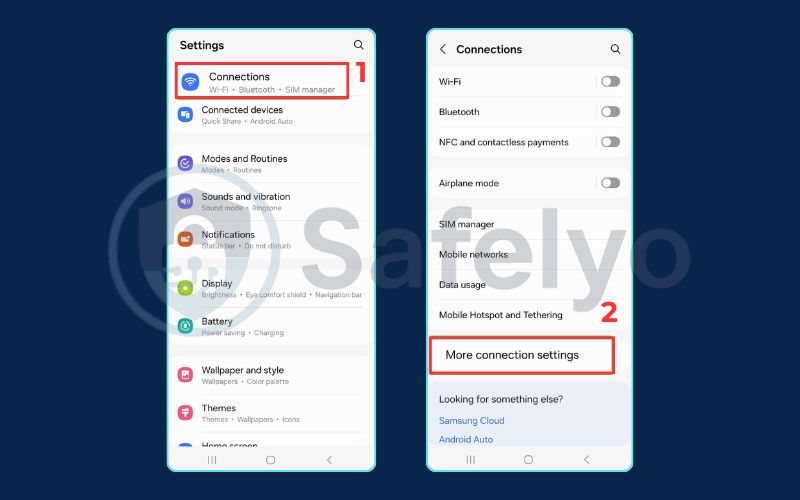
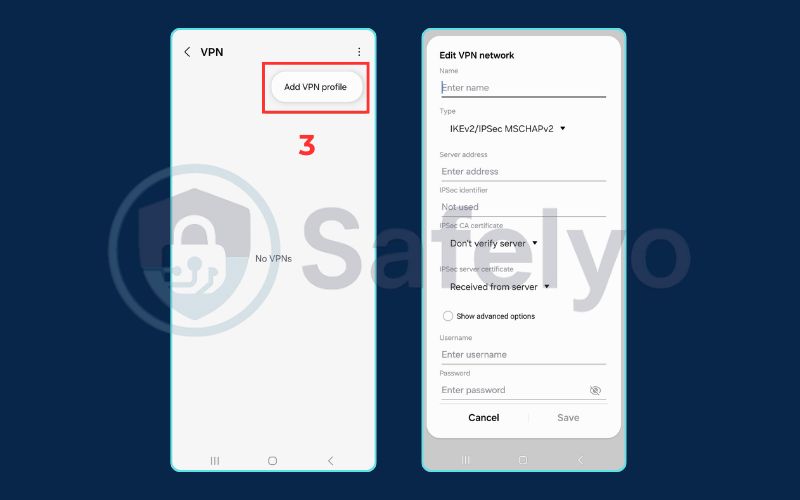
It is possible to perform a manual network configuration directly within your operating system’s settings. This process requires you to first download special configuration files (often with a .oVPN or .ikev2 extension) from your VPN provider’s website. You then import these files into your os’s built-in VPN client.
However, I rarely recommend this path. This method offers less flexibility and fewer critical features. Most importantly, you will almost always lose access to the VPN’s kill switch, which is a major security compromise. For a secure, feature-rich experience, always stick to the dedicated app.
6. FAQ about how to set up a VPN
We’ve covered the main steps, but here are quick answers to some of the most common questions people have when they set up a VPN for the first time.
How do I connect to a VPN for the first time?
The process is very simple. After choosing a provider, you just need to download their official app, log in with your account credentials, and click the main “connect” button. The app will handle the rest for you automatically.
How to set up a VPN?
The simplest way involves three steps:
- Choose a reputable VPN service and create an account.
- Download and install their official app onto your device (computer or phone).
- Open the app, log in, and click the ‘Connect’ button to secure your connection.
What is the easiest VPN to set up?
Most top-tier VPNs like NordVPN, ExpressVPN, and Surfshark are incredibly easy to set up. Their apps are specifically designed for beginners and feature a simple, one-click connection process, just like we walked through in this guide.
Can I set up a VPN for free?
While you can set up a VPN using a free service, we generally advise against it for security. Free VPNs often have significant performance issues, data limits, and may even sell your user data. A reputable paid VPN is the only way to guarantee your privacy is protected.
How do I know if my VPN is working?
After connecting, open your web browser and search for “what is my IP address”. The website you visit should show the location and IP address of the VPN server, not your real, physical location. This is a 10-second check that confirms you’re protected.
Are VPNs legal?
Yes, using a VPN is perfectly legal in the vast majority of countries, including the U.S., Canada, and most of Europe, especially when used for privacy and security. However, using a VPN to commit illegal acts is still illegal.
7. Conclusion
As you’ve seen, learning how to set up a VPN is no longer a complex task reserved for tech experts. Thanks to modern, user-friendly VPN apps, you can secure your digital life and be up and running in just a few minutes. You’ve successfully installed the tool; now it’s time to build the habit of using it.
You’ve just taken a massive step in securing your digital life. With your VPN now active and protecting you, Safelyo invites you to explore our full guide on VPN uses, from global streaming to cheaper flights. For more step-by-step tutorials and practical tips, be sure to explore our VPN Guides category.

