
Learning how to configure DNS settings on a router lets you replace your ISP’s default DNS server with a public DNS service such as Cloudflare, Google Public DNS, or Quad9. The change can improve DNS reliability, add security or family filtering, and apply the selected resolver to many devices connected to your home network.
This guide explains how to find your router address, enter new IPv4 and IPv6 DNS values, configure popular router brands, verify the result, and fix common problems. You will also learn when browser settings, VPNs, or encrypted DNS can override the configuration on your router.
Key takeaways
- Changing DNS on a router can apply the new resolver to devices that automatically receive their network settings through DHCP.
- Record the existing IPv4 and IPv6 settings before making changes so you can restore them if necessary.
- Public DNS may improve reliability or provide security filtering, but speed improvements depend on your ISP, location, and network conditions.
- Entering a public DNS address does not automatically encrypt DNS traffic. DNS over HTTPS or DNS over TLS requires separate support from the router.
- VPN apps, browser Secure DNS, Android Private DNS, and manually configured devices may bypass the DNS settings distributed by your router.
1. How to configure DNS settings on a router
Although router interfaces vary between manufacturers, the basic process is similar. You need to access the administration panel, find the DNS fields, enter the addresses supplied by your preferred provider, and verify that connected devices are using the new resolver.
Follow these general steps:
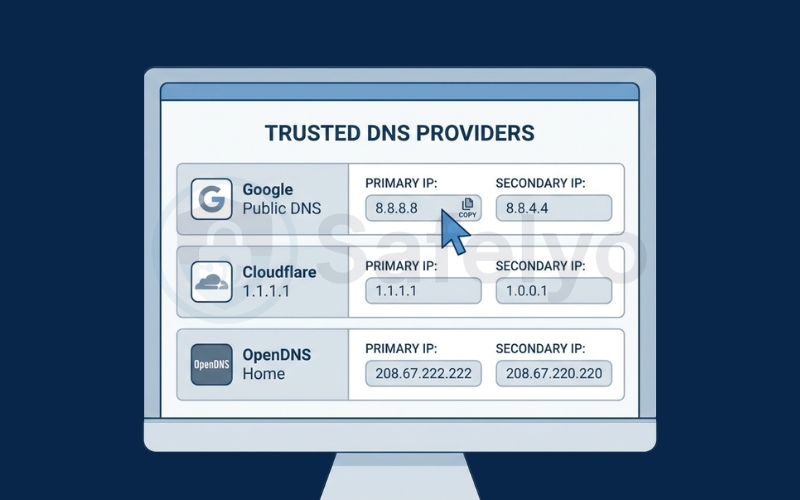
Step 1: Choose a trusted DNS provider and copy its primary and secondary DNS addresses.
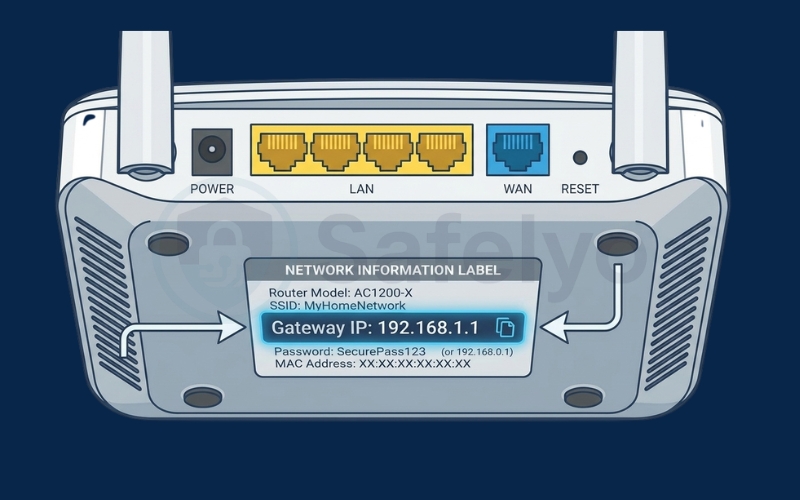
Step 2: Find your router’s gateway IP address. Common addresses include 192.168.1.1 and 192.168.0.1, although your network may use a different address.
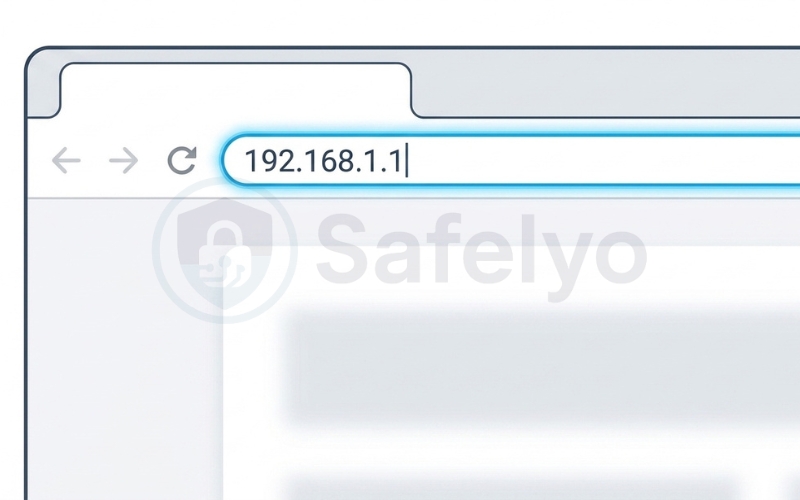
Step 3: Open a web browser and enter the gateway address directly into the address bar.
Step 4: Sign in using the router’s administrator credentials.
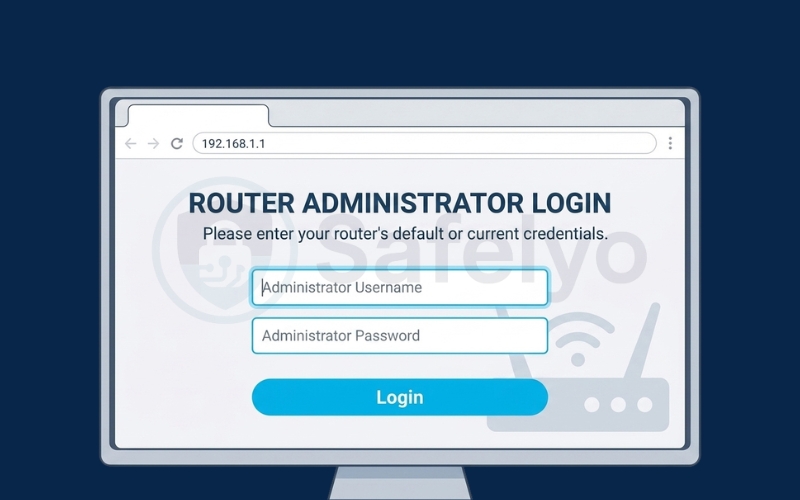
Step 5: Open the Internet, WAN, Network, LAN, or DHCP Server settings.
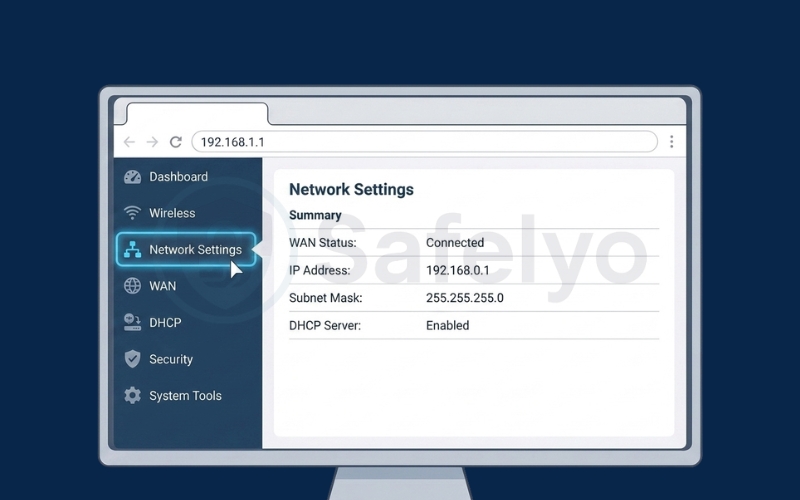
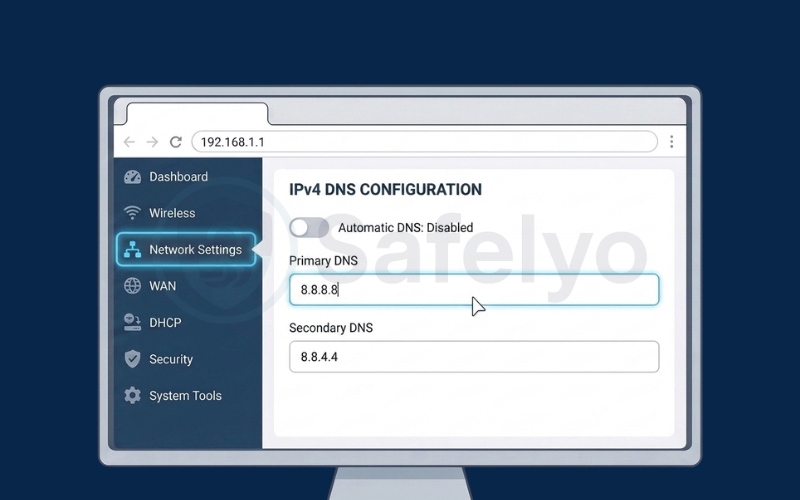
Step 6: Disable automatic DNS if required, then enter the primary and secondary DNS addresses.
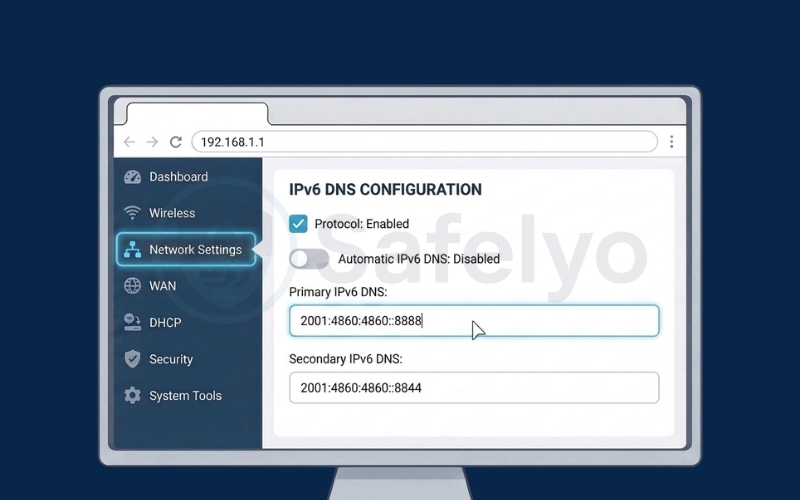
Step 7: Configure the provider’s IPv6 DNS addresses if IPv6 is enabled on your network.
Step 8: Click Save, Apply, or Confirm. Allow the router to restart if prompted.
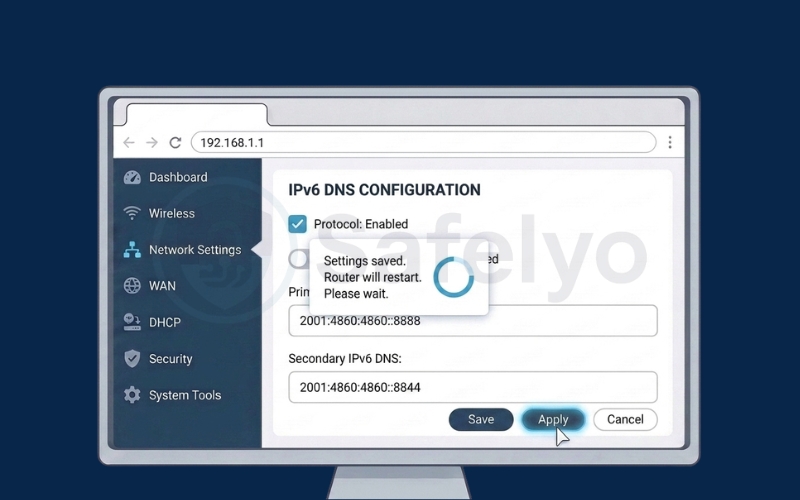
Step 9: Reconnect your devices and verify that they are using the intended DNS service.
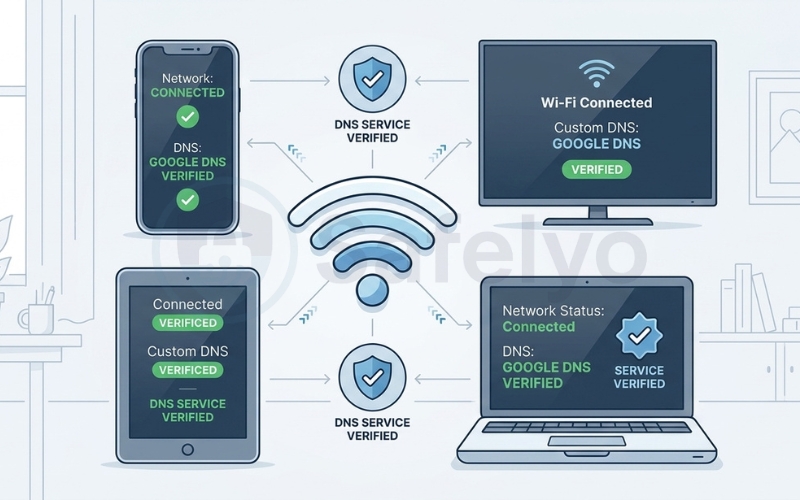
Router-level DNS is commonly distributed to connected devices through DHCP or handled by the router’s local DNS proxy. However, devices and applications with their own DNS configuration may continue to use another resolver.
2. Before changing your router’s DNS
A few minutes of preparation can prevent connection problems and make it easier to restore the original configuration. Do not delete the existing DNS values until you have recorded the current settings.
2.1. Check whether your router allows custom DNS
Most consumer routers provide an option for custom DNS, but the location and available settings depend on the model, firmware, and Internet provider. Some ISP-supplied gateways hide or lock the DNS fields, while some mesh systems require changes through a mobile application.
Check the manual or support page for the exact router model when the interface does not match this guide. Avoid changing unrelated WAN settings such as PPPoE credentials, VLAN values, static IP information, or connection authentication.
2.2. Record the current settings
Take a screenshot or photo of the existing configuration before entering new DNS addresses. This provides a simple recovery option if websites stop loading or the router behaves unexpectedly.
Record the following information when available:
- Automatic DNS status.
- Primary IPv4 DNS address.
- Secondary IPv4 DNS address.
- Primary IPv6 DNS address.
- Secondary IPv6 DNS address.
- WAN connection type.
- DHCP configuration.
Many routers obtain DNS addresses automatically from the ISP. If the custom configuration causes a problem, selecting Obtain DNS automatically, Get DNS from ISP, or a similarly named option will usually restore the previous behavior.
2.3. Have the new DNS addresses ready
Choose your DNS provider before opening the router settings. Copy both addresses into a note so you do not need to switch between browser tabs while editing the configuration.
Two resolver addresses are normally provided for redundancy. Entering both is recommended when your router offers primary and secondary fields, although a device can still operate with one valid resolver address.
2.4. Use a wired connection when possible
Connecting the computer to the router with an Ethernet cable is optional but useful. A wired connection reduces the chance of losing access to the administration page if the Wi-Fi network restarts while the new settings are being applied.
When Ethernet is unavailable, remain close to the router and avoid changing the Wi-Fi name, password, wireless mode, or channel during the DNS setup.
3. Which public DNS server should you use?
There is no single best DNS service for every user. The right option depends on whether you prioritize general reliability, threat filtering, family protection, privacy practices, or compatibility with encrypted DNS.
3.1. Public DNS comparison
| DNS provider | Primary and secondary IPv4 addresses | Main function | Best for |
|---|---|---|---|
| Cloudflare Standard | 1.1.1.1 / 1.0.0.1 | No content filtering | General-use and privacy-focused DNS |
| Cloudflare Security | 1.1.1.2 / 1.0.0.2 | Malware and phishing filtering | Basic security protection |
| Cloudflare Family | 1.1.1.3 / 1.0.0.3 | Malware and adult-content filtering | Family networks |
| Google Public DNS | 8.8.8.8 / 8.8.4.4 | General public DNS resolution | Reliability and broad compatibility |
| Quad9 Secure | 9.9.9.9 / 149.112.112.112 | Known malicious-domain blocking | Security-focused DNS |
Cloudflare Standard does not provide content filtering. Cloudflare uses separate address pairs for malware blocking and combined malware/adult-content filtering. Quad9 also provides multiple resolver profiles, so use addresses from the same profile instead of combining filtering and non-filtering endpoints. Its secure 9.9.9.9 service includes threat blocking and DNSSEC validation.
3.2. How to choose the right DNS provider
For general use, Cloudflare Standard and Google Public DNS are widely supported options. Test both from your own network rather than assuming one provider is always faster.
For threat filtering, Quad9 Secure or Cloudflare Security may be more appropriate because they block domains associated with known malicious activity. Filtering reduces exposure to some threats but cannot detect every newly created phishing page, malicious file, or compromised legitimate website.
For family networks, Cloudflare Family adds adult-content filtering alongside malware protection. DNS-based family filtering is simple to deploy at the router level, but devices that use another DNS service may bypass it.
3.3. Will changing DNS increase Internet speed?
Changing DNS can reduce the time required to resolve a domain or improve reliability when the current resolver performs poorly. It does not increase the bandwidth included in your Internet plan or make downloads exceed the connection speed provided by your ISP.
Measure performance from your own location before choosing a resolver, mainly for speed. Google recommends considering reliability, security, response validity, and performance rather than relying on one metric alone.
4. Where are DNS settings located on a router?
Router manufacturers use different menu names, so the DNS section may not appear in the same place on every model. Common locations include Internet, WAN, Network, LAN, DHCP Server, and Advanced Settings. Some routers provide more than one DNS section because WAN DNS and DHCP DNS can perform different roles. Understanding the difference helps when the router accepts the new addresses but connected devices still use another resolver.
4.1. WAN or Internet DNS
WAN DNS normally controls the upstream resolver used by the router. Common labels include:
- Obtain DNS automatically.
- Get DNS from ISP.
- Connect to the DNS server automatically.
- Primary DNS.
- Secondary DNS.
- DNS Server 1.
- DNS Server 2.
Disable the automatic option when required, then enter the addresses provided by the selected DNS service.
4.2. LAN or DHCP DNS
DHCP distributes network information to connected devices. Depending on the router, the DHCP section may include the DNS addresses supplied to computers, phones, smart TVs, and other clients.
Some routers advertise the public DNS addresses directly. Others advertise the router’s local IP address and forward DNS requests to an upstream resolver.
| Setting | Typical purpose |
|---|---|
| WAN or Internet DNS | Selects the upstream resolver used by the router |
| LAN or DHCP DNS | Distributes DNS information to connected devices |
| Router DNS proxy | Receives client queries and forwards them upstream |
Changing WAN DNS may be sufficient when the router acts as a DNS proxy. Other models may require a separate LAN or DHCP change to distribute the selected resolver directly.
5. How to change DNS on popular router brands
The instructions below cover common interfaces, but menu names can change between models and firmware versions. Keep the existing router settings open in another tab or save a screenshot before applying any changes.
5.1. TP-Link routers
TP-Link Archer routers commonly place DNS settings in the Internet configuration.
- Step 1: Connect to the TP-Link router.
- Step 2: Open the router administration page and sign in.
- Step 3: Select Advanced.
- Step 4: Go to Network > Internet.
- Step 5: Expand Advanced Settings if the DNS fields are hidden.
- Step 6: Select Use the following DNS addresses.
- Step 7: Enter the primary and secondary DNS values.
- Step 8: Click Save.
TP-Link confirms this path for many wireless routers, while DSL modem routers may place the DNS fields under Advanced > Network > LAN Settings. Deco systems use the mobile application and may place the option under More > Internet Connection > Internet Settings.
5.2. ASUS routers
ASUSWRT commonly provides DNS settings in the WAN configuration.
- Step 1: Log in to the ASUS router administration page.
- Step 2: Select WAN under Advanced Settings.
- Step 3: Open the Internet Connection tab.
- Step 4: Scroll to WAN DNS Setting.
- Step 5: Set Connect to DNS Server automatically to No, or select Assign on newer interfaces.
- Step 6: Enter the preferred resolver in DNS Server 1.
- Step 7: Enter the secondary resolver in DNS Server 2.
- Step 8: Click Apply.
ASUS documents both the automatic-DNS toggle and the newer assignment interface, depending on firmware and model.
5.3. NETGEAR routers
NETGEAR Nighthawk routers place custom DNS under the Internet settings.
- Step 1: Connect to the NETGEAR router.
- Step 2: Open the router login page and enter the administrator credentials.
- Step 3: Select the BASIC tab.
- Step 4: Select Internet.
- Step 5: Find the Domain Name Server (DNS) Address.
- Step 6: Select Use These DNS Servers.
- Step 7: Enter the primary and secondary DNS addresses.
- Step 8: Click Apply.
NETGEAR documents this path for current Nighthawk interfaces, although other product lines may use different menu names.
5.4. Linksys routers
Linksys Smart Wi-Fi routers and newer mesh systems use different interfaces. The following process applies to many mesh systems managed through the Linksys app.
- Step 1: Open the Linksys app and sign in.
- Step 2: Open the main menu.
- Step 3: Select Advanced Settings.
- Step 4: Open Local Network Settings.
- Step 5: Find DNS Settings.
- Step 6: Change the setting from Automatic to Manual.
- Step 7: Enter the primary and secondary DNS addresses.
- Step 8: Save the configuration.
Linksys notes that manually entering DNS addresses can disable its built-in Safe Browsing feature because only one DNS configuration can be active.
5.5. ISP-provided routers
Some ISP gateways do not allow users to replace the assigned DNS resolver. The fields may be hidden, locked, or available only through the provider’s mobile application.
When custom DNS is unavailable:
- Check the ISP documentation for the exact gateway model.
- Look for DNS settings under LAN or DHCP.
- Configure DNS individually on important devices.
- Consider using a compatible personal router behind the ISP gateway when more network control is required.
Do not change unrelated WAN authentication values or install third-party firmware solely to modify DNS unless you understand the recovery process and the possible effect on ISP support.
6. How to configure IPv6 DNS on a router
Changing only IPv4 DNS may not affect every query on an IPv6-enabled network. A router can continue advertising an ISP-provided IPv6 resolver even after custom IPv4 addresses have been entered.
As a result, different devices may use the public resolver over IPv4 while continuing to use the ISP resolver over IPv6. Configure addresses from the same provider for both protocols when the router supports custom IPv6 DNS.
6.1. Check whether IPv6 is enabled
Open the router settings and look for:
- IPv6.
- Internet IPv6.
- WAN IPv6.
- DHCPv6.
- Router Advertisement.
- IPv6 DNS.
When IPv6 is active, enter the provider’s IPv6 resolver addresses instead of disabling the protocol by default.
| Provider | Primary IPv6 DNS | Secondary IPv6 DNS |
|---|---|---|
| Cloudflare Standard | 2606:4700:4700::1111 | 2606:4700:4700::1001 |
| Cloudflare Security | 2606:4700:4700::1112 | 2606:4700:4700::1002 |
| Cloudflare Family | 2606:4700:4700::1113 | 2606:4700:4700::1003 |
| Google Public DNS | 2001:4860:4860::8888 | 2001:4860:4860::8844 |
| Quad9 Secure | 2620:fe::fe | 2620:fe::9 |
Cloudflare and Quad9 publish separate IPv6 addresses for their resolver profiles.
6.2. Should you disable IPv6?
Disabling IPv6 should not be the default solution. Configure the preferred IPv6 resolver when the router supports it, then test both IPv4 and IPv6 after reconnecting the devices.
Temporarily disabling IPv6 may help isolate a specific compatibility problem, but restore it when the issue has been identified. Avoid treating IPv6 itself as a security risk simply because the DNS settings were incomplete.
7. Does changing the router’s DNS encrypt your queries?
Entering a public DNS address changes the resolver but does not automatically change the transport protocol. Traditional DNS queries can still travel without encryption between the router and resolver.
DNS over HTTPS and DNS over TLS provide encrypted transport for DNS queries. They help prevent observers on the network path from reading or modifying the DNS request, but they do not hide your public IP address or encrypt all Internet traffic.
- DNS over HTTPS
DNS over HTTPS, or DoH, sends DNS queries inside HTTPS traffic. It commonly uses port 443, the same port used for normal encrypted web connections. A DoH-compatible router normally requires a provider URL, hostname, profile, or built-in resolver option. Simply entering 1.1.1.1 or 8.8.8.8 does not prove that DoH is enabled.
- DNS over TLS
DNS over TLS, or DoT, sends DNS queries through a dedicated encrypted TLS connection, commonly on port 853. The router may require a resolver hostname or TLS server name in addition to an IP address. Support varies between router models and firmware versions. Some ASUS routers, for example, include a DNS Privacy or DNS-over-TLS option in the WAN configuration.
- Browser Secure DNS may override the router
Modern browsers can use their own DoH configuration. When browser Secure DNS is enabled with another provider, browser queries may not use the resolver distributed by the router. Check browser DNS settings when router-level tests produce inconsistent results. This is especially important when DNS filtering works in one application but not in the web browser.
8. How to verify the new DNS settings
Do not assume the change worked only because the router accepted the addresses. Reconnect at least one device and verify the active resolver before applying the configuration to security or family filtering.
8.1. Reconnect connected devices
After clicking Save or Apply, allow the router to complete any automatic restart. Wait until the Internet connection is restored before testing. Reconnect the test device by turning Wi-Fi off and on. Restarting the device can also help it obtain updated network information when it continues using the old DNS configuration.
8.2. Flush the DNS cache on Windows
Windows stores DNS responses locally, so cached results may remain after the router configuration changes. Microsoft documents ipconfig /flushdns as a troubleshooting command that clears the DNS client resolver cache.
Open Command Prompt and enter “ipconfig /flushdns“
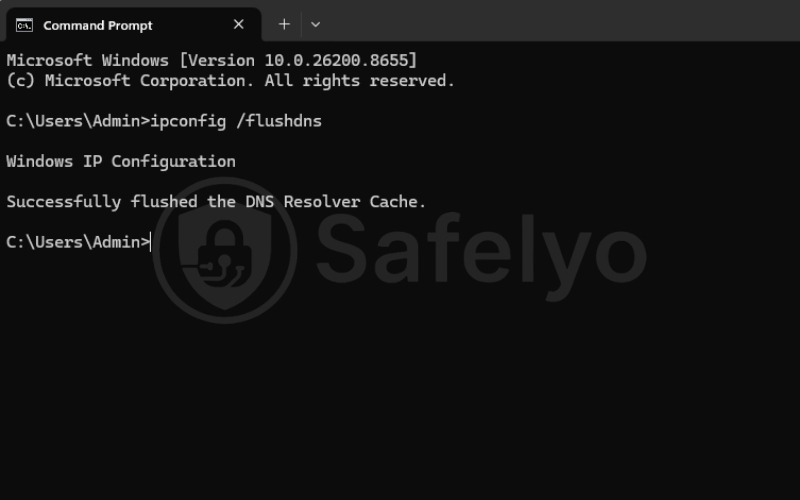
A confirmation message should appear after the cache has been cleared. Restart the browser before testing again.
8.3. Check the active resolver
Use a DNS testing service from a device connected to the router. Check the provider name, run the test more than once, and review IPv4 and IPv6 results separately when available.
Cloudflare provides a dedicated connection check for users of 1.1.1.1. The test reports whether the device is using Cloudflare DNS and identifies the data center serving the request.
Remember that a test result applies to the device being checked. It does not automatically prove that every phone, smart TV, browser, and application on the network uses the same resolver.
8.4. Check for router DNS proxy behavior
On Windows, open Command Prompt and enter “nslookup safelyo.com”
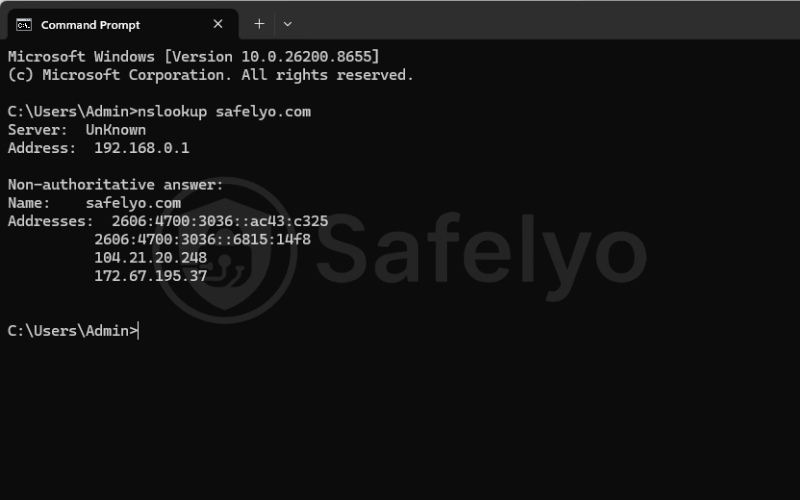
The result may show the router’s local IP address rather than the public DNS provider. This can be normal when the router acts as a DNS proxy and forwards requests to the configured upstream resolver.
8.5. Check IPv4 and IPv6 separately
When the test still displays an ISP resolver:
- Confirm that custom IPv6 DNS was entered.
- Reconnect the device.
- Check whether the operating system received new network settings.
- Review the browser’s secure DNS.
- Disconnect any active VPN and test again.
A successful IPv4 result does not prove that IPv6 queries use the same provider.
9. Troubleshooting router DNS problems
Most DNS configuration problems are caused by incorrect addresses, cached network settings, IPv6, application-level overrides, or restrictions in ISP-provided firmware.
9.1. I cannot find the DNS settings
Try switching from Basic to Advanced mode, then check the Internet, WAN, LAN, and DHCP Server sections. Some routers hide custom DNS until automatic DNS is disabled. Mesh systems may place the option in a mobile application instead of the browser interface. Access points and bridge-mode devices may not provide DNS settings because another gateway manages DHCP and Internet access.
9.2. The DNS fields are missing or locked
Locked DNS fields can indicate ISP-managed firmware or an automatic connection profile. Check the provider documentation before changing unrelated connection settings. When the gateway does not support custom DNS, configure the resolver on individual devices or use a separate router that provides the required controls.
9.3. The Internet stopped working after changing the DNS
Check the addresses for typing errors and confirm that the primary and secondary entries belong to the same service profile. Mixing Cloudflare Standard with Cloudflare Family, for example, may produce inconsistent filtering because clients do not always query resolvers in a fixed order.
Save the settings again and restart the router. When the problem continues, restore automatic DNS or return to the original values recorded before the change.
9.4. Devices still use the ISP’s DNS
Possible causes include the following:
- The device has not renewed its network information.
- IPv6 still advertises the ISP resolver.
- The device has manual DNS settings.
- Browser Secure DNS is enabled.
- Android Private DNS is enabled.
- A VPN supplies its own resolver.
- The router ignores or overrides the custom values.
Reconnect the device and check each possible override individually. Avoid assuming the router failed until IPv4, IPv6, browser settings, and active VPN connections have been reviewed.
9.5. A VPN changes the active DNS server
Many VPN applications use DNS resolvers operated or selected by the VPN provider. This helps keep DNS requests within the VPN connection and can temporarily override the router’s DNS. Seeing another resolver while a VPN is connected does not automatically indicate a leak. Disconnect the VPN and repeat the DNS test when checking the router configuration by itself.
9.6. DNS filtering does not block a test domain
Confirm that you entered the filtering addresses rather than the provider’s standard resolver. Also check IPv6, browser Secure DNS, manual device settings, and cached responses. Cloudflare provides separate test domains for its security and family-filtering profiles. The provider recommends testing after configuration to confirm that the selected filter is active.
9.7. How to restore automatic DNS
Follow these steps to return to the original configuration:
- Step 1: Log in to the router.
- Step 2: Open the Internet, WAN, LAN, or DHCP DNS section.
- Step 3: Select Obtain DNS automatically, Get DNS from ISP, or the equivalent setting.
- Step 4: Restore the recorded IPv4 and IPv6 values when the router previously used custom addresses.
- Step 5: Click Save or Apply.
- Step 6: Restart the router if required.
- Step 7: Reconnect the devices and test the Internet connection.
10. FAQ about configuring DNS settings on a router
Is it safe to change DNS on a router?
Yes. Use valid DNS addresses from a reputable provider and save your original settings first. If problems occur, restore automatic DNS or re-enter the previous values.
Will changing DNS make my Internet faster?
It may improve DNS lookup speed or reliability, but it does not increase your Internet bandwidth. Results depend on your ISP, location, and network routing.
Does changing the router’s DNS affect every device?
Usually, it affects devices that receive network settings automatically from the router. VPNs, secure browser DNS, manual DNS, or separate IPv6 settings may override it.
Should I configure both IPv4 and IPv6 DNS?
Yes, if IPv6 is enabled and your router supports custom IPv6 DNS. Otherwise, some devices may continue using the ISP’s IPv6 resolver.
Does changing DNS hide browsing activity from an ISP?
Not completely. Standard DNS is not encrypted. DoH or DoT encrypts DNS queries, while a VPN provides broader protection for Internet traffic.
Is changing DNS the same as using a VPN?
No. DNS resolves domain names, while a VPN encrypts traffic and can change your public IP address. The two technologies serve different purposes.
Does entering 1.1.1.1 enable encrypted DNS?
No. It only selects Cloudflare as the resolver. Your router must separately support and enable DNS over HTTPS or DNS over TLS.
Why is my device using another DNS server?
The device may use IPv6 DNS, browser Secure DNS, manual settings, Android Private DNS, or a VPN resolver. Check these settings before assuming the router configuration failed.
What happens if I enter the wrong DNS address?
Websites may stop loading by domain name. Correct the address or restore automatic DNS, then reconnect your devices and test the connection again.
11. Conclusion
Learning how to configure DNS settings on a router gives you more control over which resolver handles requests across your home network. The safest approach is to record the existing configuration, choose a trusted provider, configure IPv4 and IPv6 when supported, and verify the result rather than assuming the change worked.
A public DNS service can improve reliability or add security and family filtering, but it does not replace a VPN, antivirus software, or complete parental controls. Standard DNS is also not encrypted unless the router or device explicitly uses DNS over HTTPS or DNS over TLS. Explore more practical networking and online privacy guides in the Privacy & Security Basics section of Safelyo.